Ford F-150: How to Replace Starter
Replacing the starter on your Ford F-150 is a simple process that can save you some money.
This articles applies to the Ford F-150 (2004-2014).
The starter functions by engaging the flywheel on the transmission to turn the engine over, thus starting the vehicle. If the motor won't turn over at all or turns over very slowly, it could mean the starter is bad. Before diving in and replacing it, it's recommended to diagnose why it won't start. Starter issues are very similar to both battery and alternator issues.

Materials Needed
- 3/8", 1/2", and 1/4" ratchet
- 13mm socket wrench
- Extensions (ratchet and wrench)
Step 1 - Disconnect the battery
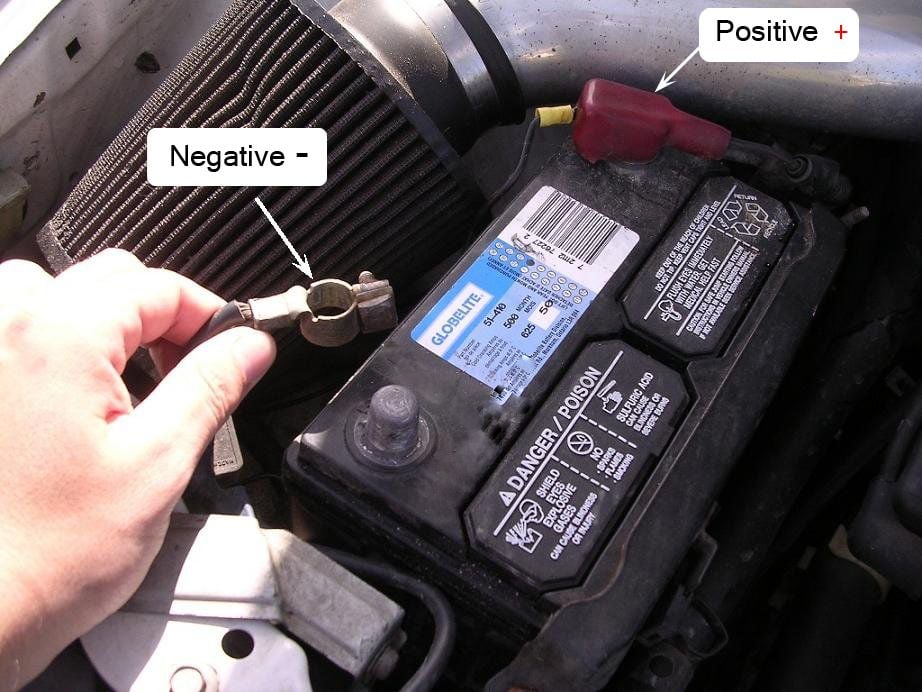
The very first step is disconnecting the battery. Because the starter is tied into the battery, failure to disconnect can lead to a lot of sparks, the possibility of getting shocked, or the risk of starting a fire.
- Disconnect the negative terminal (8mm or 10mm).
- Disconnect the positive terminal.
Step 2 - Prep for removal (optional)
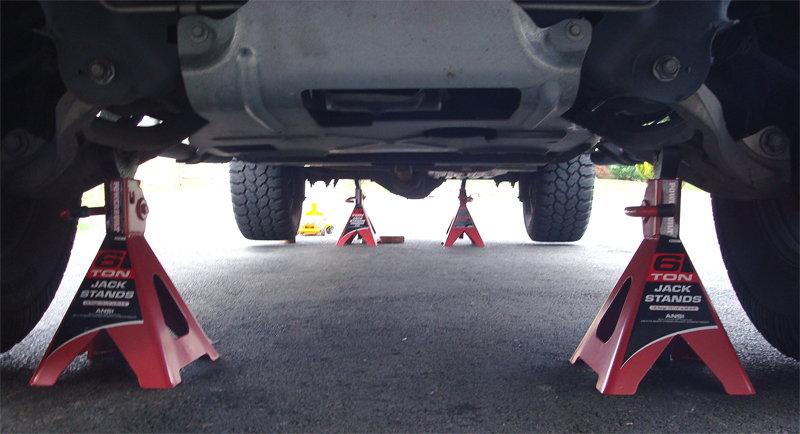
This step isn't required, but can make the removal and installment a lot easier. Using the floor jack, raise the truck until it's high enough to slide the jack stand underneath. Then, lower the truck onto the jack stand by the lower control arm.
Step 3 - Remove the starter
This is where you'll really need all those extensions for the ratchet. Again, an air wrench isn't necessary but can make breaking the three bolts on the starter free a lot easier.
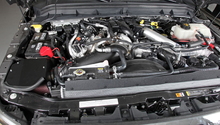
- Get under the truck and locate the starter on the the passenger side of the engine block's lower side, towards the transmission bell housing. You can also trace the red cable going from the battery to the starter to find it.
- Locate the electrical connections on the top of the starter (usually two or three).
- Disconnect the connections using the 10 or 13mm socket (depending on starter).
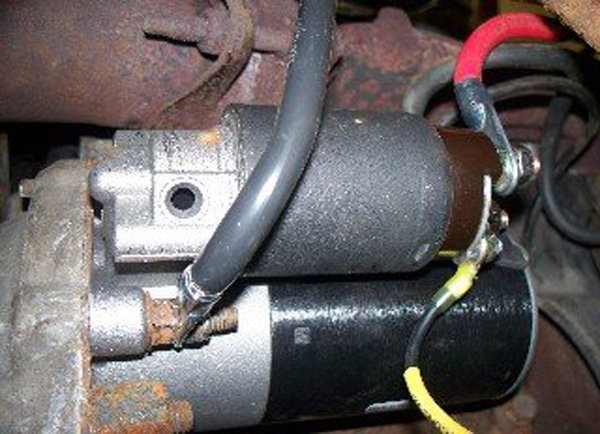
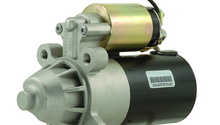
Figure 3. Starter. 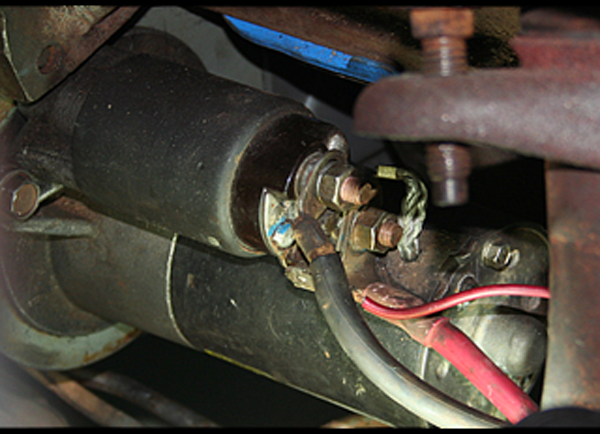
Figure 4. Starter.
- If you have an air wrench, use it now to break the bolt free and then switch to the ratchet to remove it. Otherwise you can remove it using the ratchet.
- Feel for the next two bolts on the starter. These two are more easily accessible and will only require the short or medium ratchet extensions.
- Once all bolts are removed, carefully remove the starter (it has some weight to it, so be prepared so you won't drop it).

Step 4 - Install new starter
Install in the reverse steps listed above. Be sure to torque the three bolts on the starter to 18 ft/lbs. It is also recommend at this time to clean the electrical connections on both the starter wires and on the battery terminals using a wire brush.
Featured Video: How to Replace Starter
Related Discussion
- How-To: Remove 5.4L Starter - F150online.com