1978 F250 "Black and Tan" Build-up with pics
#1
1978 F250 "Black and Tan" Build-up with pics
Hello everyone,
This will be an ongoing thread about an extensive overhaul of a 1978 Ford F250 pickup truck. The story of this old brute begins in a small New Jersey town where we picked it up off a kid who could no longer afford it as a daily driver. It obviously had some miles on it and had a lot of glass work done on the body but compared to other Ford's I've seen, even 80's trucks, the lack of rust was surprising. It had a solid frame, a reliable engine, and a transfer case and transmission that could definitely pass muster - plus, it is a 1978 F250 - what is not to love!
GunneyF250: Afghanistan Veteran SOCOM
Some general specs on the truck as we found her:
351M V8 Engine
T-18 Manual Transmission
NP-205 Transfer Case
3/4 Ton Dana 44 Front Rear
Dana 60 Rear
33" Tires on White Wagon Wheels
8ft Box
We immediately took it out for an off road test the first weekend we had it - it performed wonderfully. The highlight of the day was definitely the initial test of 4-Lo. We encountered a mound of fill on the side of a mining road used for road repairs, it was loose, powdery shale steeply mounded about 15ft high...we dropped the truck into first gear and idled right to the top in about 2 seconds much to our surprise. Was this a herculean feat? No but this was essentially still a bone stock truck on all terrains and it was already getting some.
We stopped in a scenic area to get some photos of the old truck


Last edited by gunneyF250; 12-21-2012 at 08:51 AM. Reason: update
#3
#4
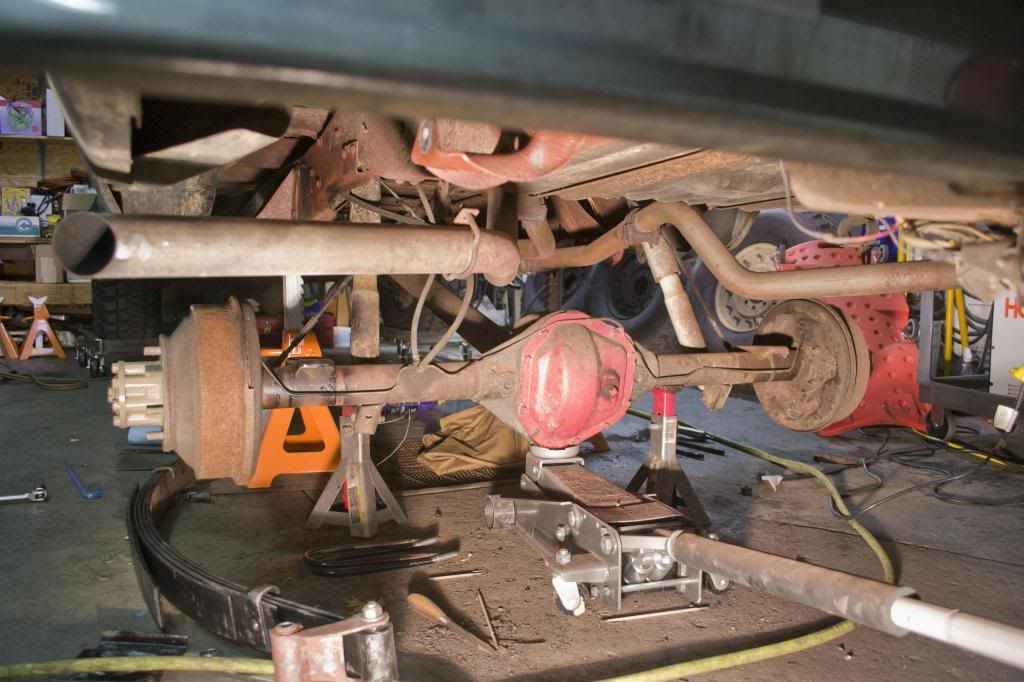
We got to work tearing out the old, tired leafs
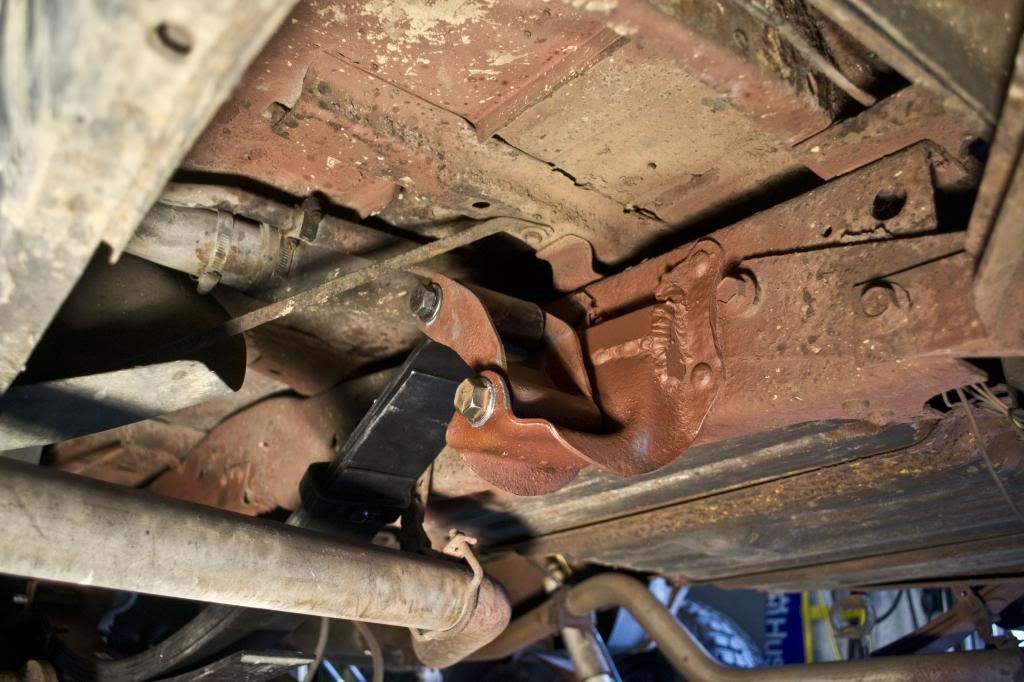
We immediately noticed that the rear shackle hangers were severely cancered out and promptly beefed them up with 1/4 plate and the electric welder
We lightly snugged up the leaf pack for a test fit - this allowed us to realize that the suspension still needed a little something.
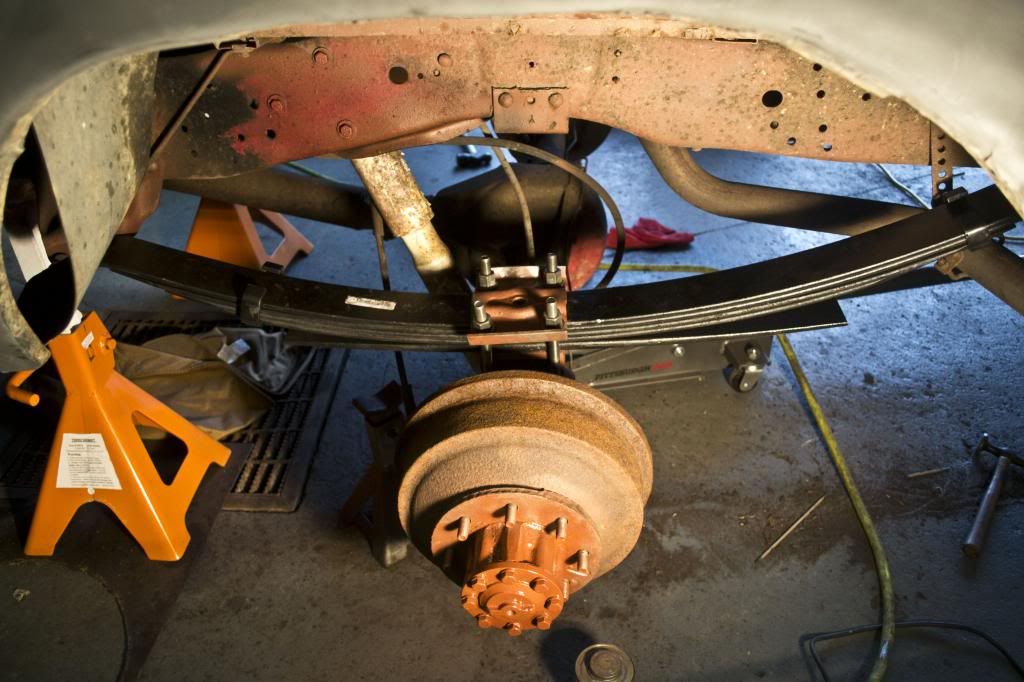
It was still sitting a tad too low but we did not want to get into a large lift for aesthetic and geometric reasons. We settled on a tasteful 1" lift we could fab ourselves from 1" plate steel we had laying around the shop.
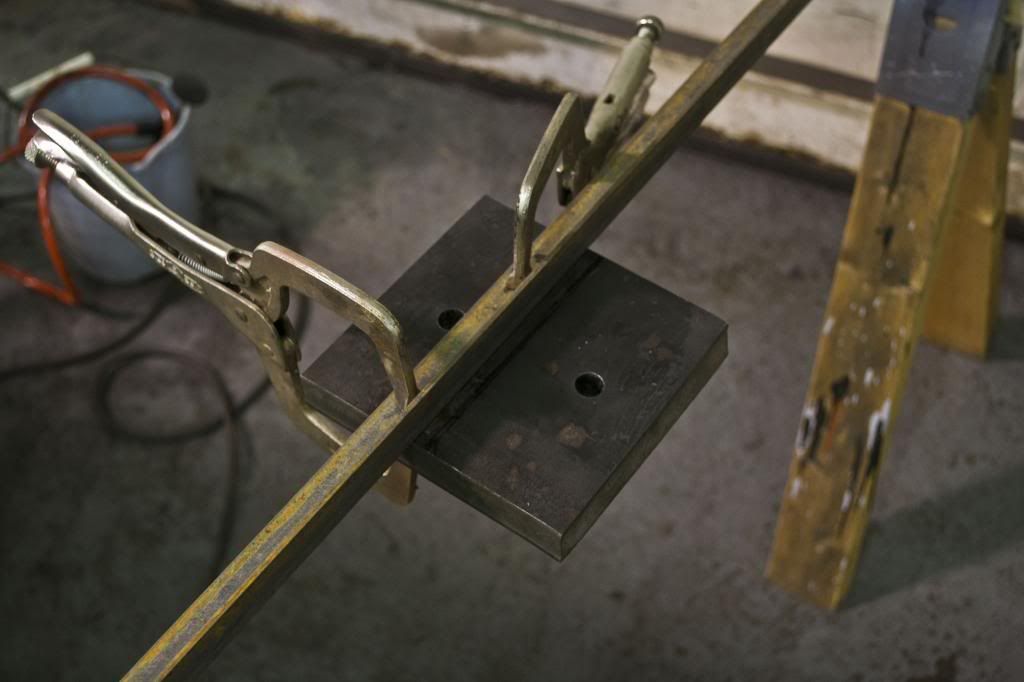
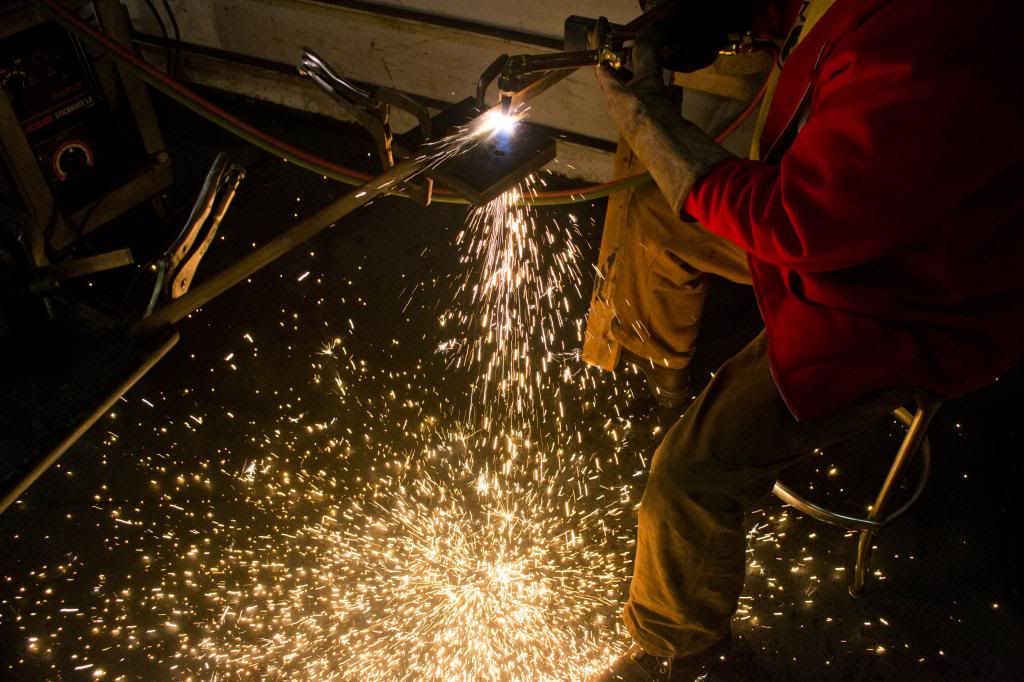
We drilled the alignment holes and then set up the plate in our specialty cutting jig which while far more homely, is vastly cheaper than a CNC machine
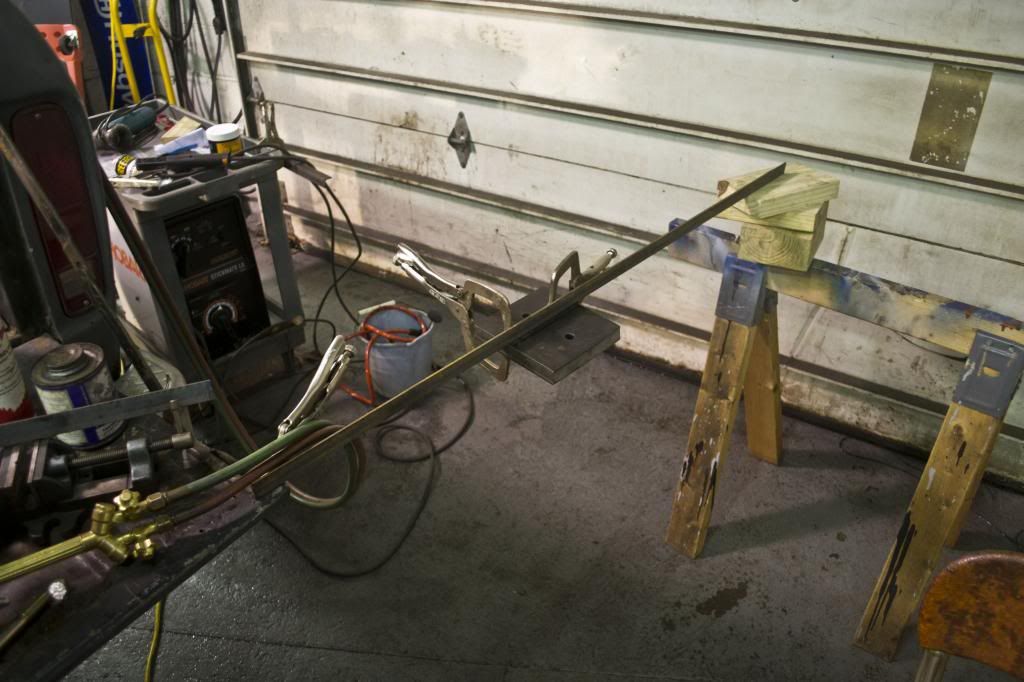
The drilled and cut blocks:
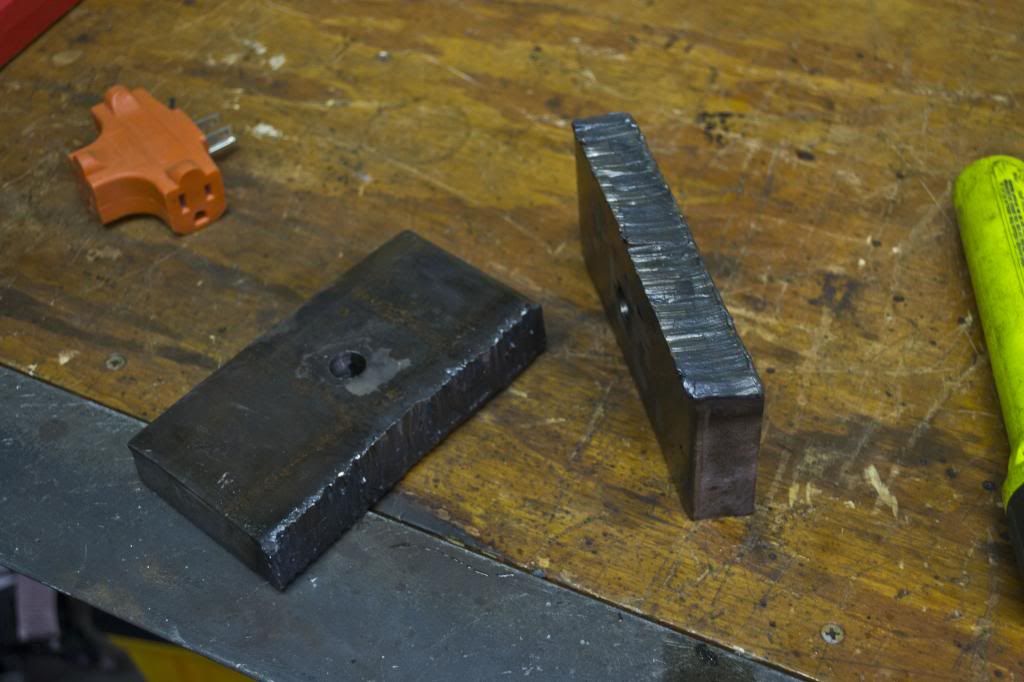
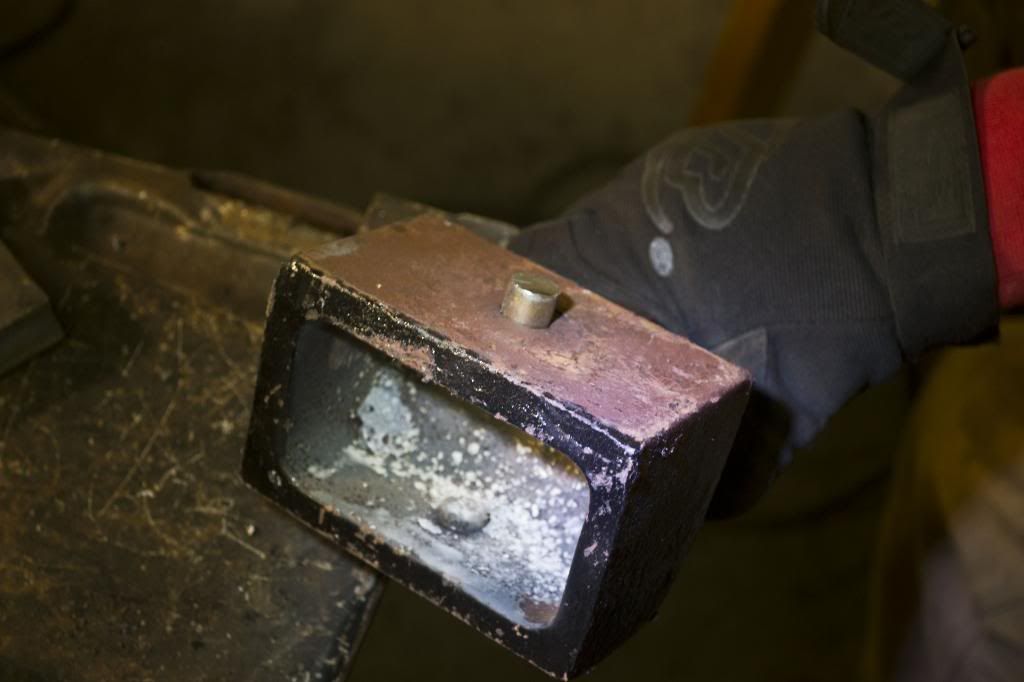
Before installing the lift plates we had to modify the factory blocks by welding an alignment pin in place.
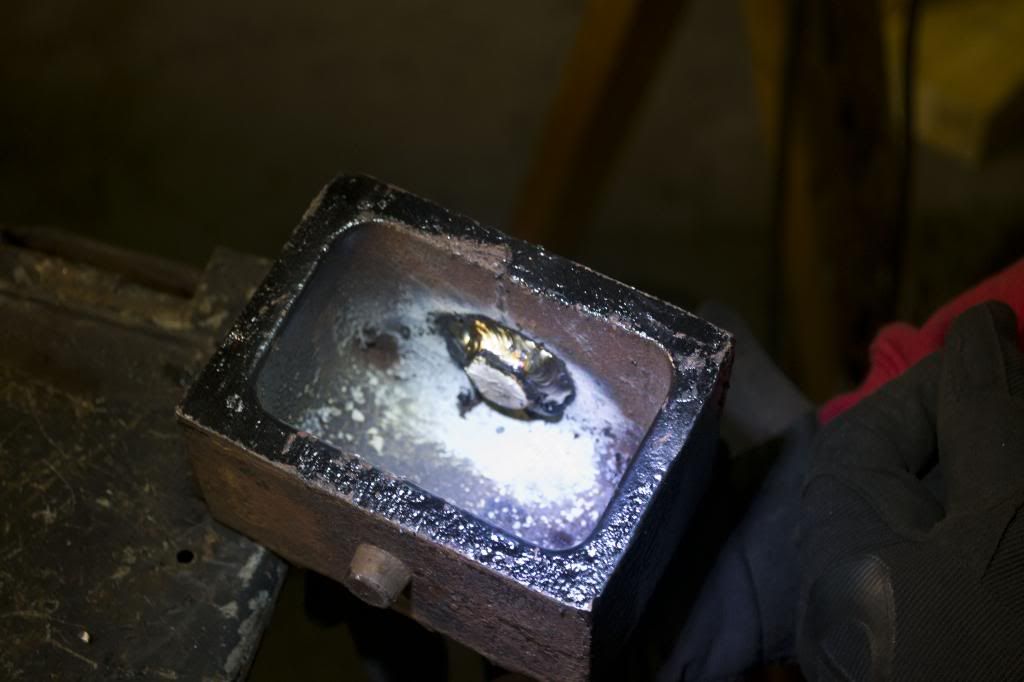
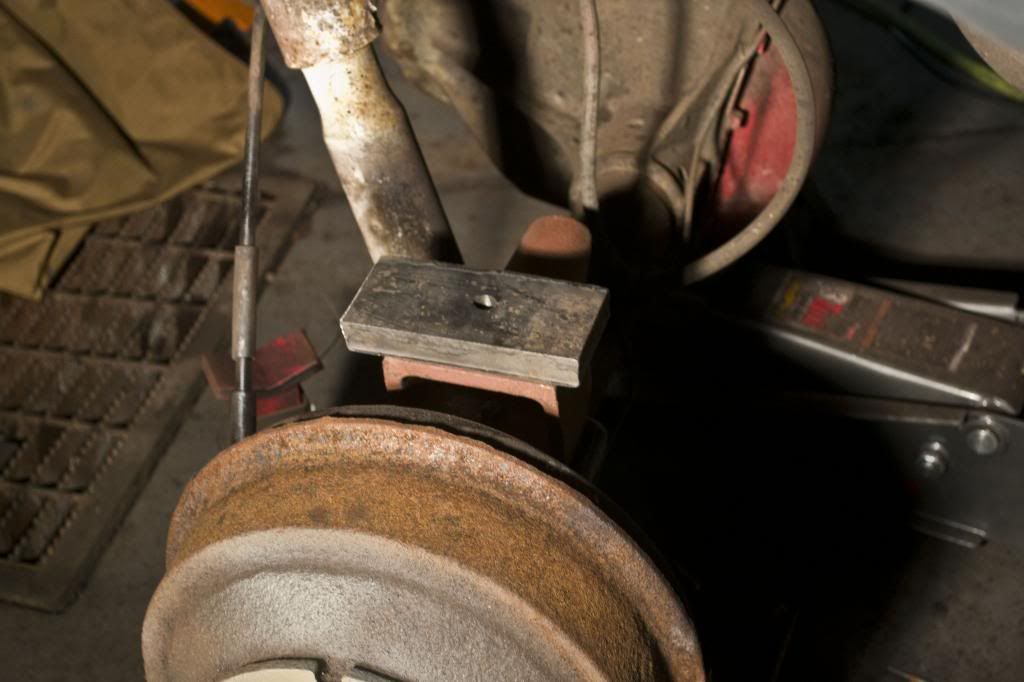
Here is the lift plate in place, ready to accept the leaf pack. Please don't flame us on this one, it is 1" solid plate steel and its broad size makes for a very stable setup.
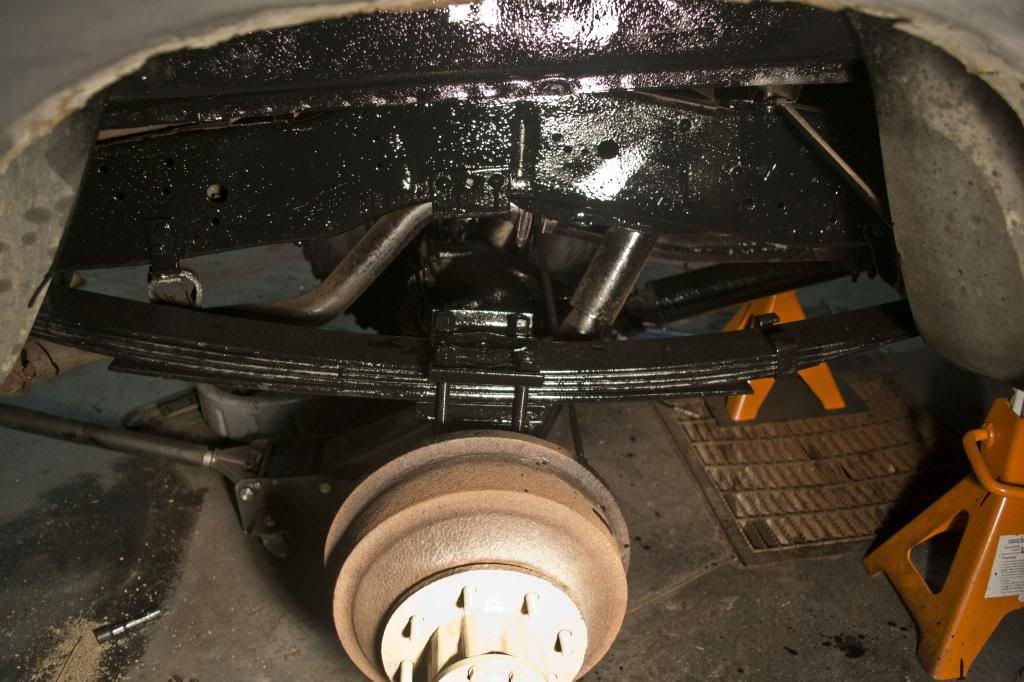
All that was left was to pin it in place and torque everything down. Aftwards, a healthy layer of Chassis Saver, a POR 15 alternative, was liberally applied over the frame, rear, and leaf hardware. It is meant to be applied directly over heavily rusted surfaces, sealing and inhibiting any further oxidation while leaving an aesthetically pleasing gloss black surface
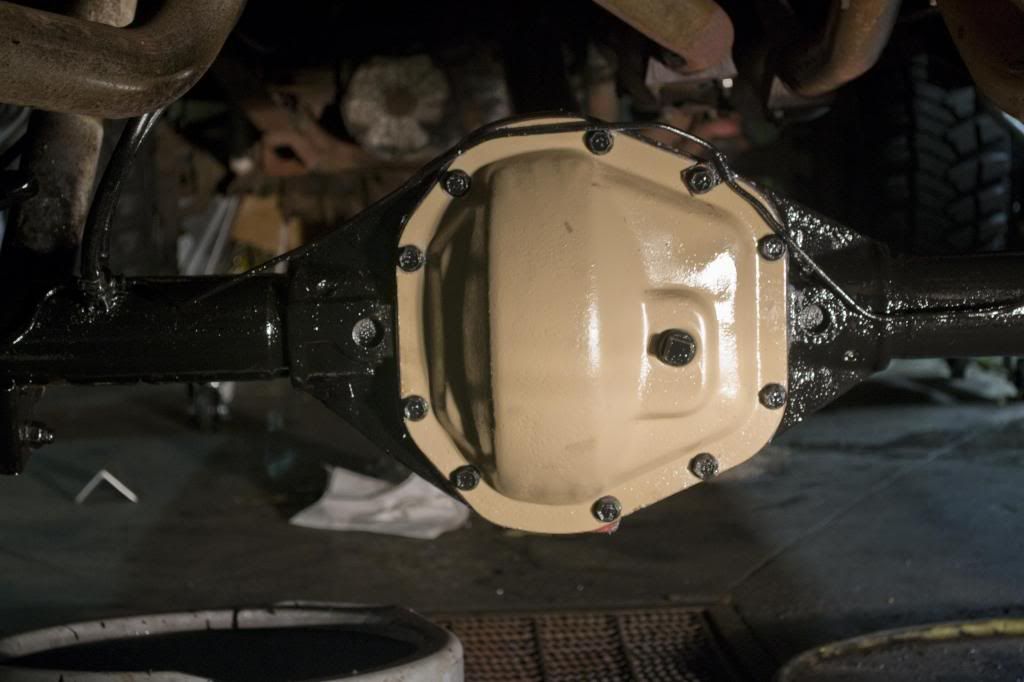
Cummins tan will be the accent color on this Ford. Why? Just personal preference, it is a nice tan afterall and we already had some at the garage. Our first piece to get this color was the differential cover after we drained and filled with Royal Purple.

We immediately noticed that the rear shackle hangers were severely cancered out and promptly beefed them up with 1/4 plate and the electric welder

We lightly snugged up the leaf pack for a test fit - this allowed us to realize that the suspension still needed a little something.

It was still sitting a tad too low but we did not want to get into a large lift for aesthetic and geometric reasons. We settled on a tasteful 1" lift we could fab ourselves from 1" plate steel we had laying around the shop.
We drilled the alignment holes and then set up the plate in our specialty cutting jig which while far more homely, is vastly cheaper than a CNC machine


The drilled and cut blocks:

Before installing the lift plates we had to modify the factory blocks by welding an alignment pin in place.


Here is the lift plate in place, ready to accept the leaf pack. Please don't flame us on this one, it is 1" solid plate steel and its broad size makes for a very stable setup.

All that was left was to pin it in place and torque everything down. Aftwards, a healthy layer of Chassis Saver, a POR 15 alternative, was liberally applied over the frame, rear, and leaf hardware. It is meant to be applied directly over heavily rusted surfaces, sealing and inhibiting any further oxidation while leaving an aesthetically pleasing gloss black surface

Cummins tan will be the accent color on this Ford. Why? Just personal preference, it is a nice tan afterall and we already had some at the garage. Our first piece to get this color was the differential cover after we drained and filled with Royal Purple.

#7
Trending Topics
#8
#9
Ha! What a another set of eyes can do! During assembly everything was moving right along and when I was looking at it everything looked right on. Now that this has been pointed out it jumps right off the screen at me! I can't believe I missed that! That's why I like build threads - helps catch mistakes. Thanks for the info guys!
Last edited by gunneyF250; 12-19-2012 at 08:17 AM. Reason: typo
#11
Looking good, Be sure to post a picture of the truck with the lift. I am planning on doing a mild lift on my 79 F-250 (about 4") with 35s, so I would be curious to see how the stance of your truck looks. About how much lift do you think you achieved with the new springs and blocks overall?
#12
I'd say we probably gained at most 2 inches of lift at most....
I guess I'll take the time to explain the whole "we" part of my posts. I'm 25 and have been helping my dad with this truck....He's 64 and recently retired.
He owned Ford trucks and vans his whole life until recently and I convinced him to finally buy another - his first F250.. We will be overhauling this truck, adding small personal touches, keeping it very street worthy but also capable of some off-roading. Mostly it will see old mine and logging roads, nothing too too crazy - hence the mild lift.
This is his account but I'll be taking and posting most of the pictures for this write up. He is closely following everyone's responses and will chime in from time to time.
We're both named Ed so he'll go by Gunney.
Thanks guys, more updates to follow,
Ed
#13
Gunney checking in here. Was at the local junk yard today. Felt like I was in a candy store. What a little ingenuity can do. Got just what I needed and some spare parts for $10.00. Ed is my real go-to man. Last time I really played with this stuff was in the late 60's when everything was simple. I had a dwell tach and a sun timing light back then, I wish I could remember what I did with them. Out here.
#14
We were on a deadline and needed the F250 to haul tires off the mountain for a local cleanup that my off-road club, Black Rock Motorsports, organized in conjunction with Schuylkill Headwaters so we were forced to put it back in action even though only the rear had been lifted.
(by the way feel free to check us out at blackrockmotorsports.com and follow us on instagram or twitter if you'd like)
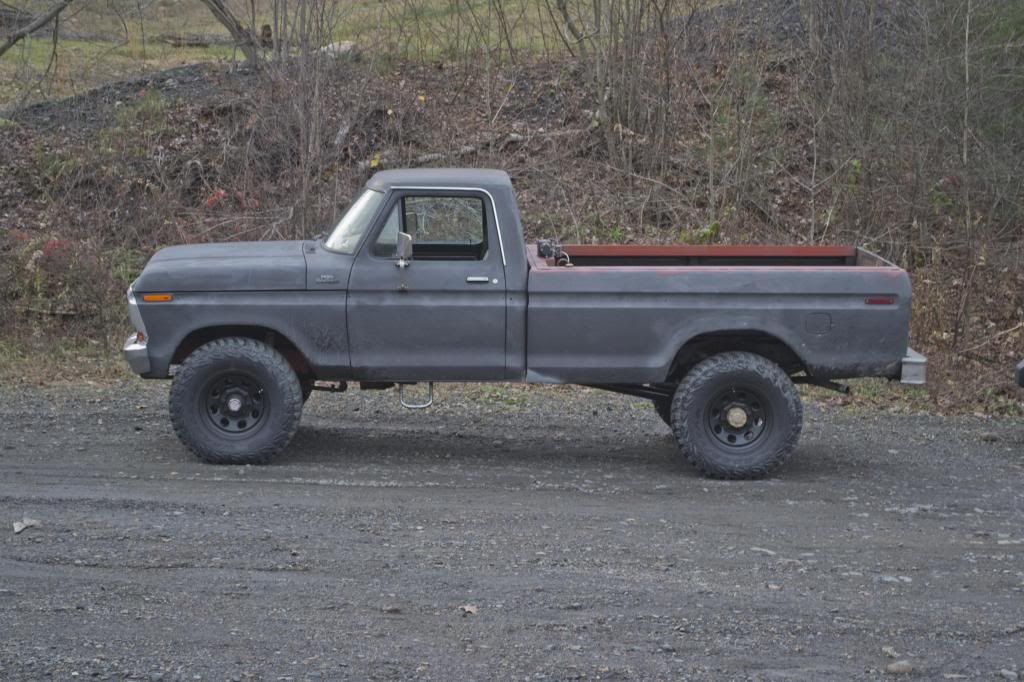
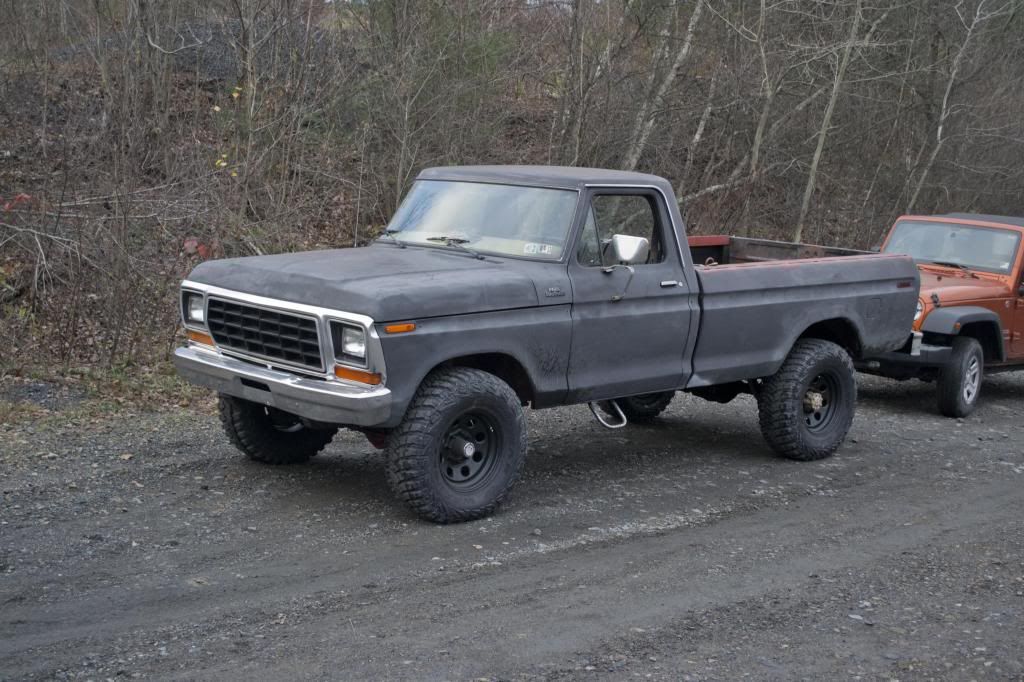
Here is what it looked like the day of the clean up - the rear is sitting just about where we want her while the front still leaves more than a little to be desired.
If you have a good eye, your also probably wondering what's up with bed rails. We added some 3" angle iron to stiffen up the rails and provide a sturdy, weldable attachment point for tie down loops. The entire bed will be framed out with 3" angle so everything is stout from the top rails down to the bed floor (most likely some frame tie-ins as well) but this will be Gunney's job as he has around 40 years of welding experience around his belt.
A 3000lb winch was also mounted for the cleanup to haul heavy items into the bed with ramps. We barely used it this time around which is good since all the tie-ins are not yet complete. It will be a handy thing to have in the future though.
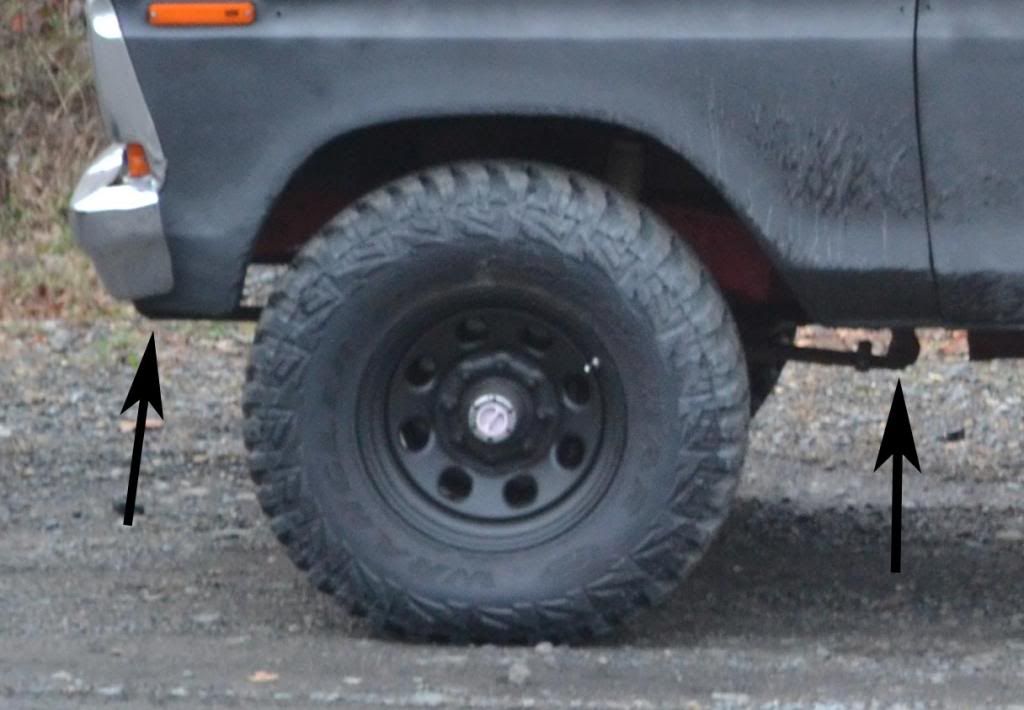
The front leafs really are sagging terribly...its is very noticible..replacing them is a top priority!
-Ed
(by the way feel free to check us out at blackrockmotorsports.com and follow us on instagram or twitter if you'd like)
Here is what it looked like the day of the clean up - the rear is sitting just about where we want her while the front still leaves more than a little to be desired.
If you have a good eye, your also probably wondering what's up with bed rails. We added some 3" angle iron to stiffen up the rails and provide a sturdy, weldable attachment point for tie down loops. The entire bed will be framed out with 3" angle so everything is stout from the top rails down to the bed floor (most likely some frame tie-ins as well) but this will be Gunney's job as he has around 40 years of welding experience around his belt.
A 3000lb winch was also mounted for the cleanup to haul heavy items into the bed with ramps. We barely used it this time around which is good since all the tie-ins are not yet complete. It will be a handy thing to have in the future though.


The front leafs really are sagging terribly...its is very noticible..replacing them is a top priority!

-Ed
Last edited by gunneyF250; 12-19-2012 at 09:35 PM. Reason: correct a spacing issue
#15
Back at the shop, the first step was to take the weight off the front suspension.
Once we took the weight off the tired springs they warped back into shape like a piece of taffy. They kept drooping and drooping, I was amazed at how high we had to lift the frame to get the front tires off the ground. Daylight was plainly visible through the packs
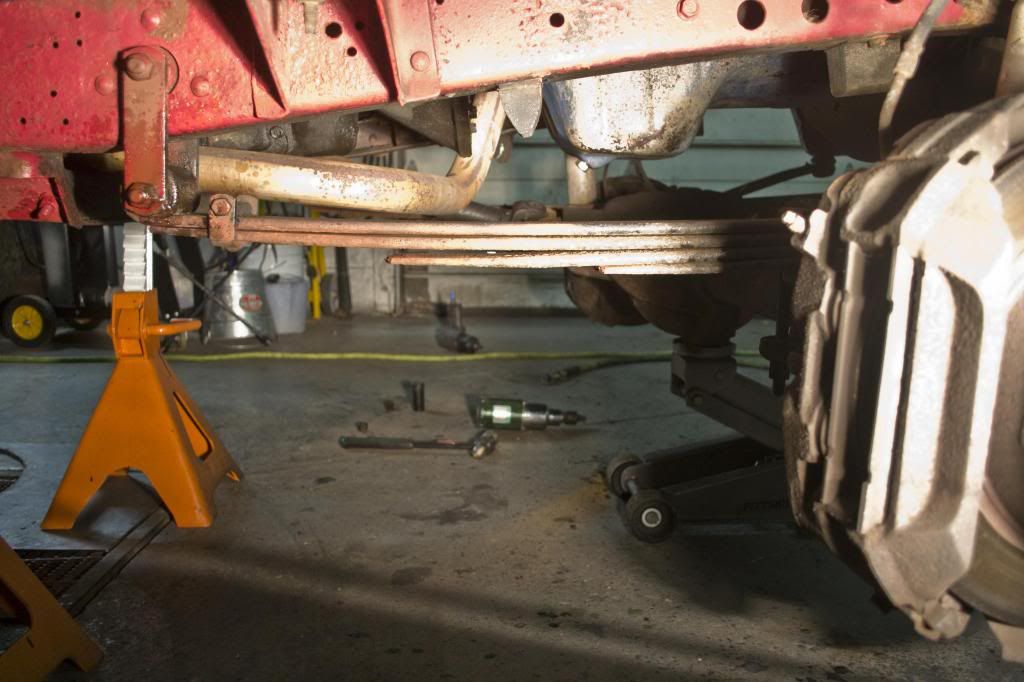
Next step is dis-assembly - updates to follow
P.S. This fire engine red frame has to go!
-Ed
Once we took the weight off the tired springs they warped back into shape like a piece of taffy. They kept drooping and drooping, I was amazed at how high we had to lift the frame to get the front tires off the ground. Daylight was plainly visible through the packs

Next step is dis-assembly - updates to follow
P.S. This fire engine red frame has to go!
-Ed


