1994 F350 crew, shortened frame, w a 93 Cummins, NV4500, gear vendors and NP205
#1
1994 F350 crew, shortened frame, w a 93 Cummins, NV4500, gear vendors and NP205
Hi guys, I'm new to posting but have enjoyed reading a lot of posts on this forum. I finally got a chance to take pictures of my project. I'm in Vail, AZ which is close to Tucson, AZ.
Basically I'm trying to make a truck that me, my fiance and family can tow 6-10K, drive on a regular basis, be very reliable and get great mileage. I'm not looking for a lot of power, the engine has the HTT compressor wheel and housing, 4" exhaust and a custom fuel pin. I'm happy with its performance and I was getting ~21 mpg in the 93 2wd without a lockup converter. I'm hoping the conversion to manual and the gear vendors will allow similar mileage even with the added weight. I also really need 4wd since our move to Vail, I can't tow a trailer up a steep hill on our driveway without full throttle smokey launches. It will be nice to be able to click into 4 low and cruise up the driveway.
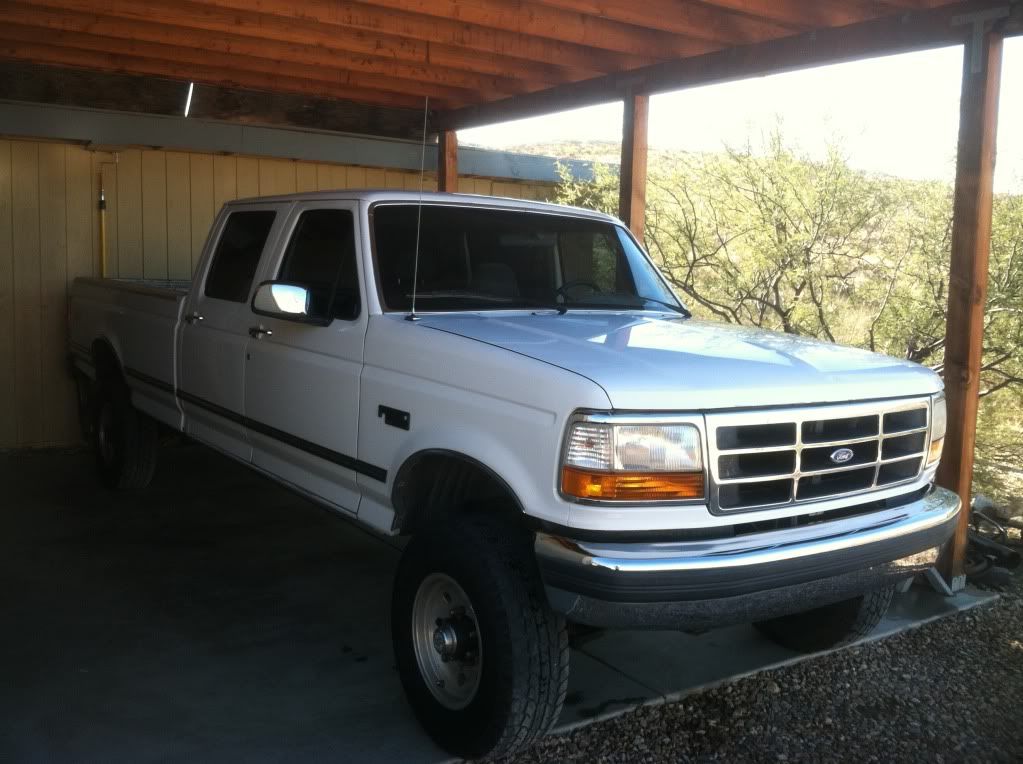
Here is the truck as I purchased it, 460 gasser, almost 200K miles, 4.10 gears. I picked it up for $3500 in Phoenix, but it had a gear vendors installed in it. Just clean enough to use on a regular basis.
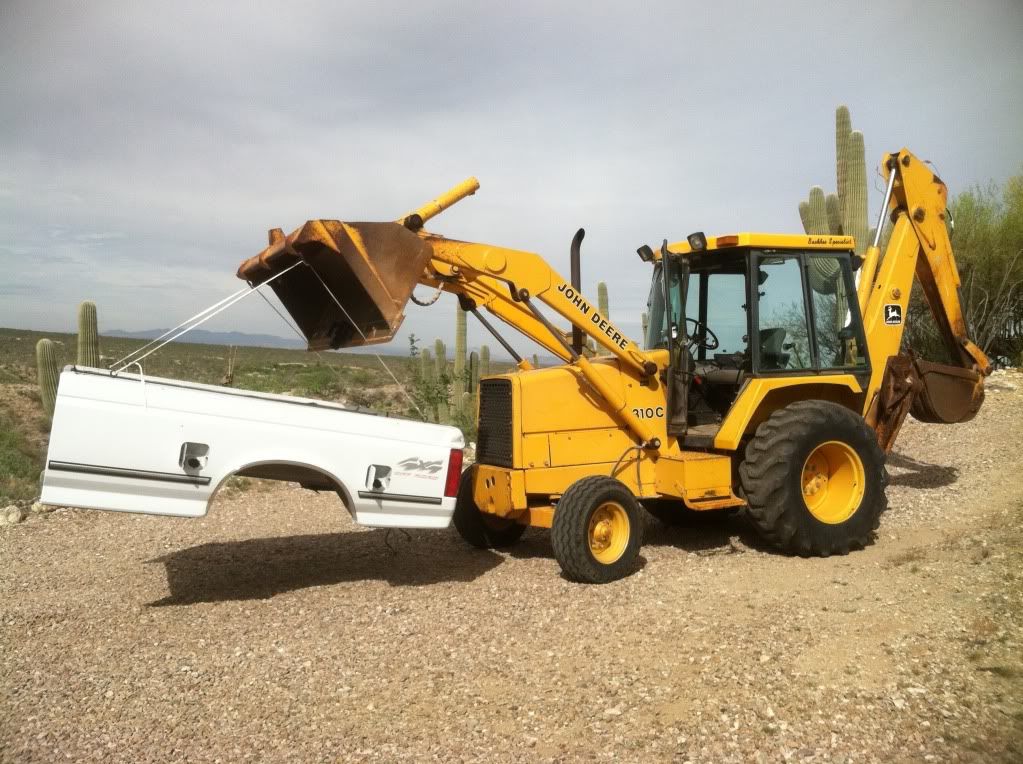
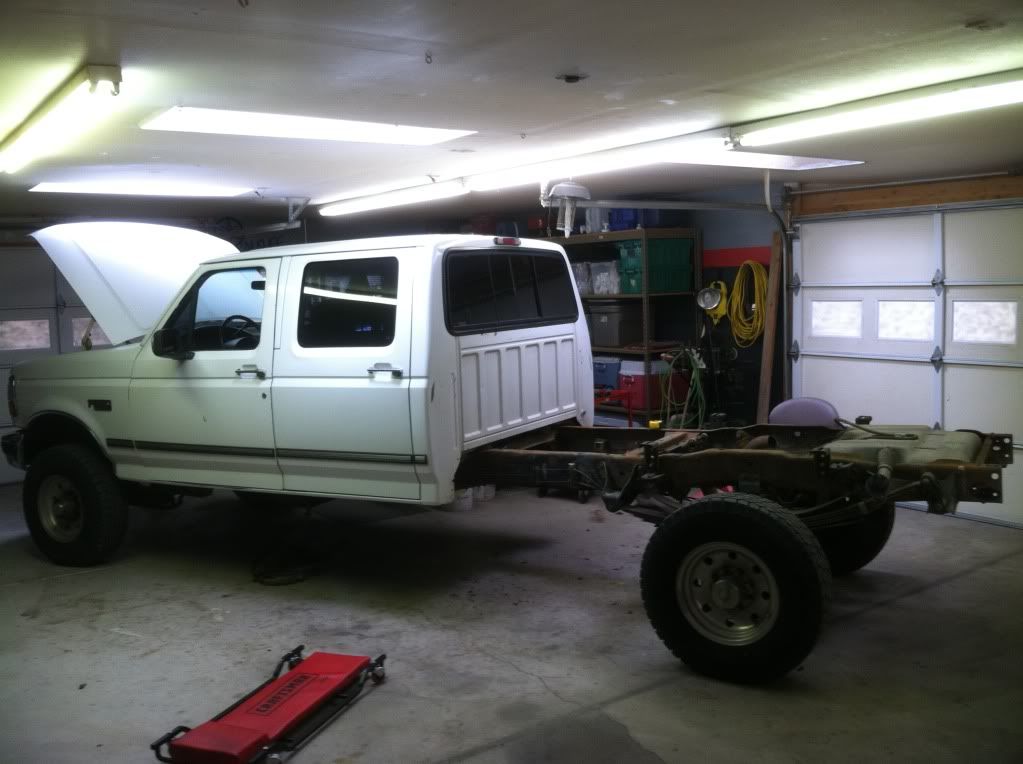
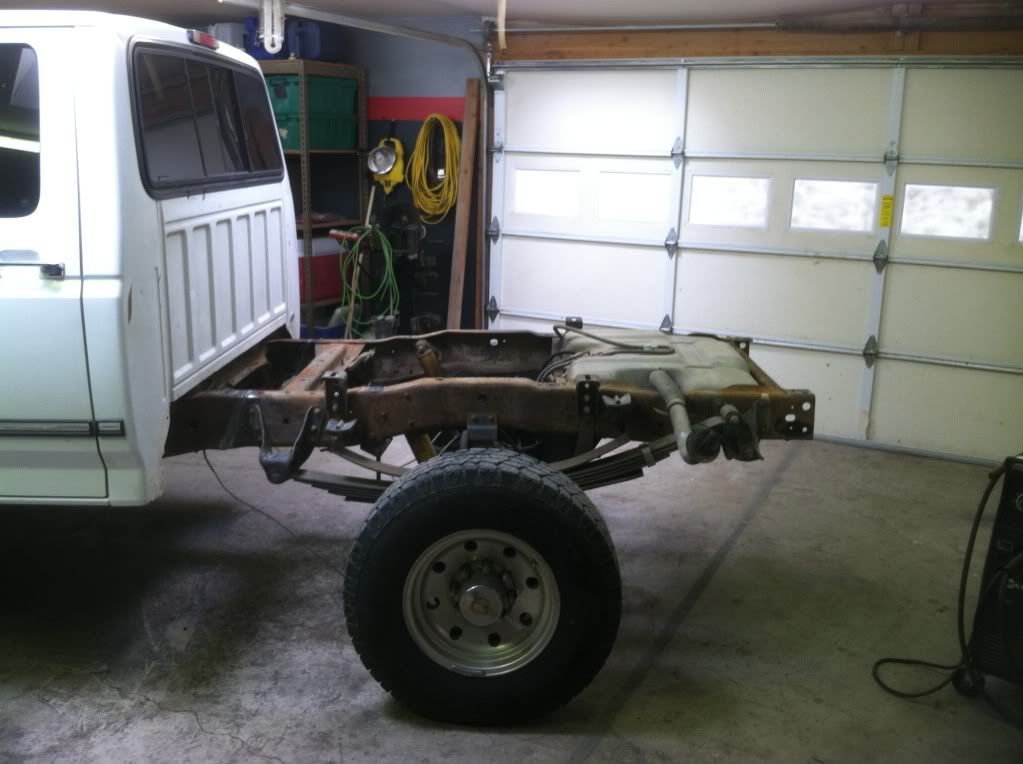
First order is to cut the frame down. I can't stand how long these trucks are for daily driving. I'm going to shorten the bed and frame 20" to make the bed the same as most chevy short bed.
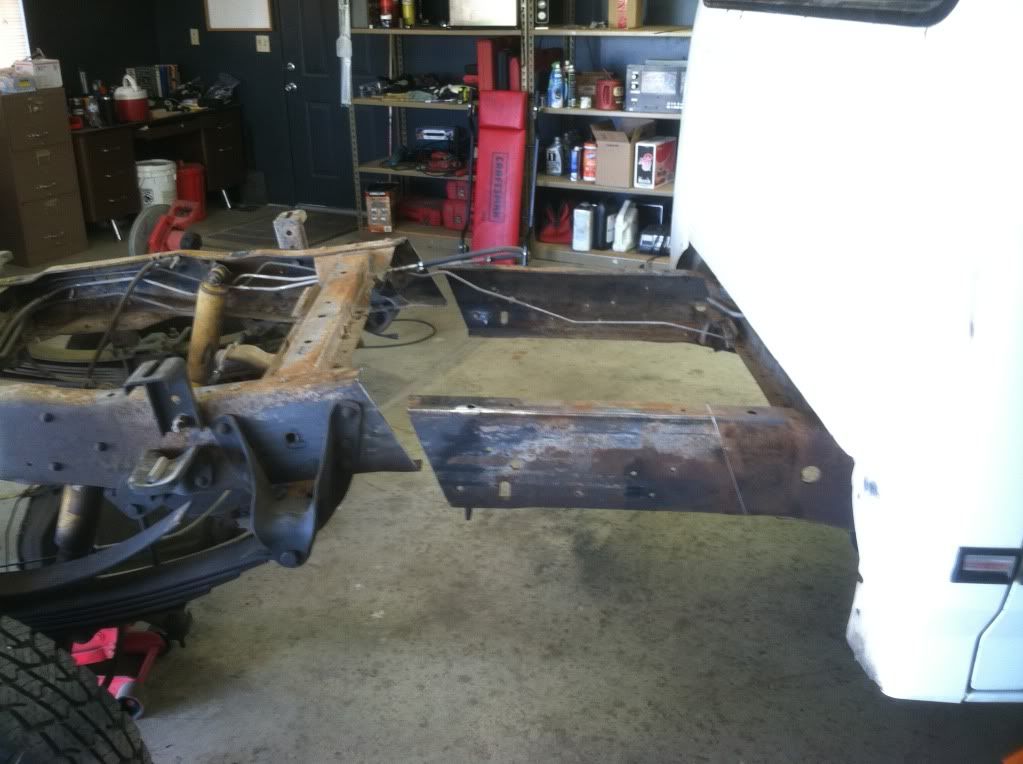
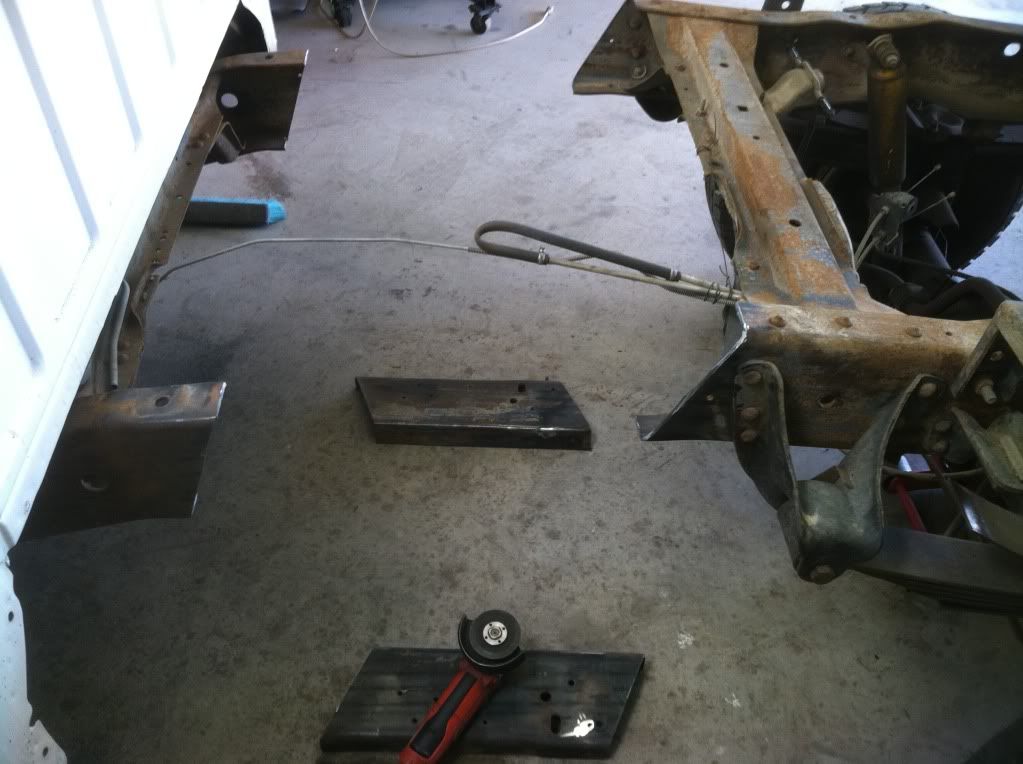
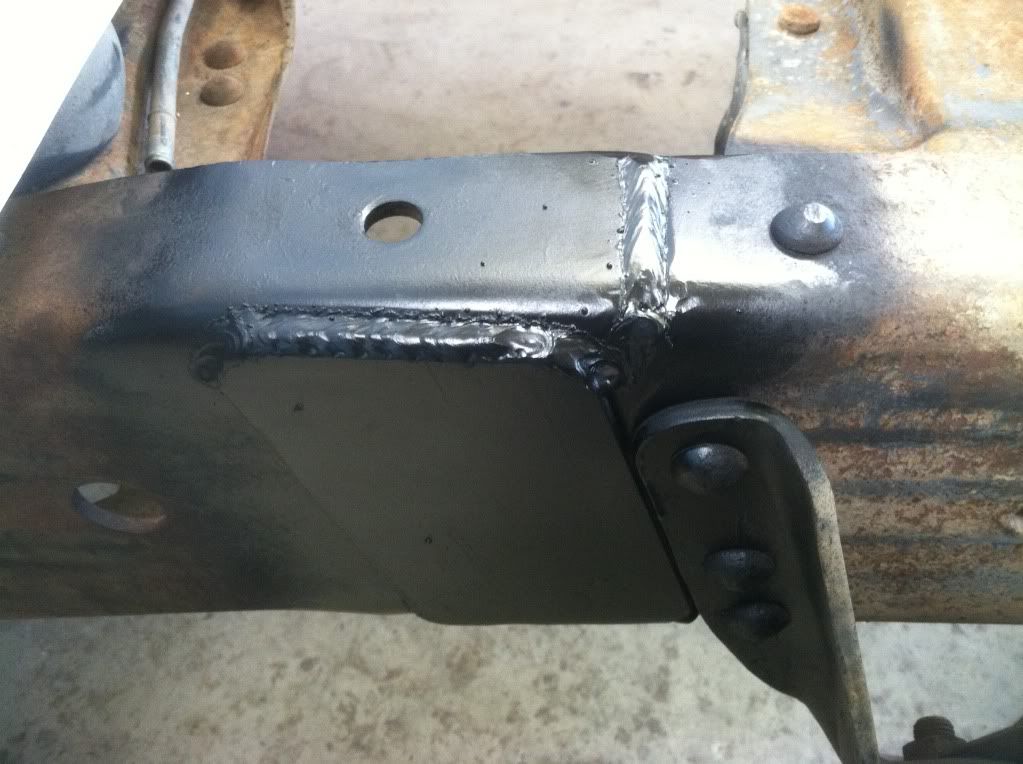
Welding prep to get full penetration...
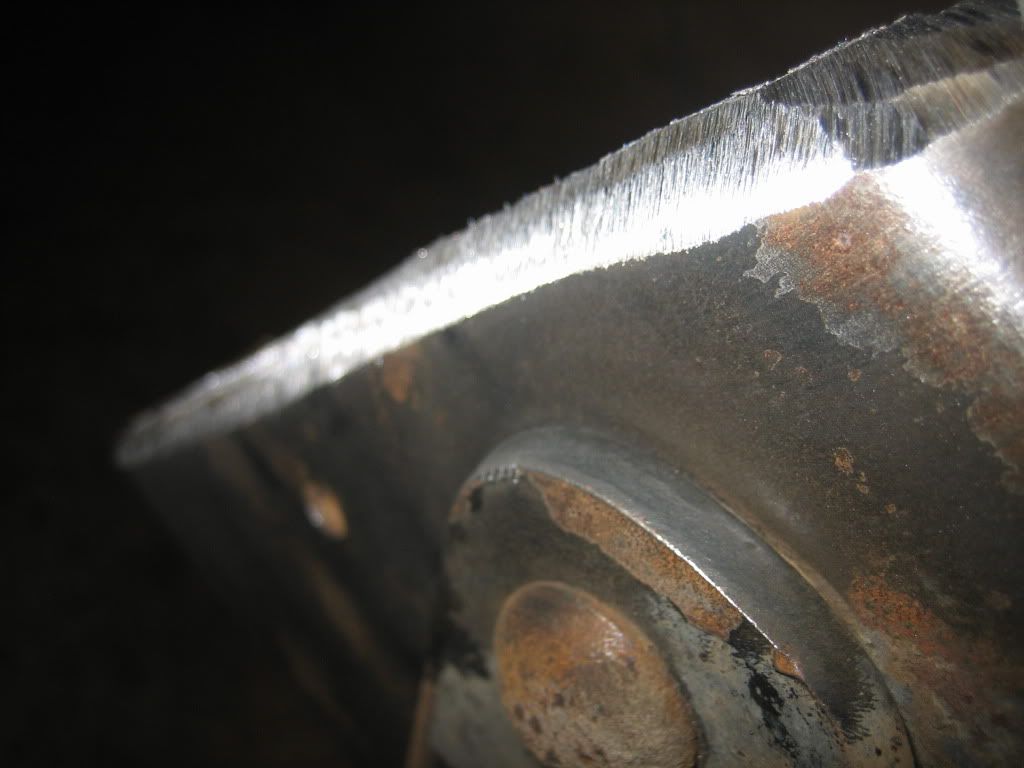
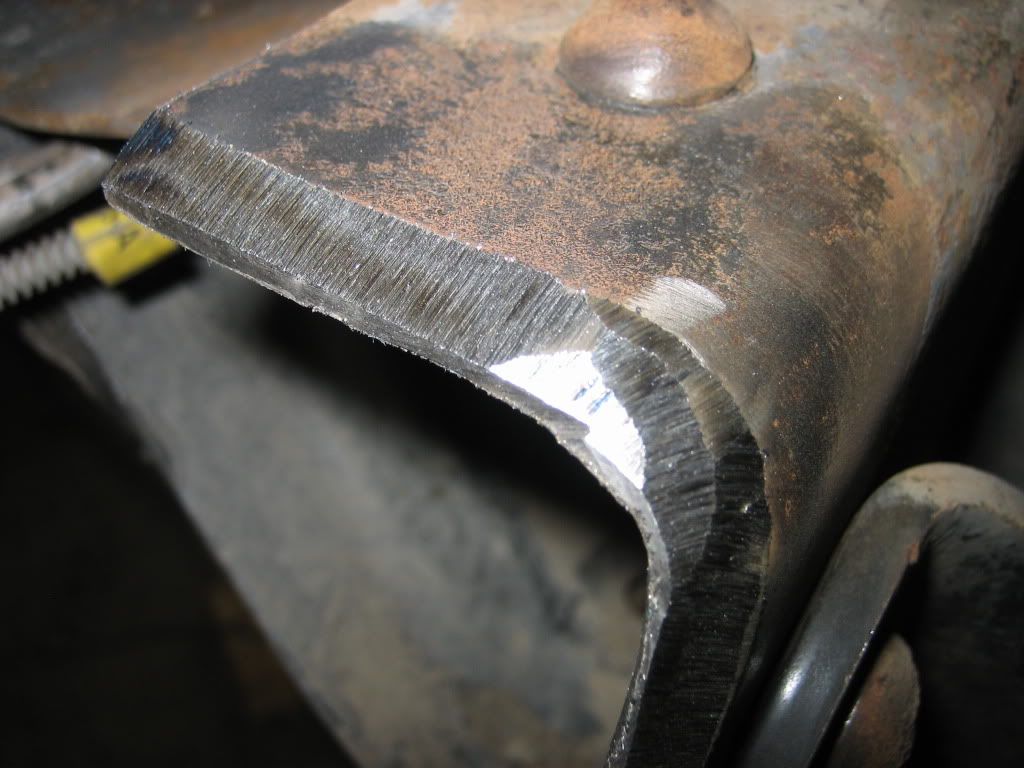
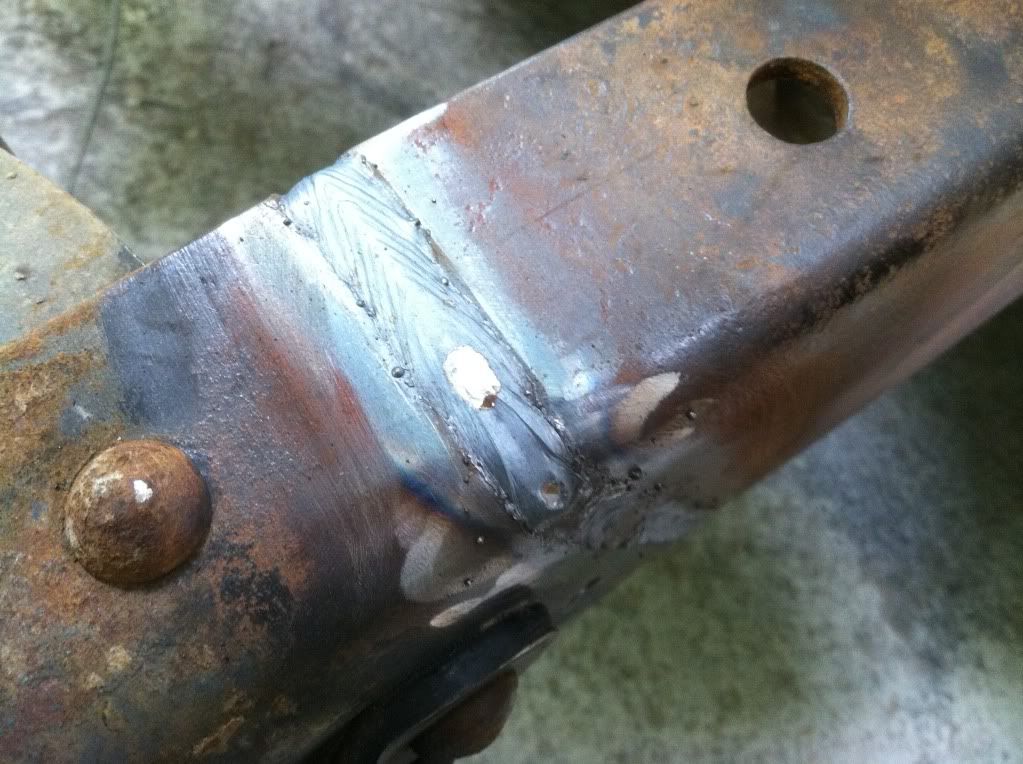
Plate welded in opposite direction as initial cut, rosette welded opposite sides of cut, but left sides unwelded.
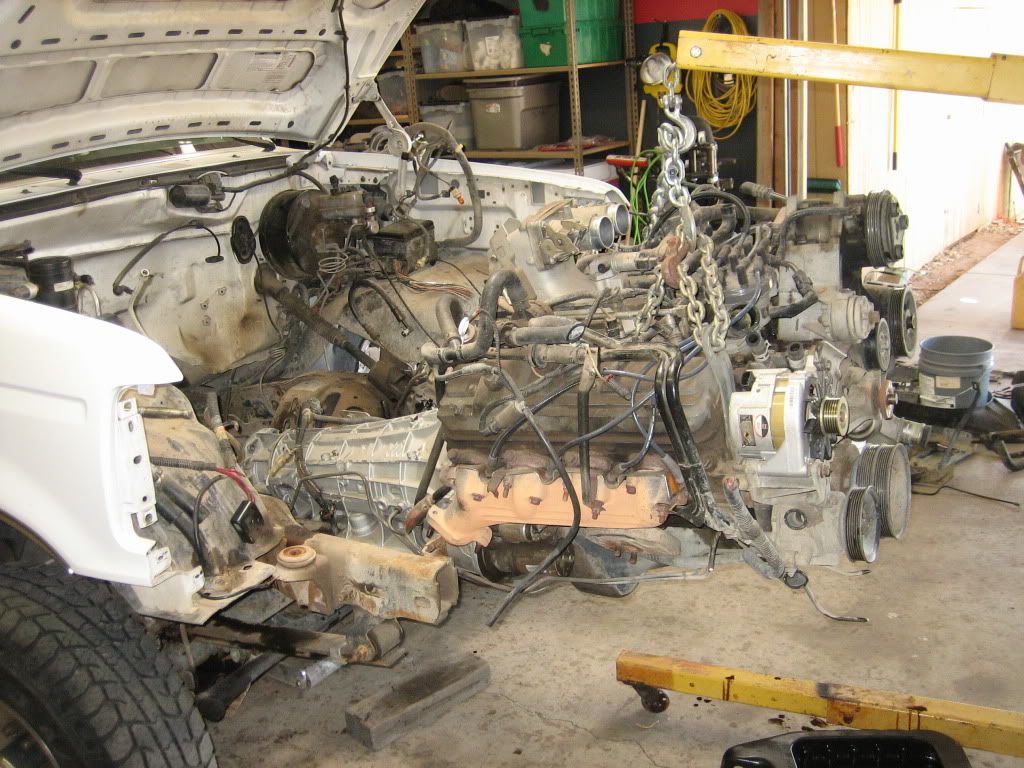
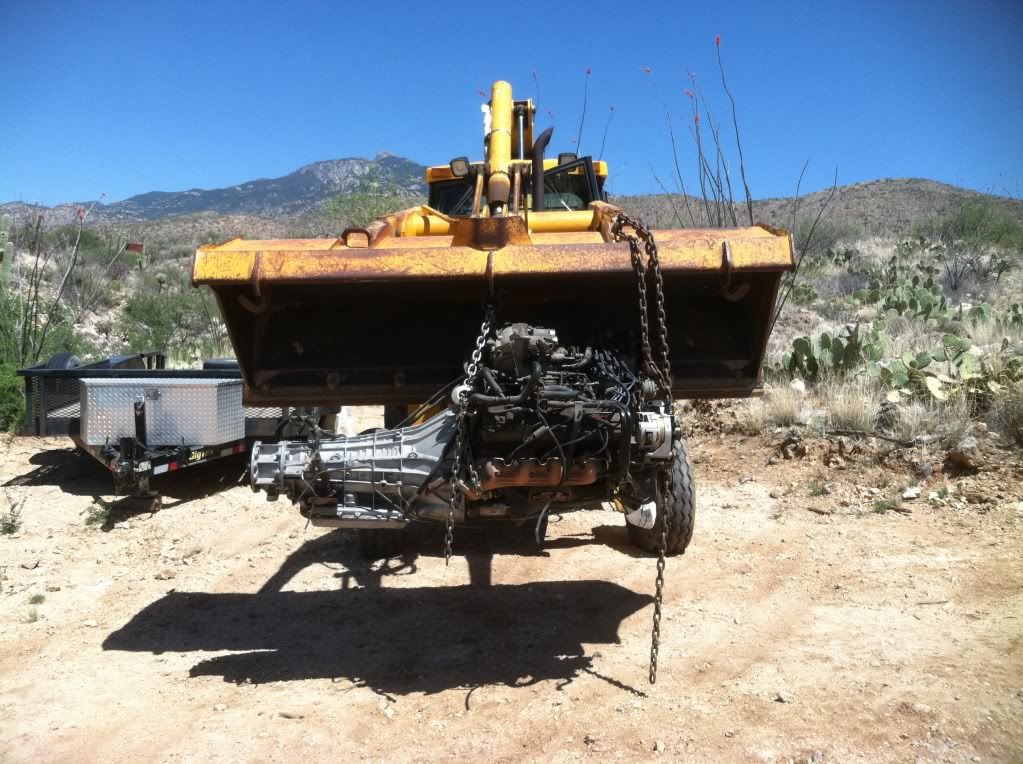
Out with that nasty old 460 and e40d, the thing got 10 mpg driving back from phoenix, haha
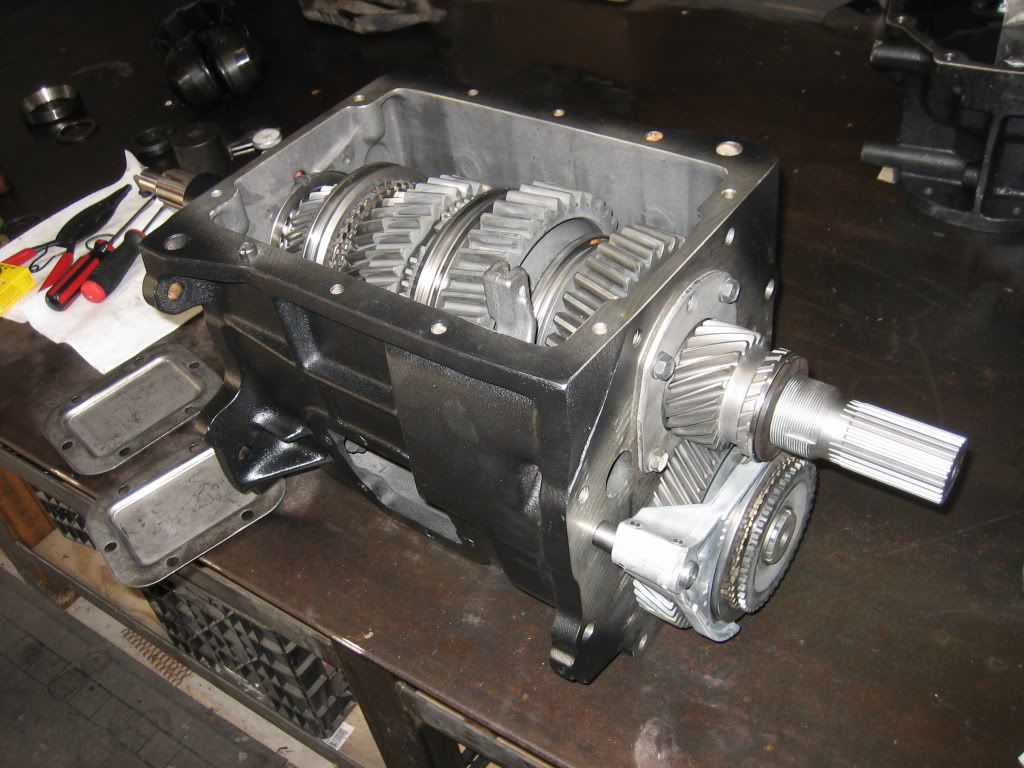
The NV4500 I got a killer deal on, $650 and it came with engine plate, flywheel, shifter, starter and all hardware. Came out of a 2002, but it was 2wd. Although I'm running a divorced t-case, I am putting a gear vendors on the back of the NV4500 so I need the trans as short as possible. The idea is that I can use the gearvendors in low range to combat the weak link of backing up a hill causing the clutch to burn up in the gear vendors. This way in low range the gear vendors has 1/2 the load versus being mounted after the t-case...
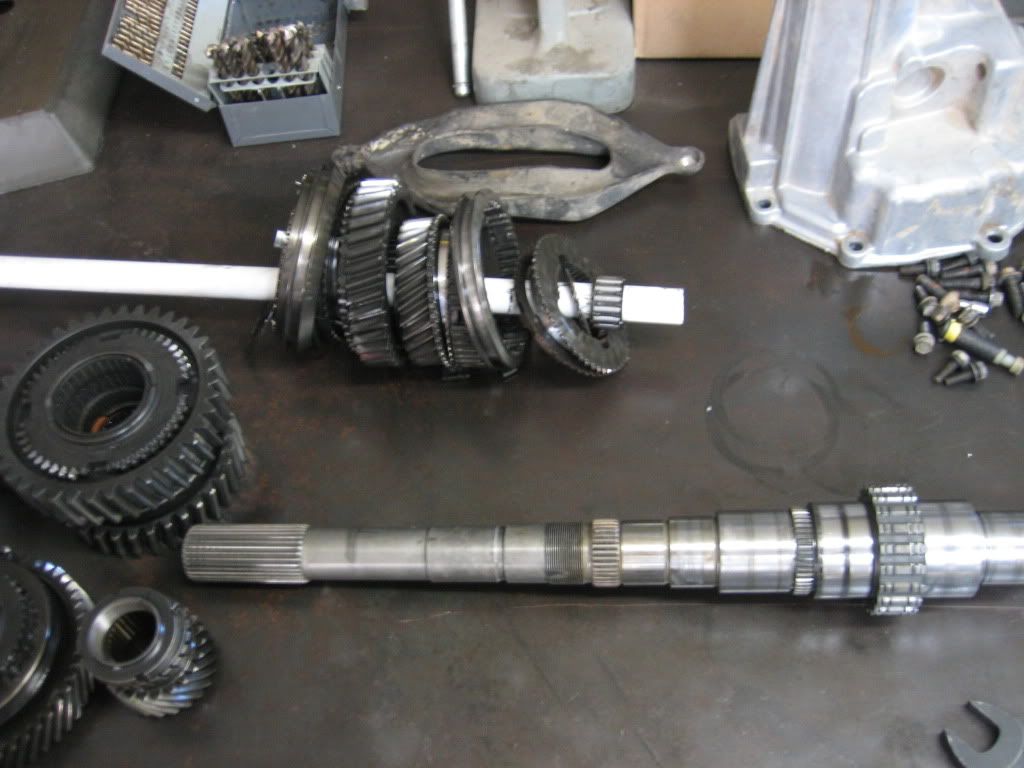
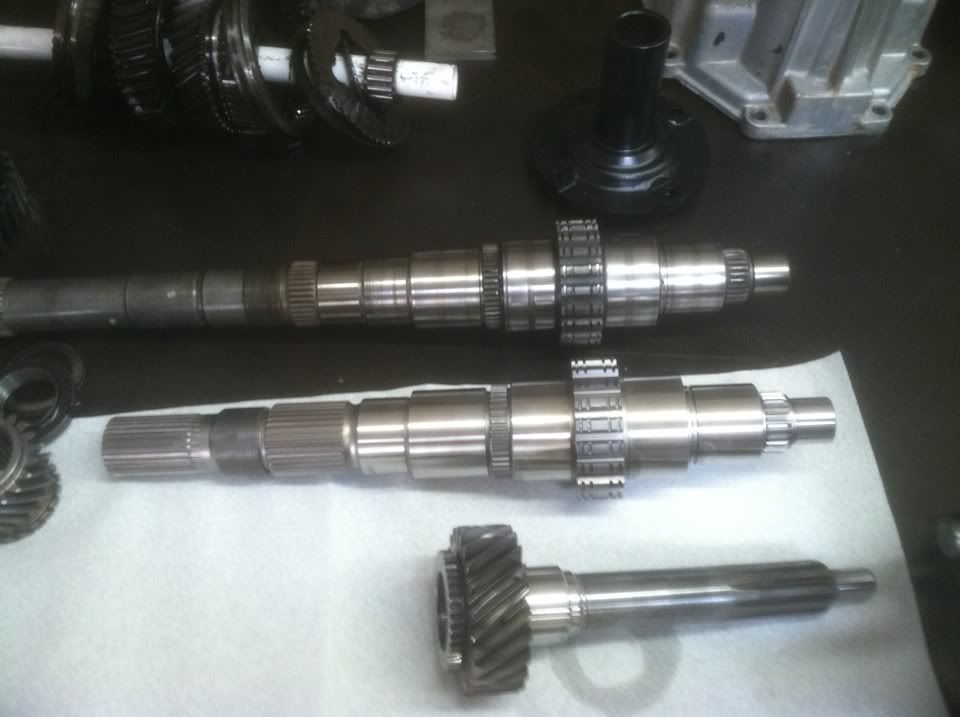
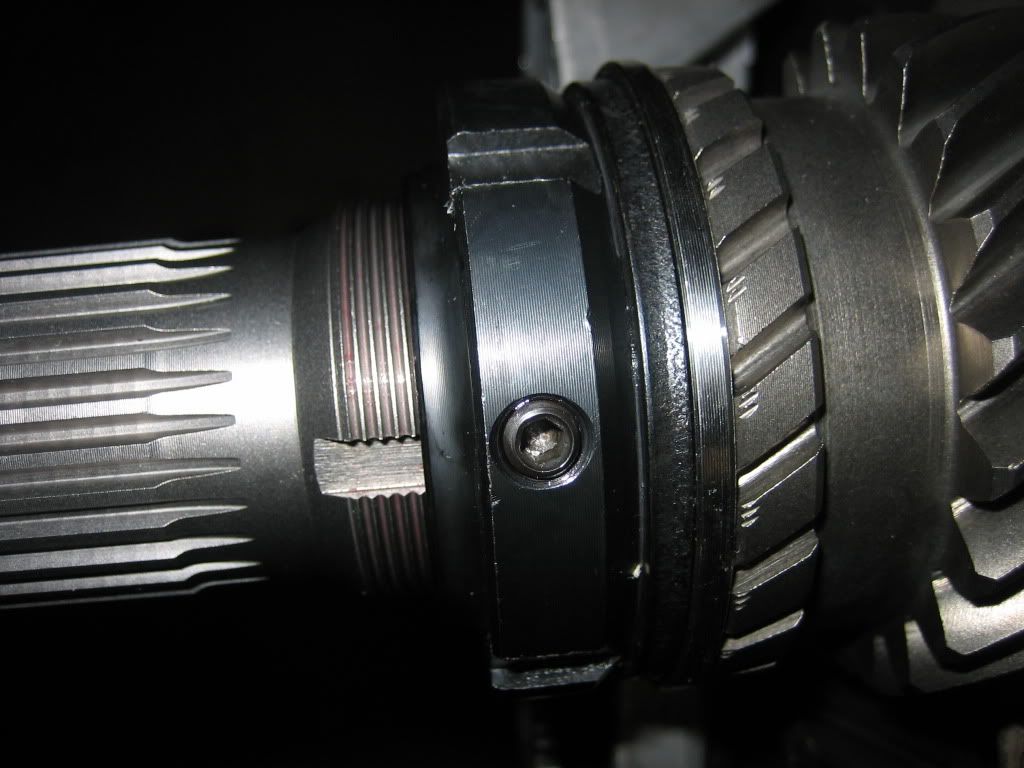
Old 2wd shaft and new 4wd shaft with updated split thrust washer to fix the 5th gear problem... Permanently I hope...
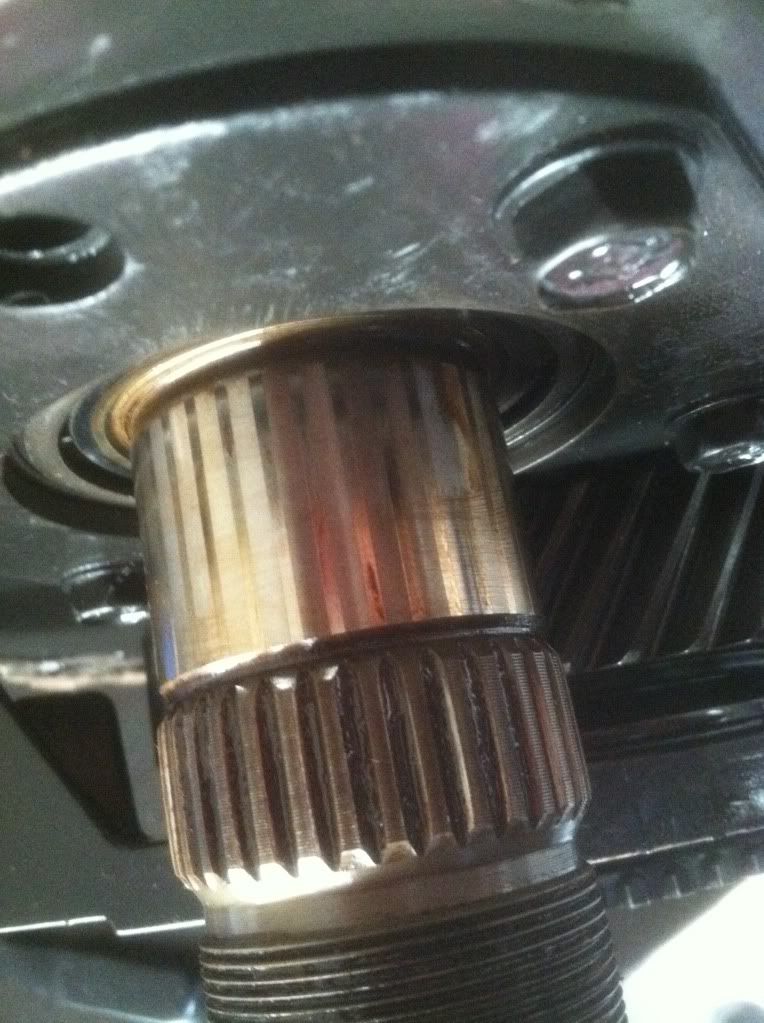
Fretting of old 5th gear trying to work it's way off...
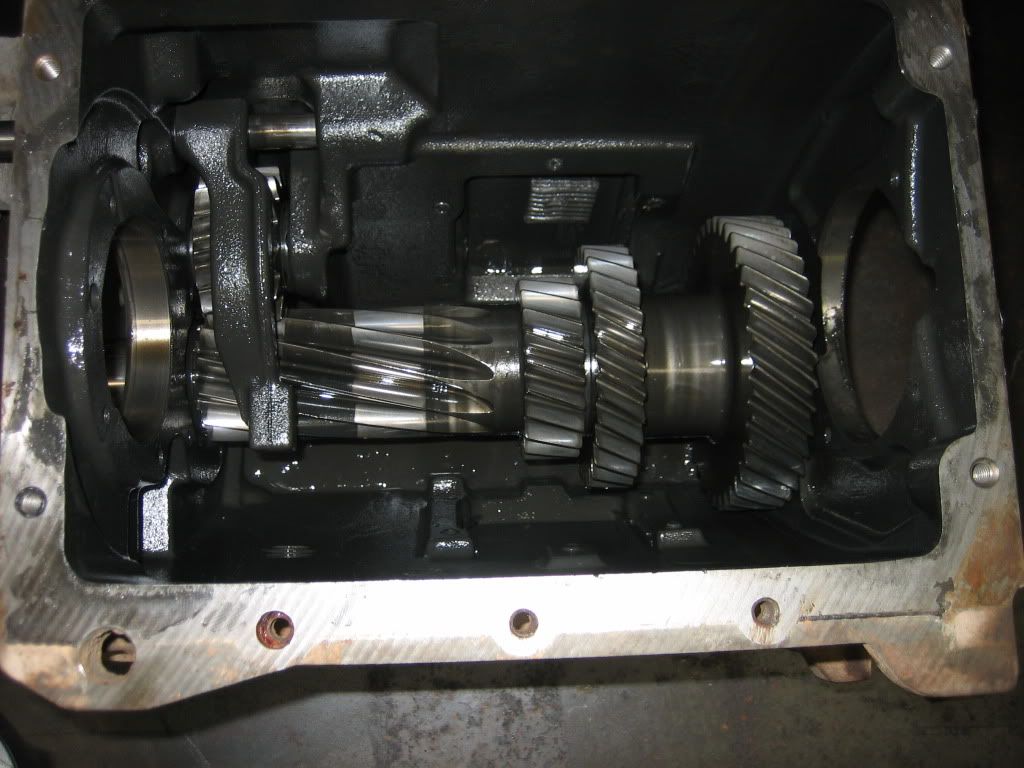
Cast iron tailhousing from standard transmission, I checked bearing for center it was dead on.
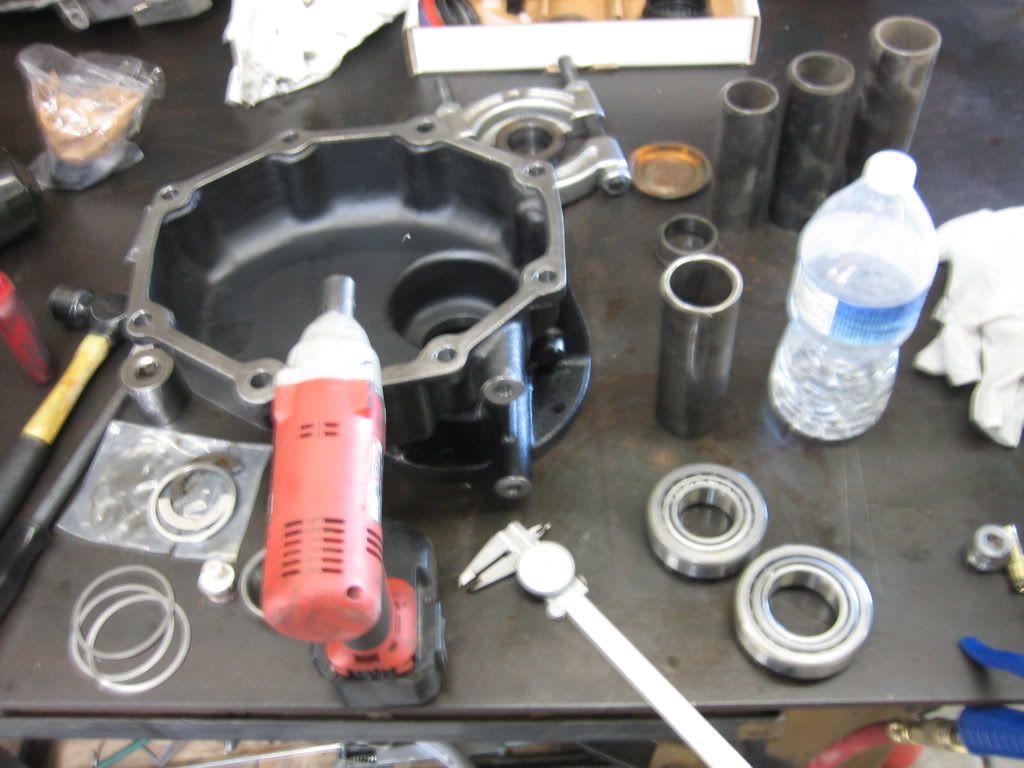
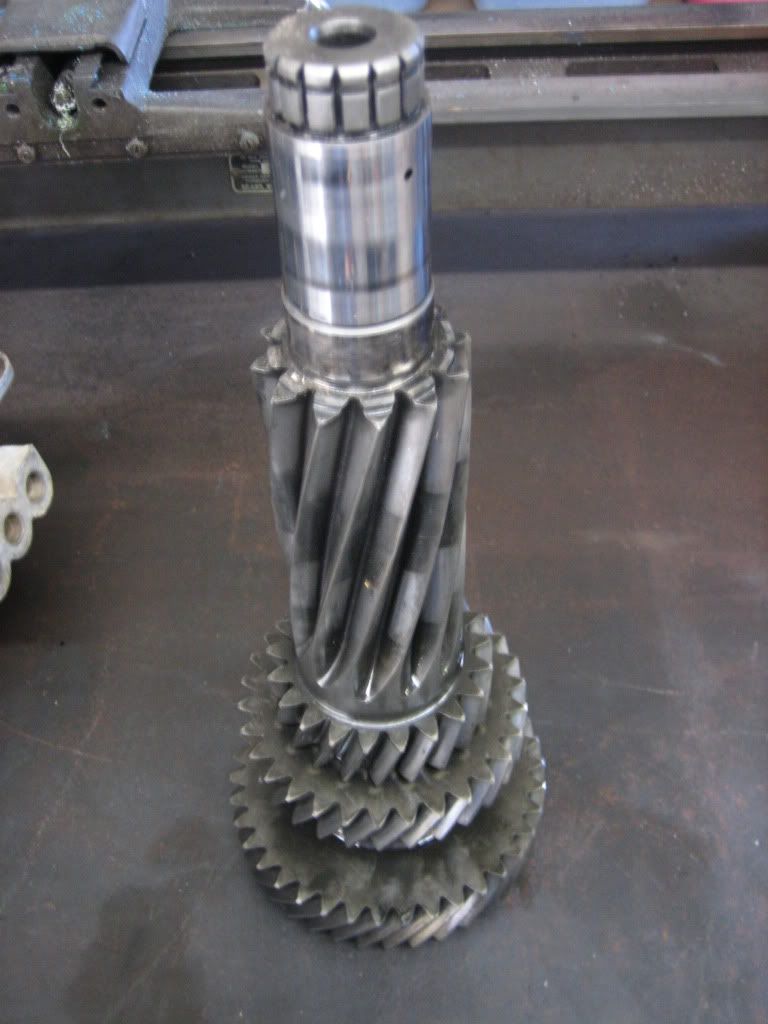

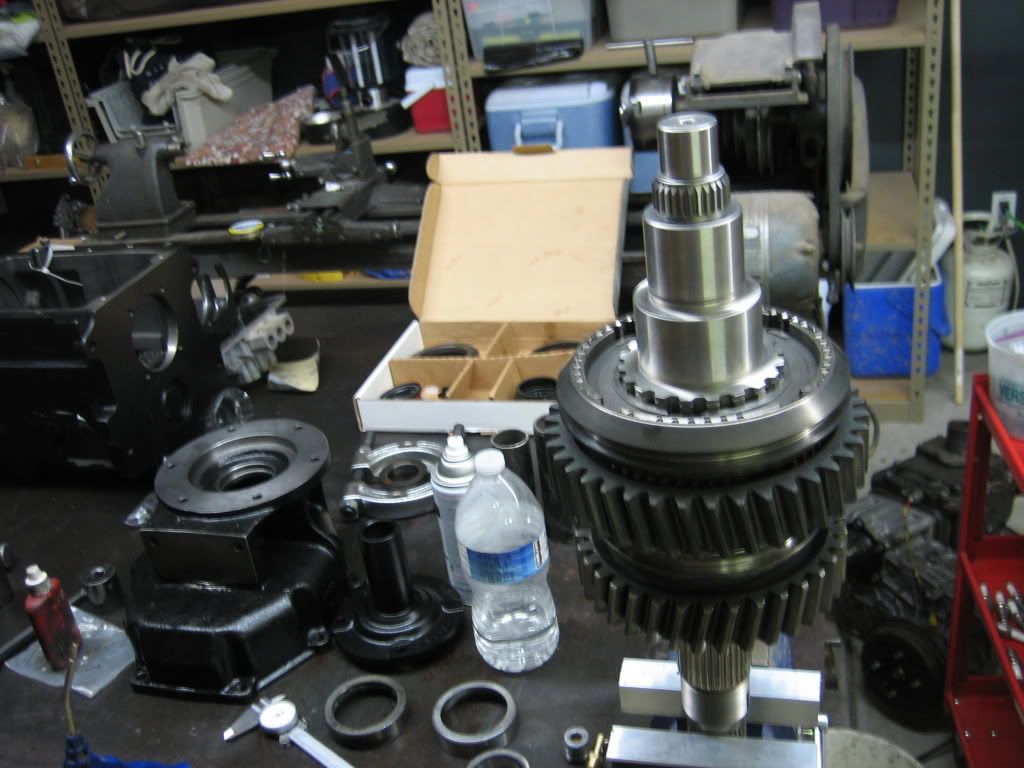
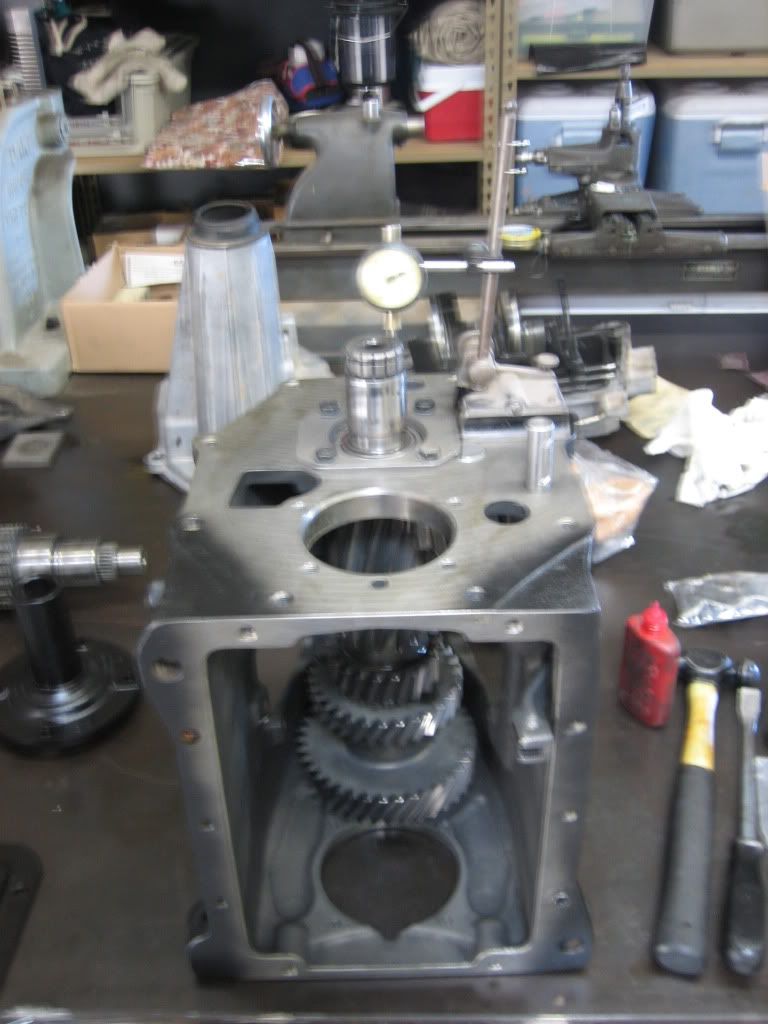
Preload set right at .002
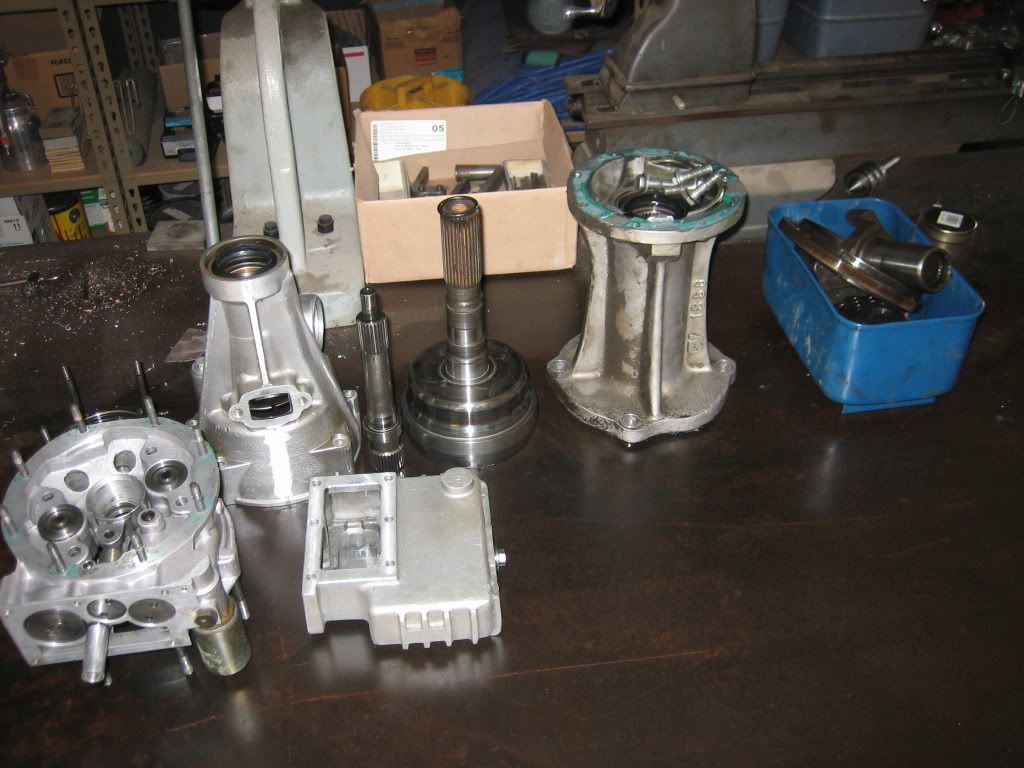
Gear vendors disassembled, damn thing has pitted gears in the annulus, going to have to get a rebuilt one... Still way cheaper than buying a new unit.
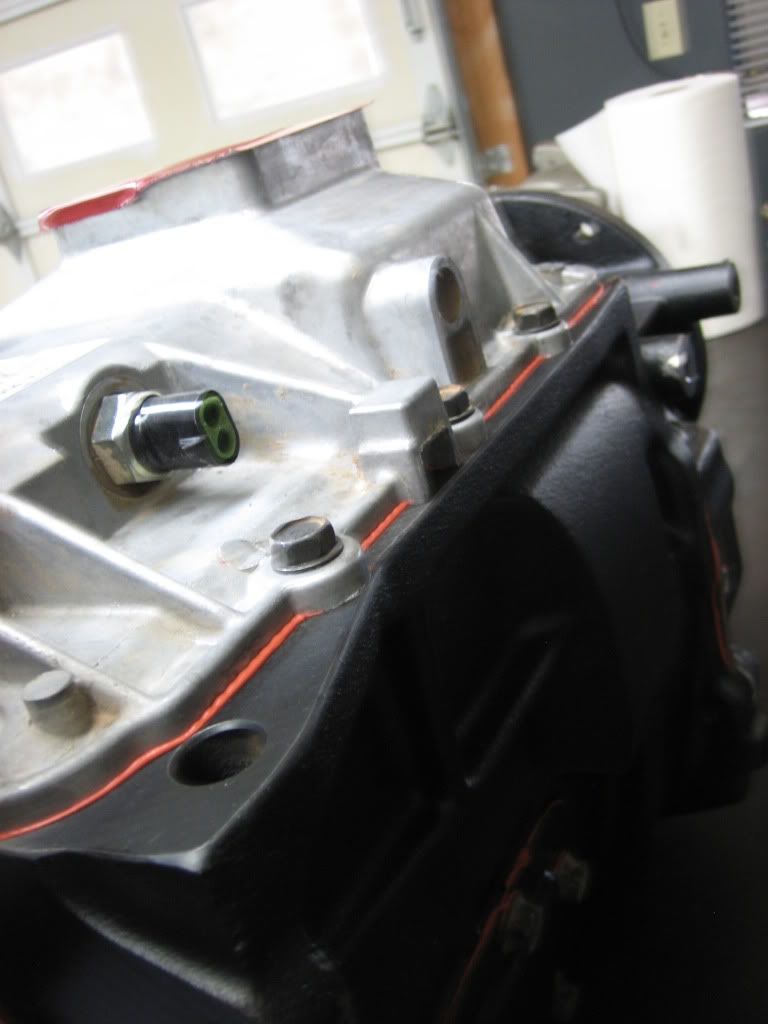
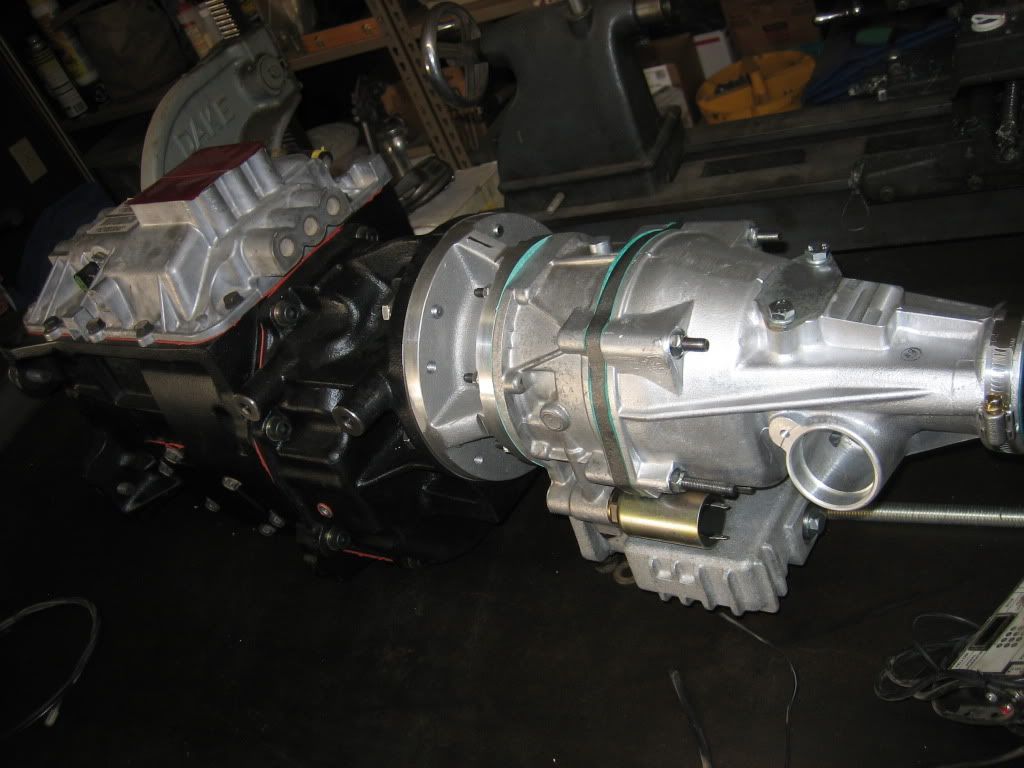
Gear vendors rebuilt unit installed, I had to drill and tap the adapter myself so the unit would sit flat, wasn't too bad though.
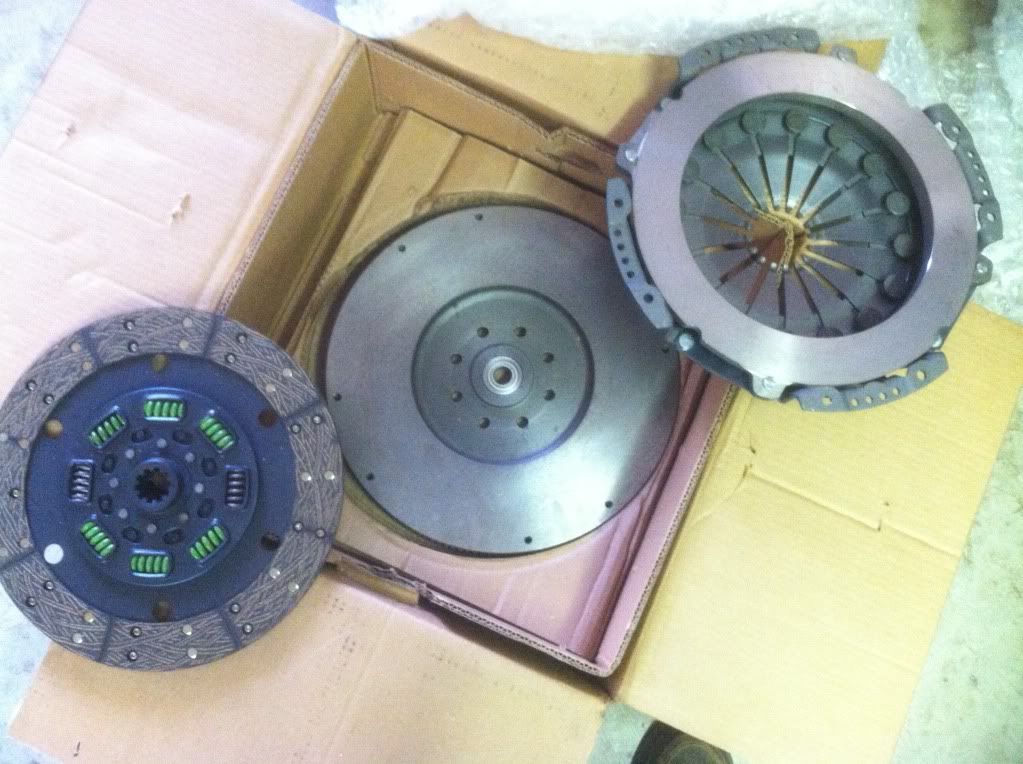
Valair 13" clutch, I hope it lasts for a long time. I'm not going to be very hard on it.
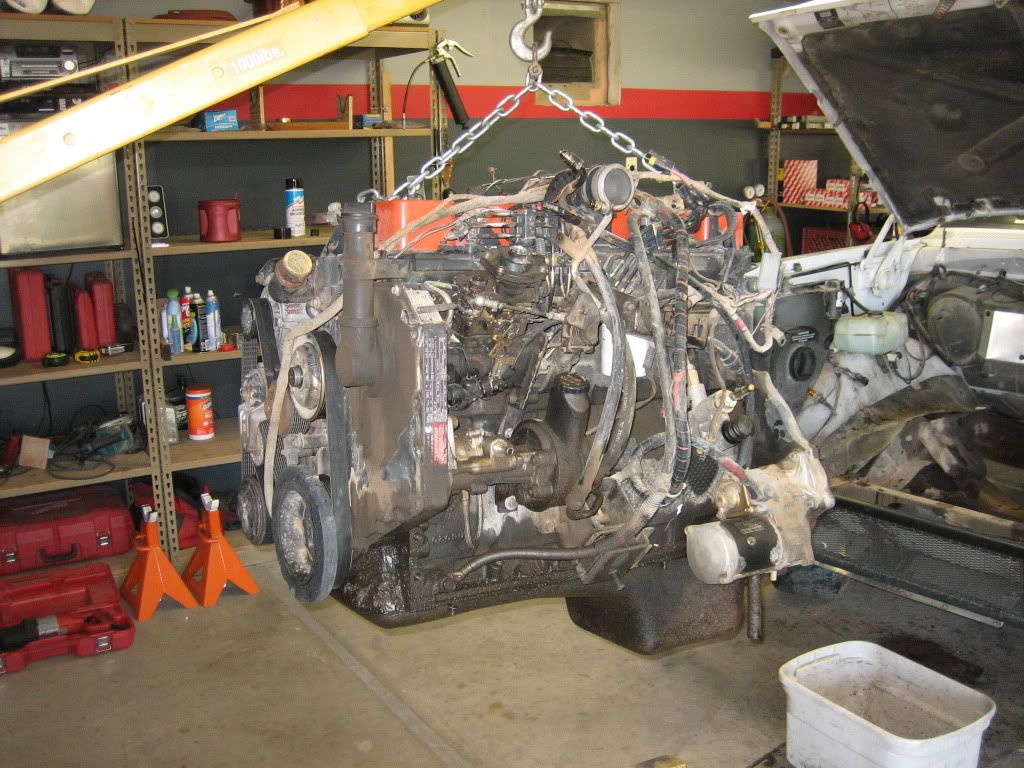
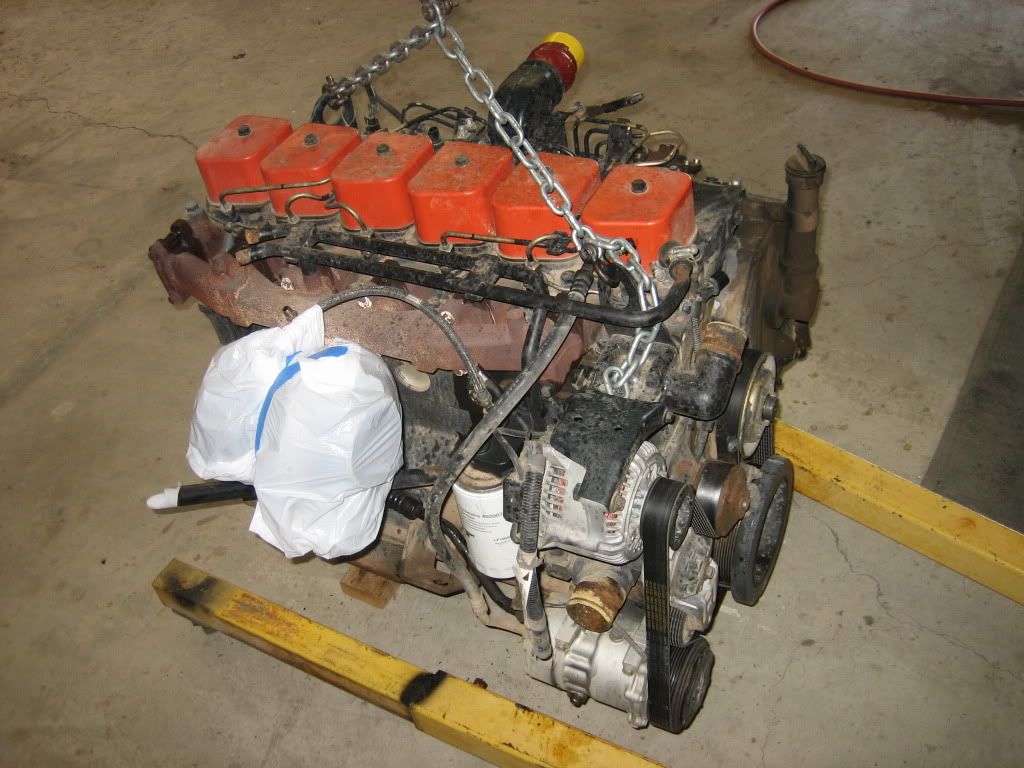
Time to get that Cummins out, poor old dodge, I loved that truck but it just doesn't fit the bill anymore. At least it's heart will go with me many more places.
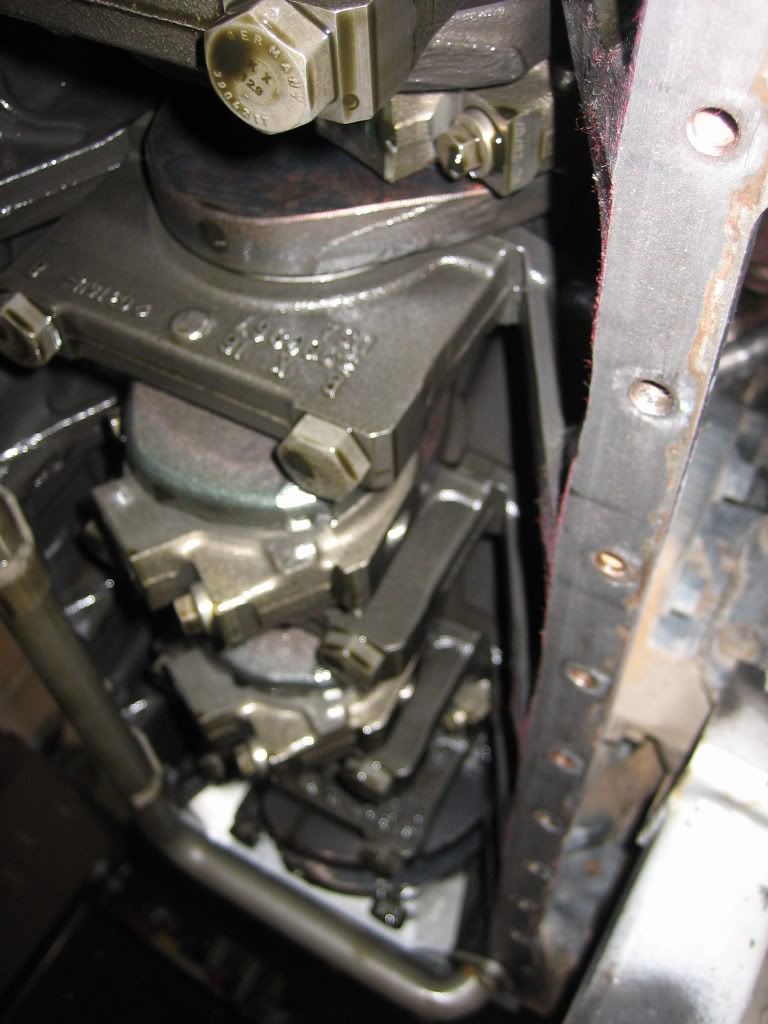
So I pulled the oil pan off to re-seal it and found a busted plastic piston cooling squirter. Got some billet aluminum ones on the way, but the crank has to come out. Bummer, gonna set me back a week.
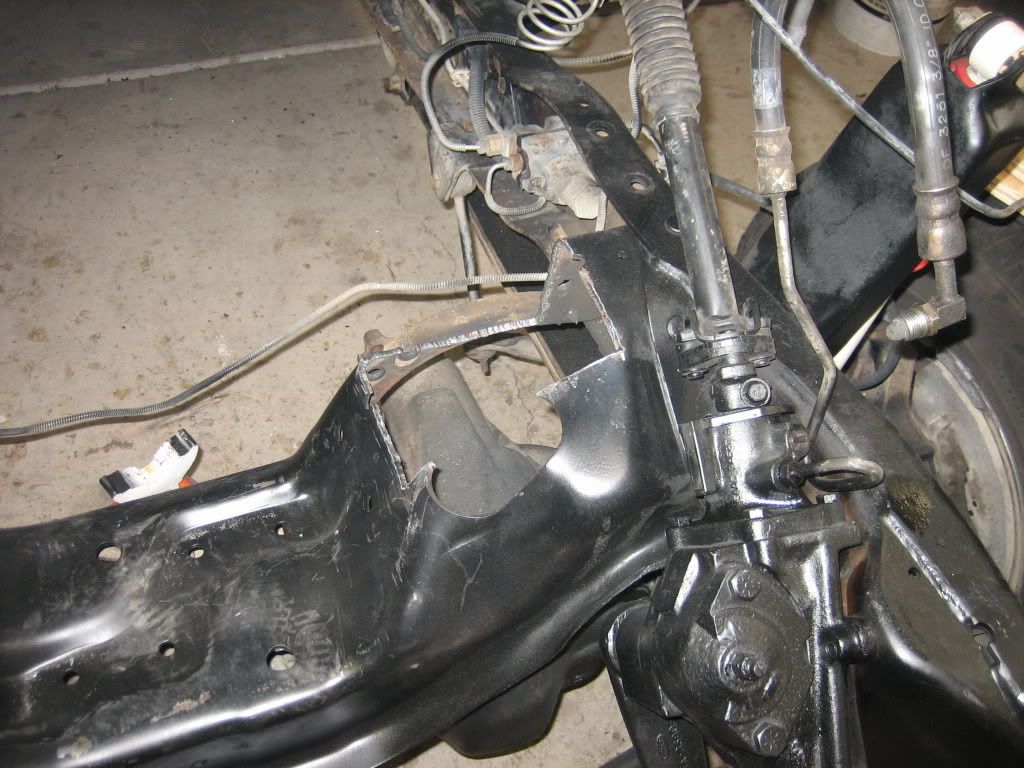
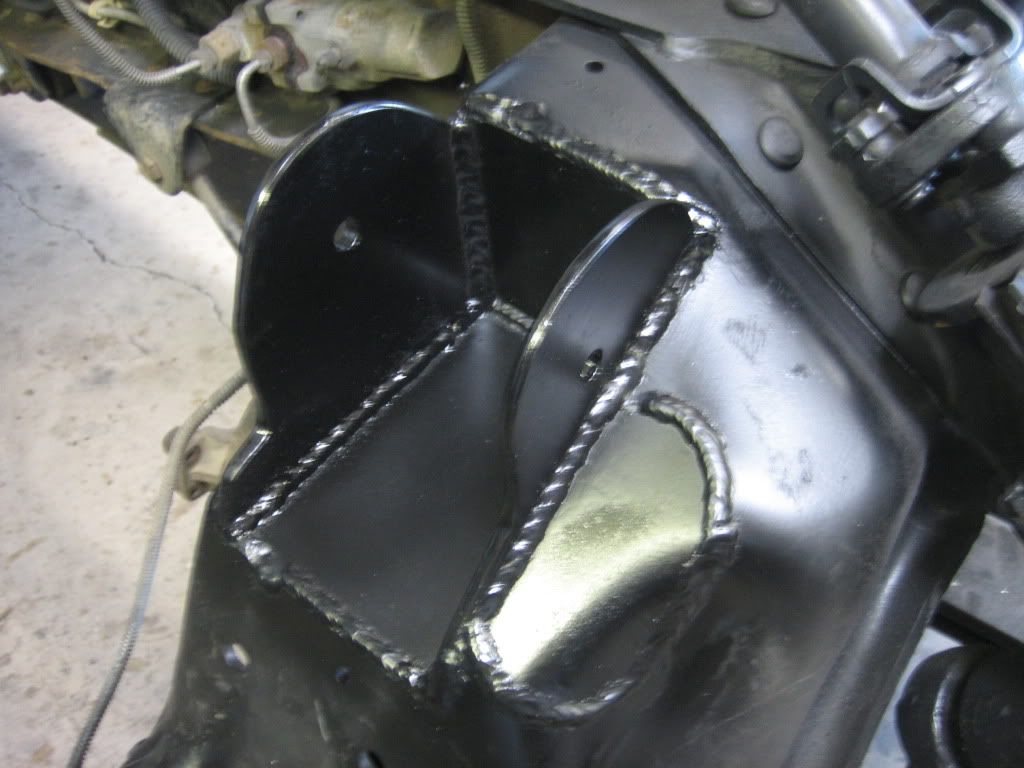
Time to start working on the motor mounts. I used ones from a 24 valve on accident- the holes are cast back further on those engines so these are far forward on the 12 valve. It actually ended up working really well, putting the mounts right in the middle of the crossmember. It was a lot more work but I like how they turned out. The p/s pump is really close but it does clear.
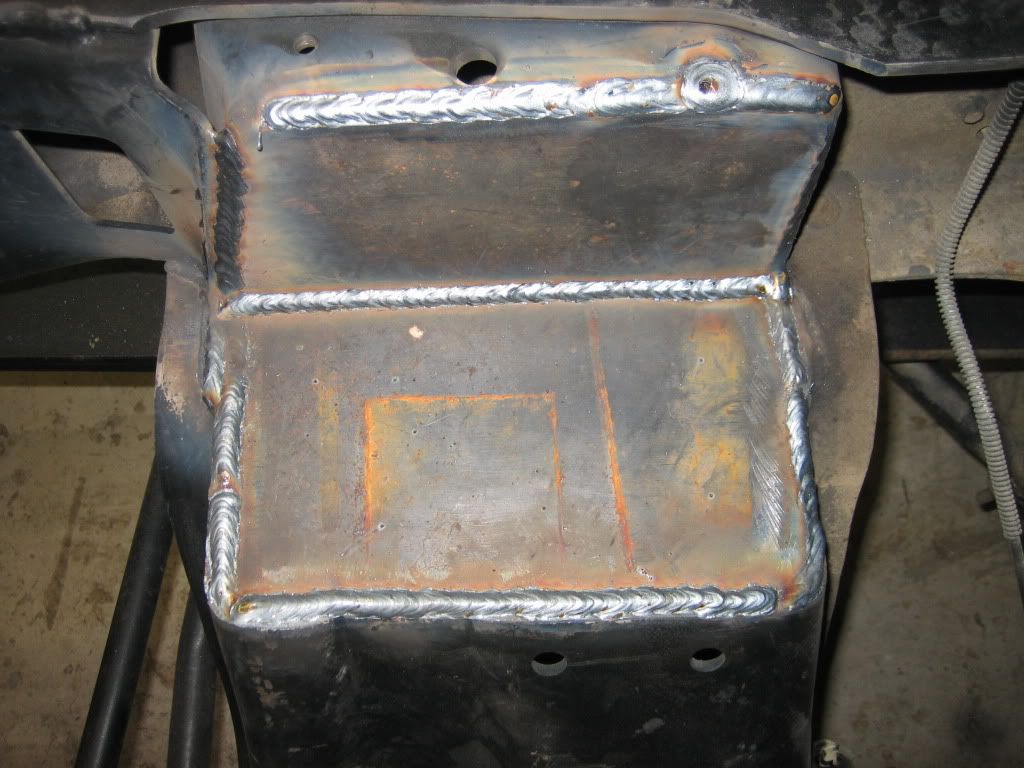
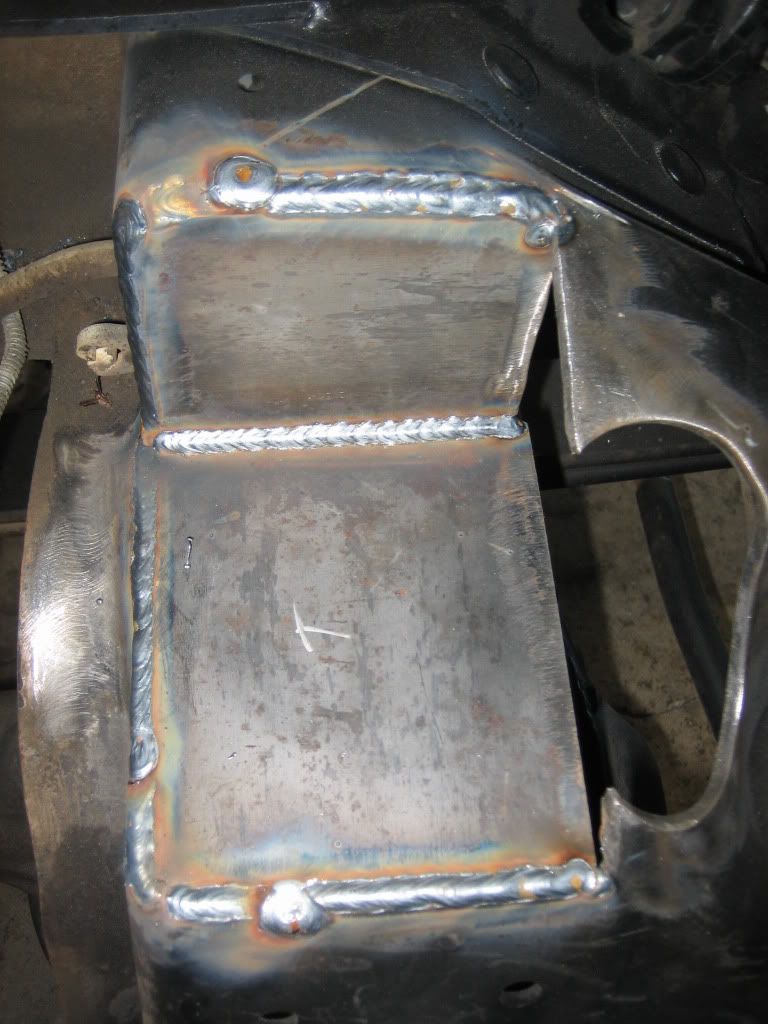
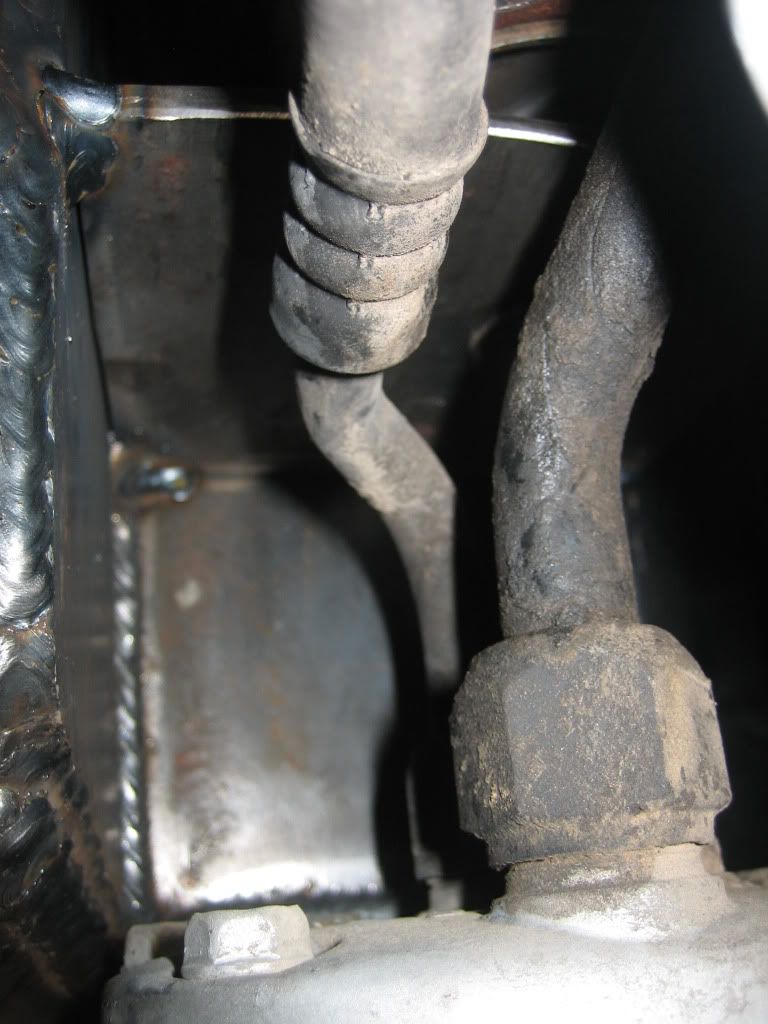
Gusseting while trying to stay clear of a/c compressor
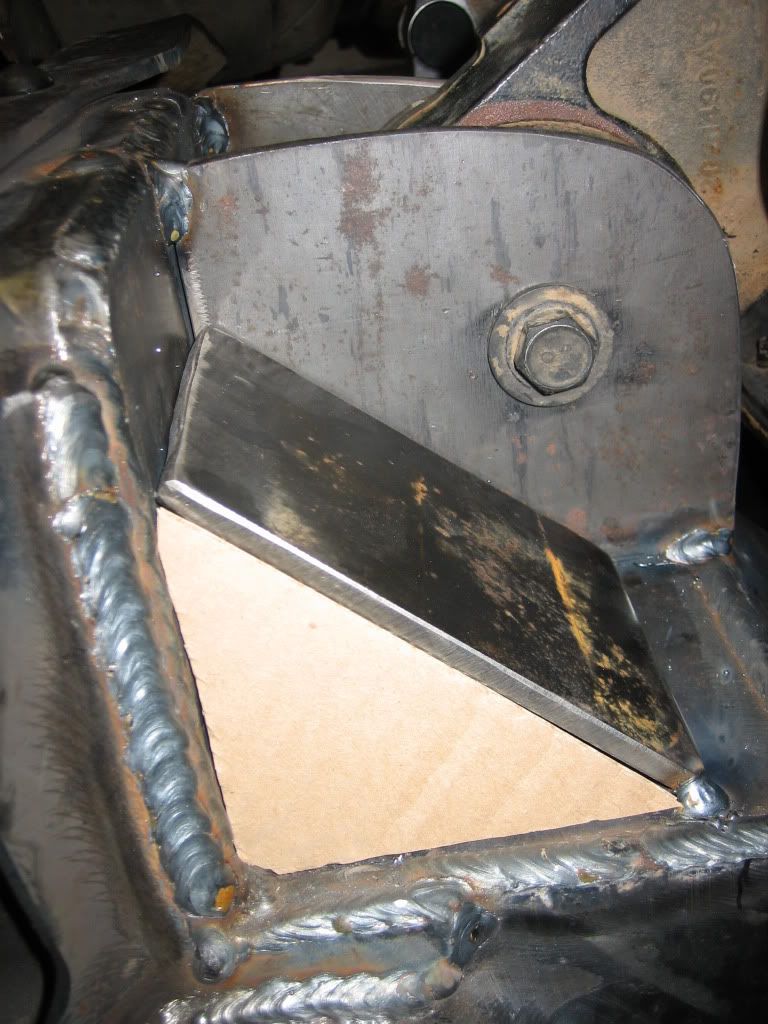
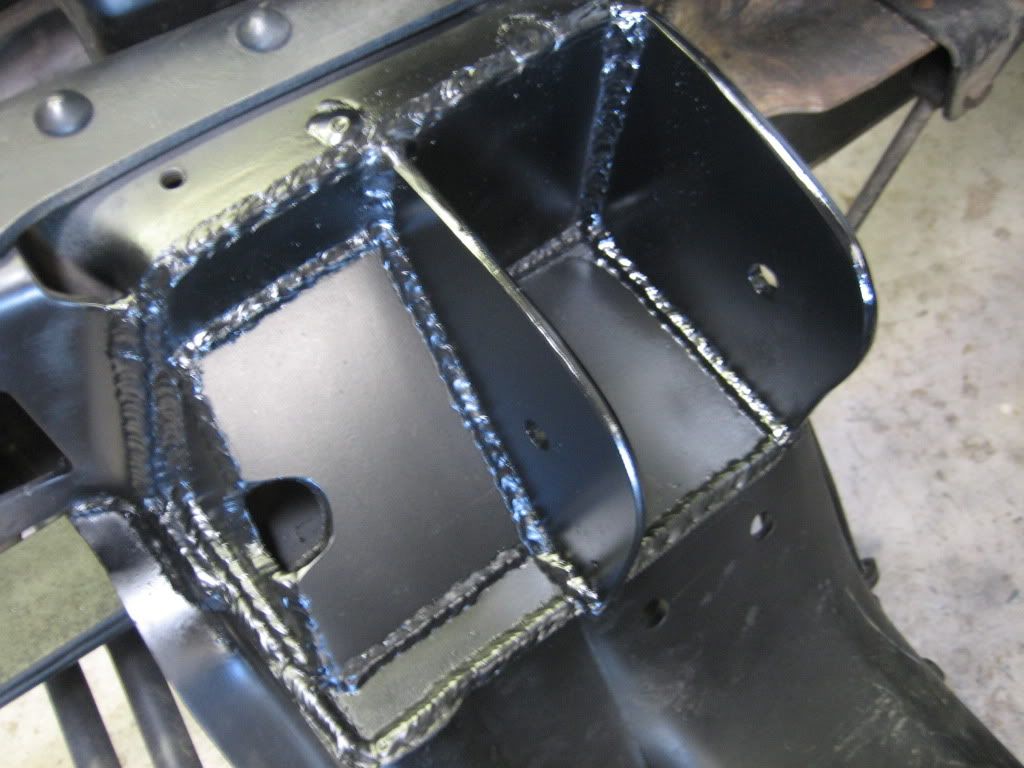
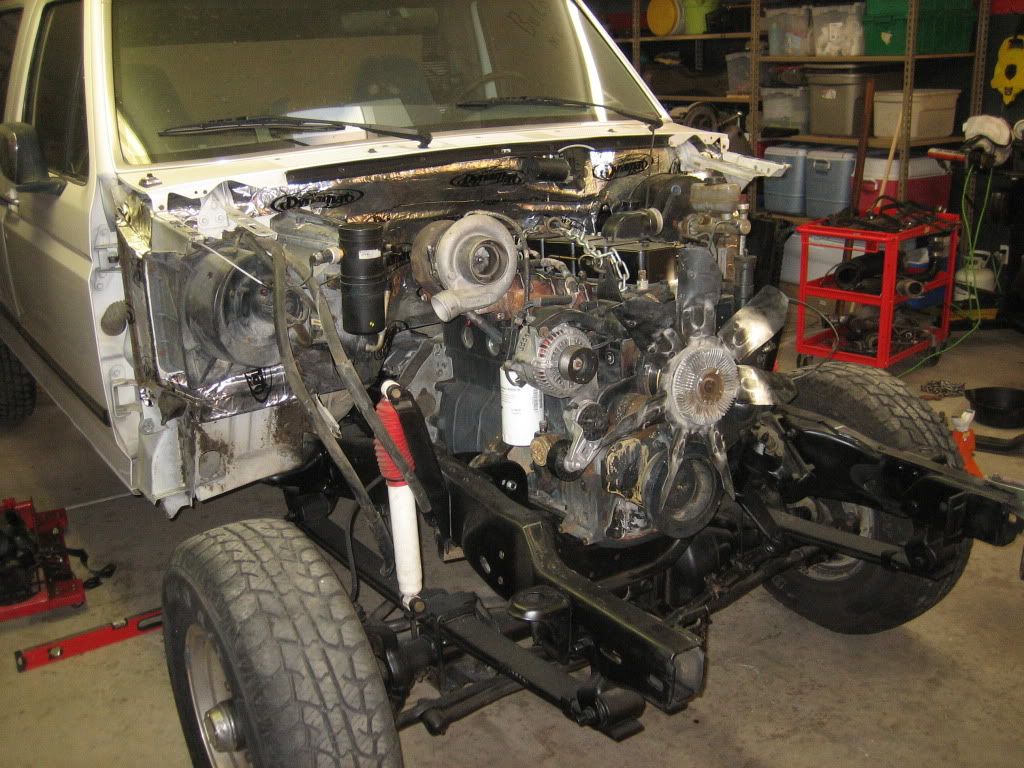
Engine and dynamat installed, going to have to come back out to fix oil nozzle but I have to keep moving forward...
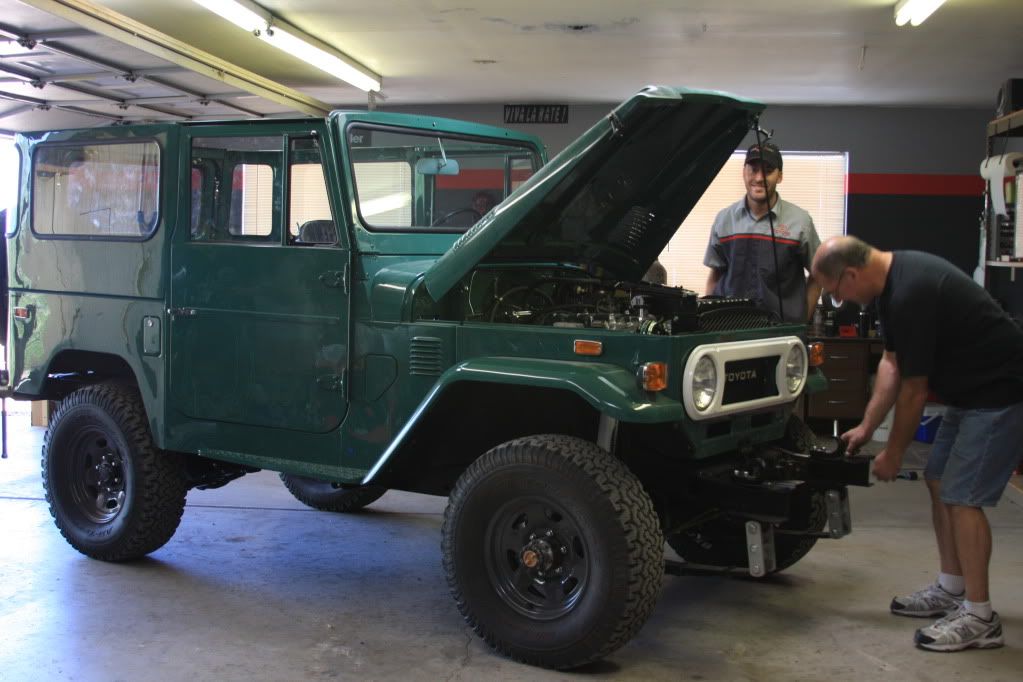
Meanwhile finishing up helping a customer restore a 1974 FJ40 TLC. Had the truck down to the frame, powdercoated just about everything steel, rebuilt the entire drivetrain- most all mechanical work I did. I don't do body work though!
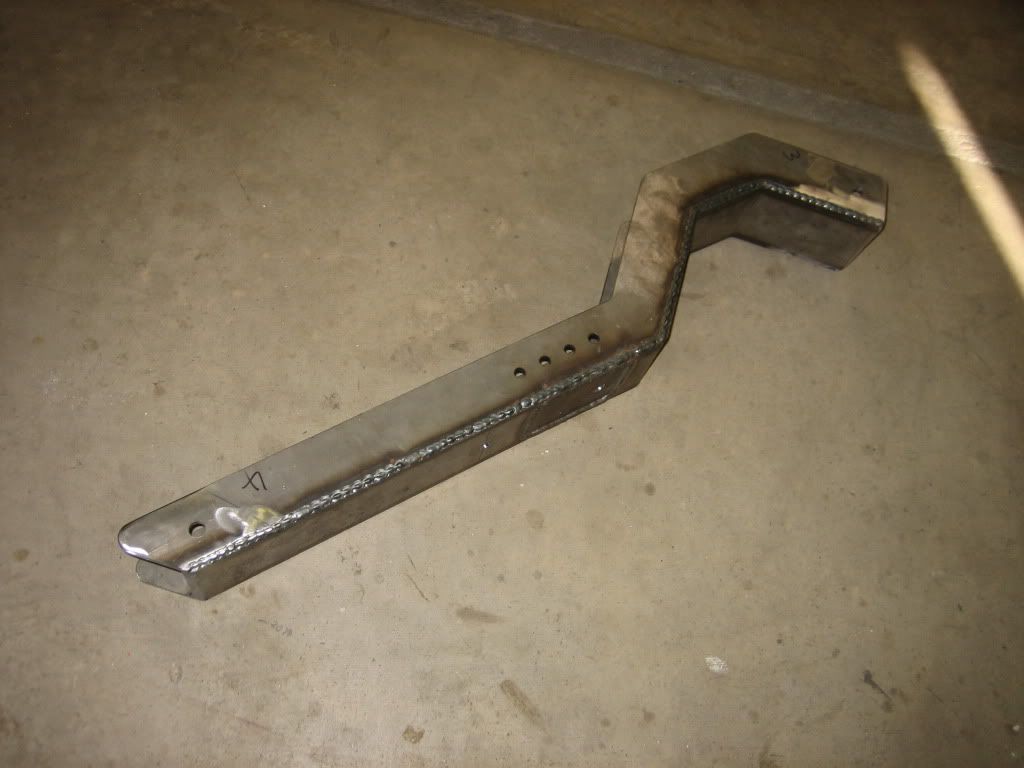
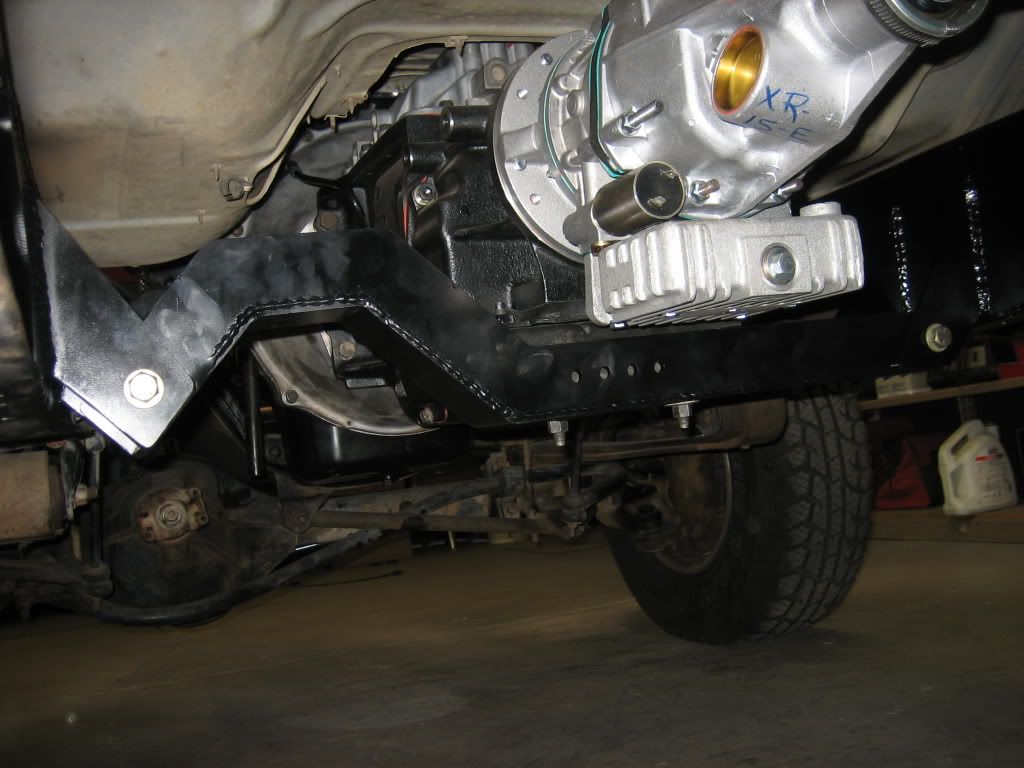
Time to mount the transmission. Many many thanks to Ballistic Fabrication - Manufacturers of Precision Offroad Fabrication Supplies for the laser cut parts. The crossmember was for a superduty that I cut up and modified. Great guys, Allen the engineer can do just about anything you want for a reasonable price.
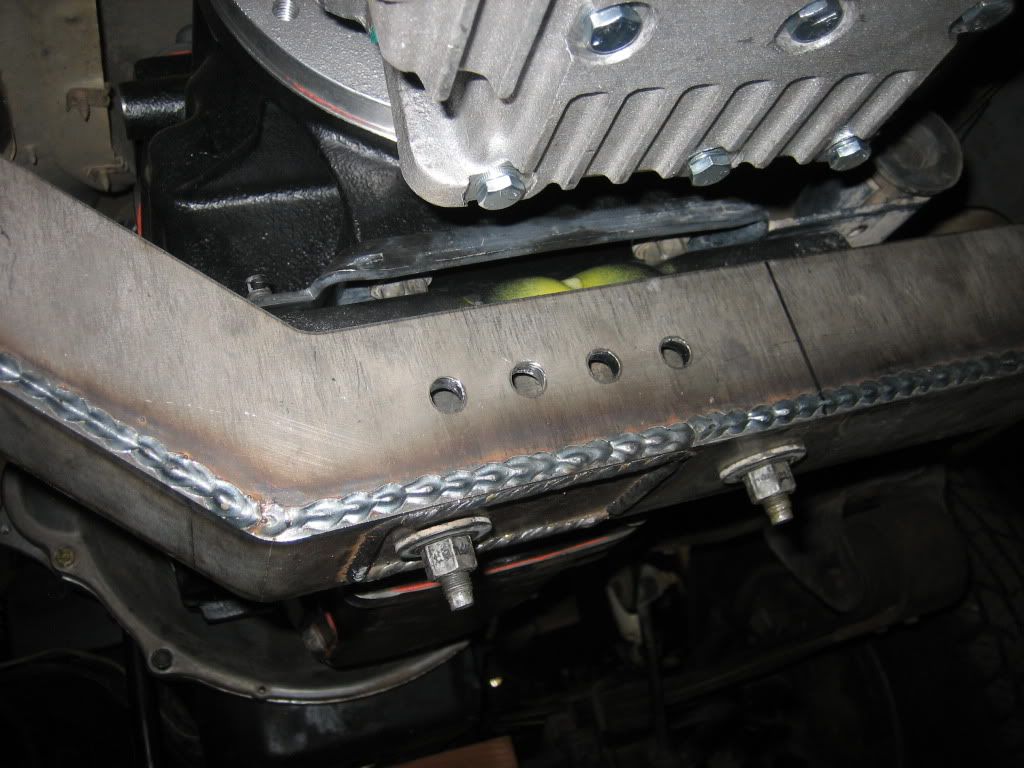
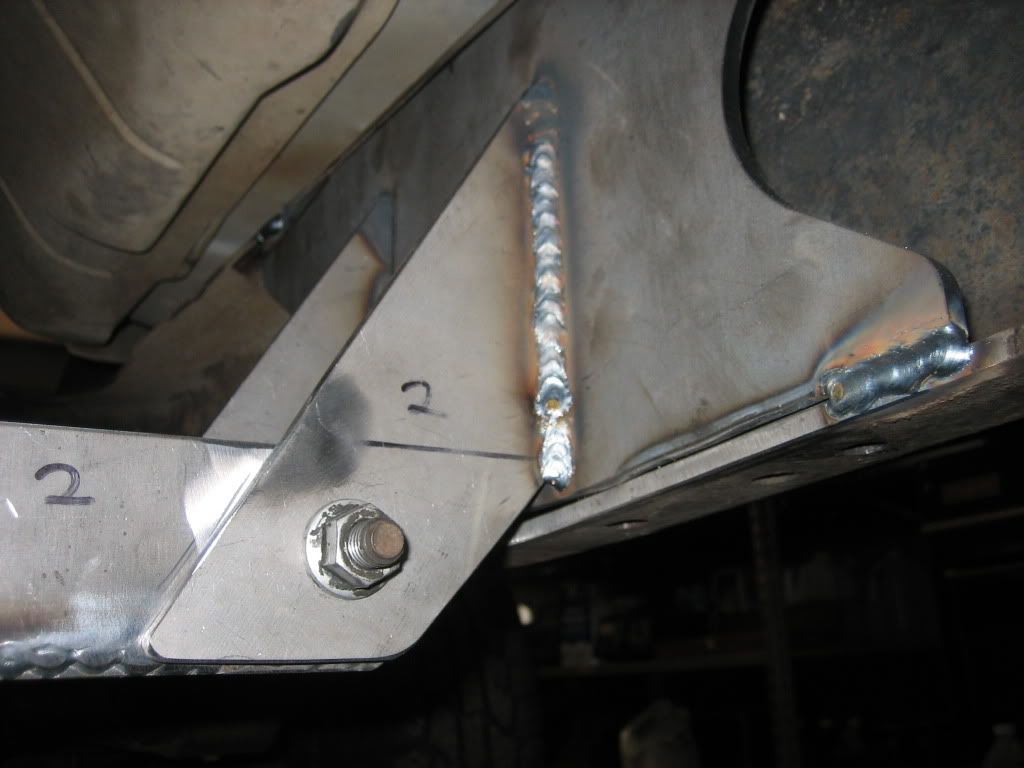
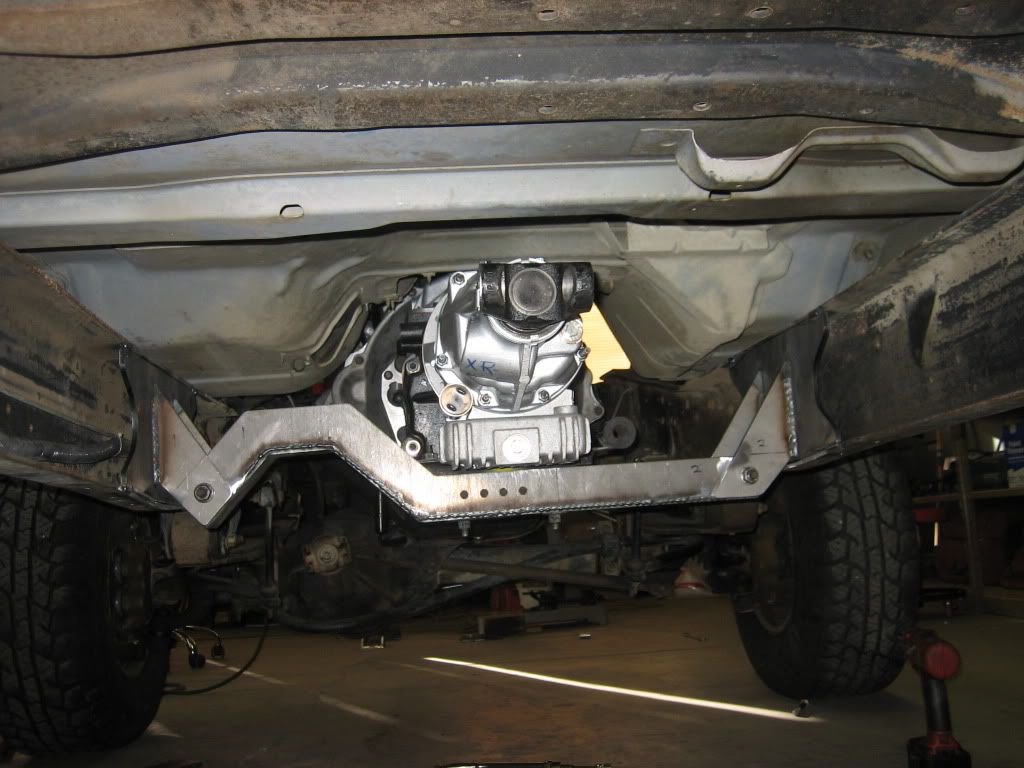
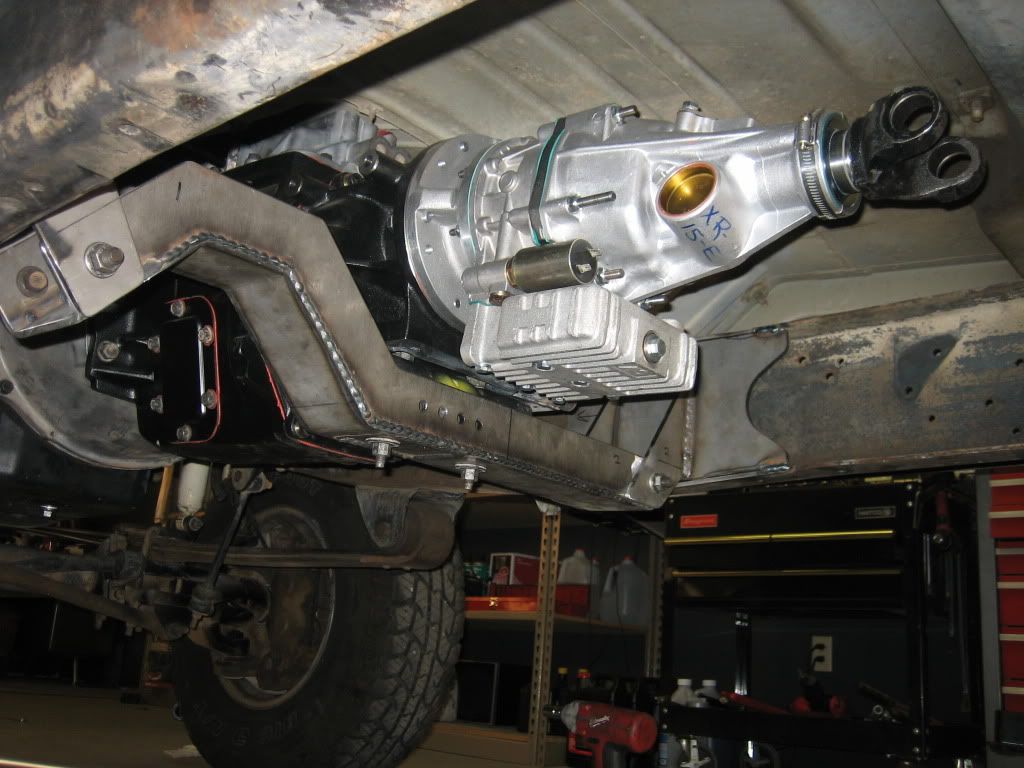
Trans looks like it was meant to fit in there!
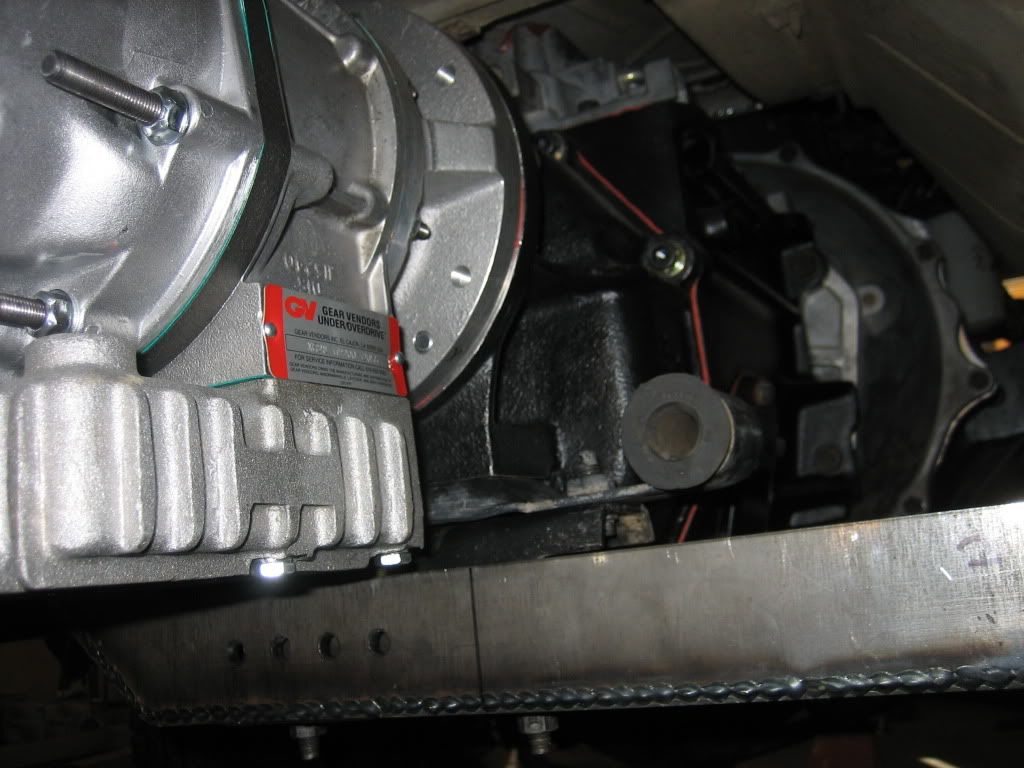
Time to mount up the divorced 205, I will be taking everything back out to finish welding and rebuild the 205. Also that pesky oil nozzle keeps haunting me...
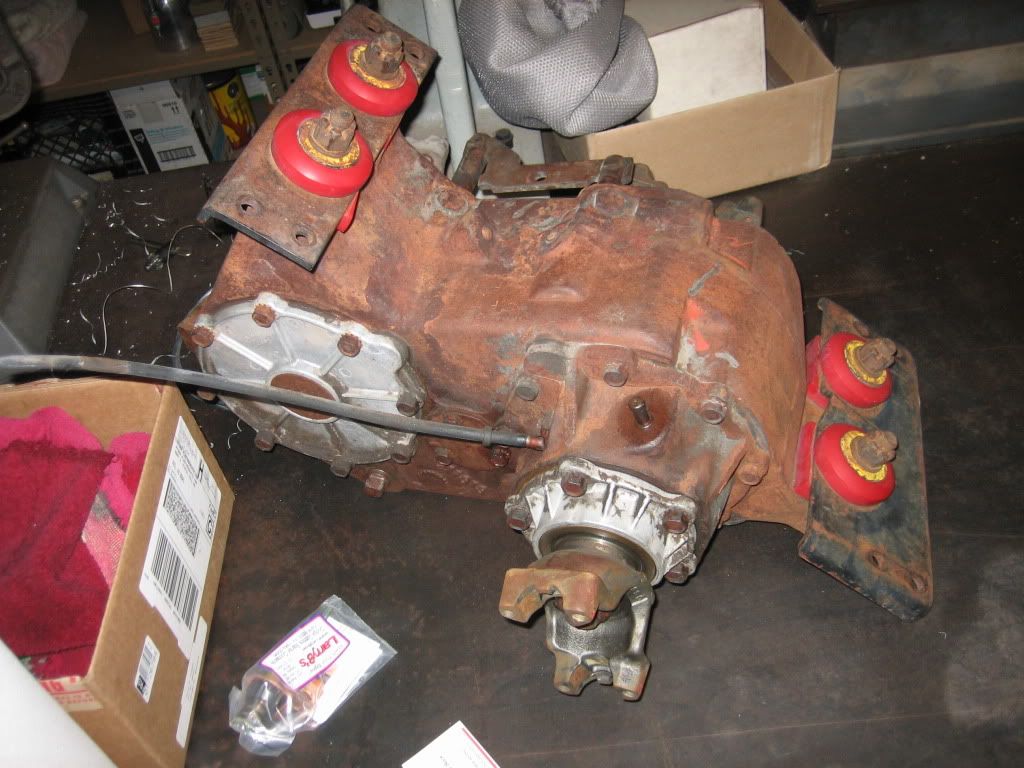
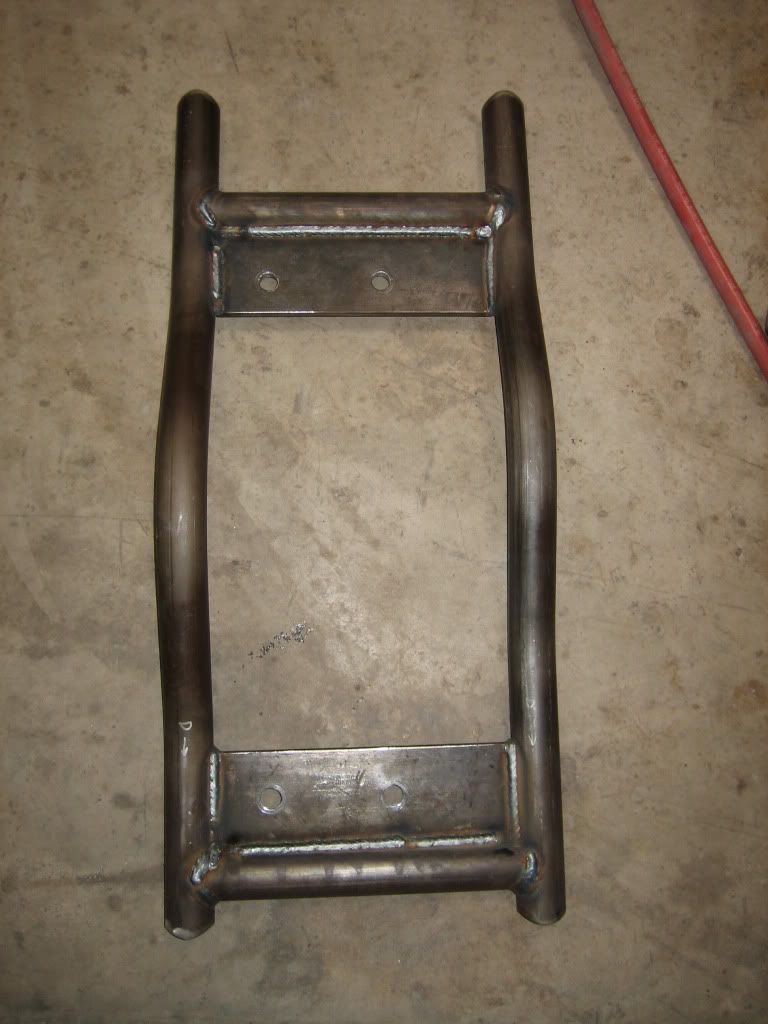
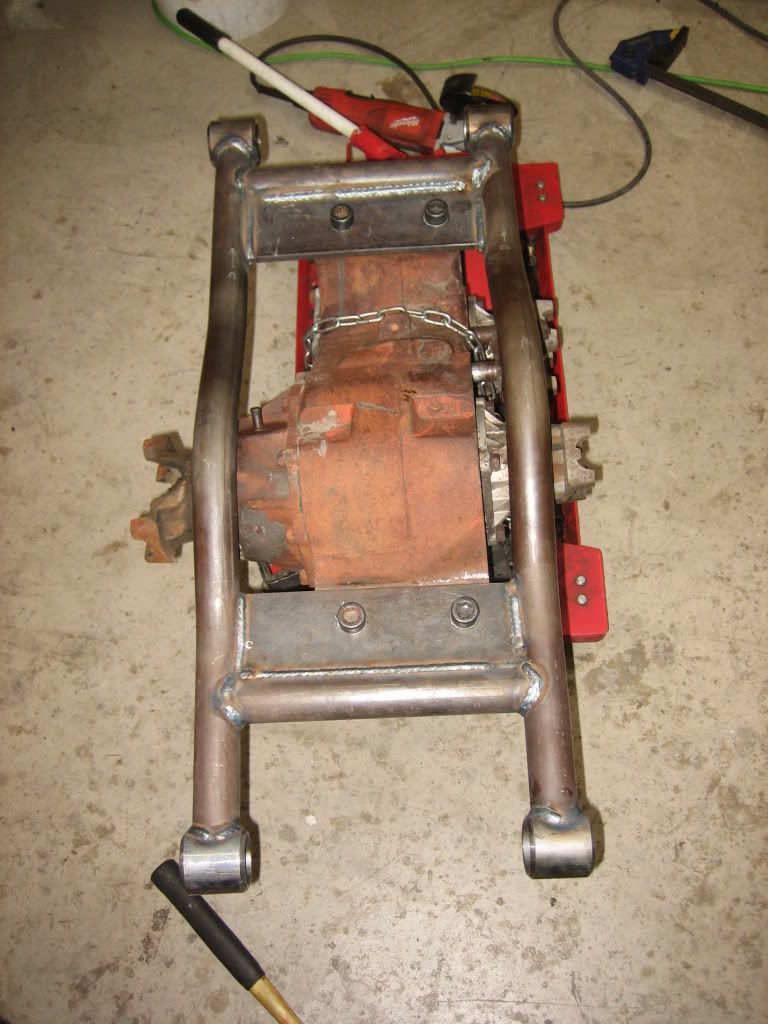
Laser cut frame plates, beautiful stuff.
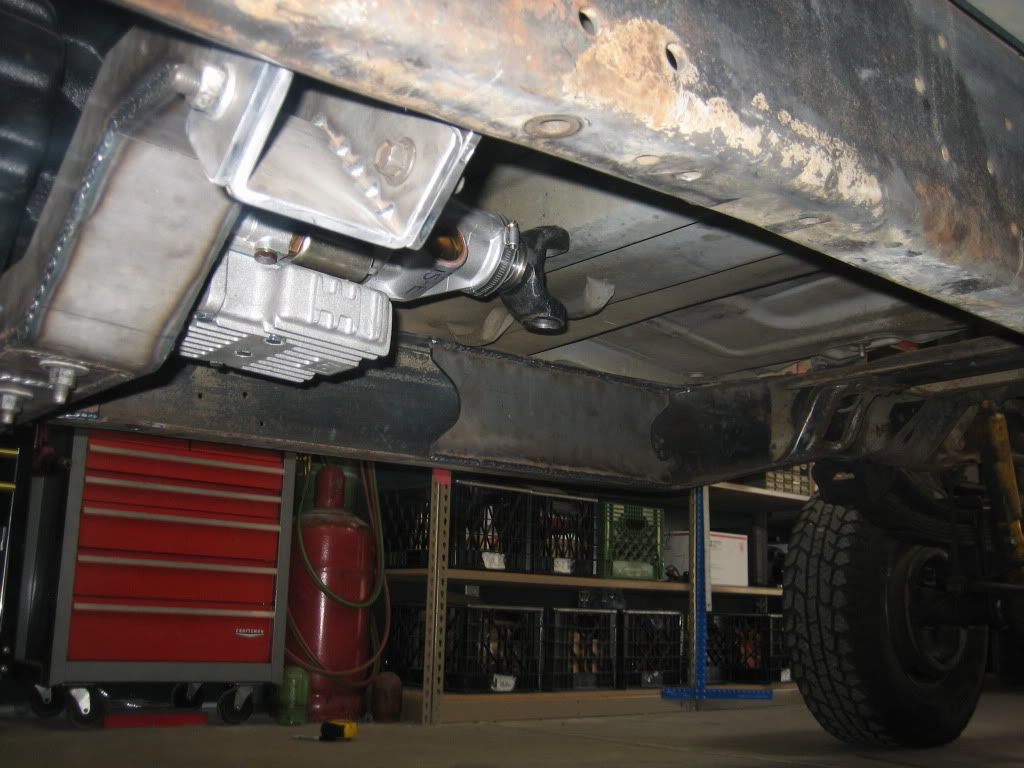
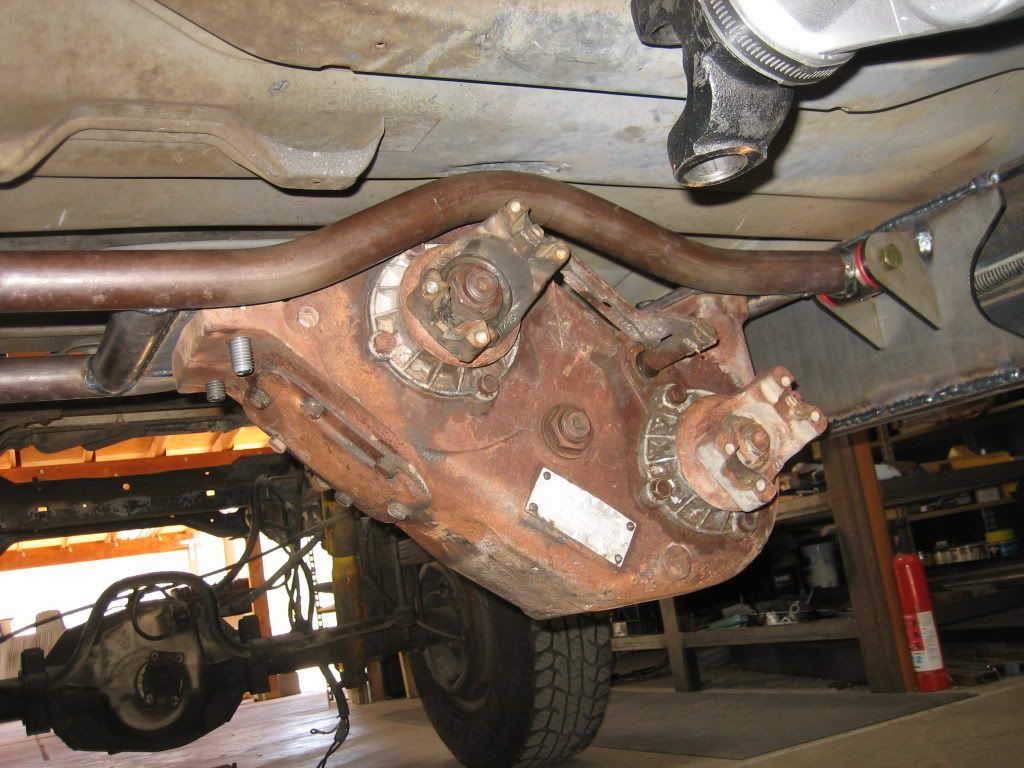
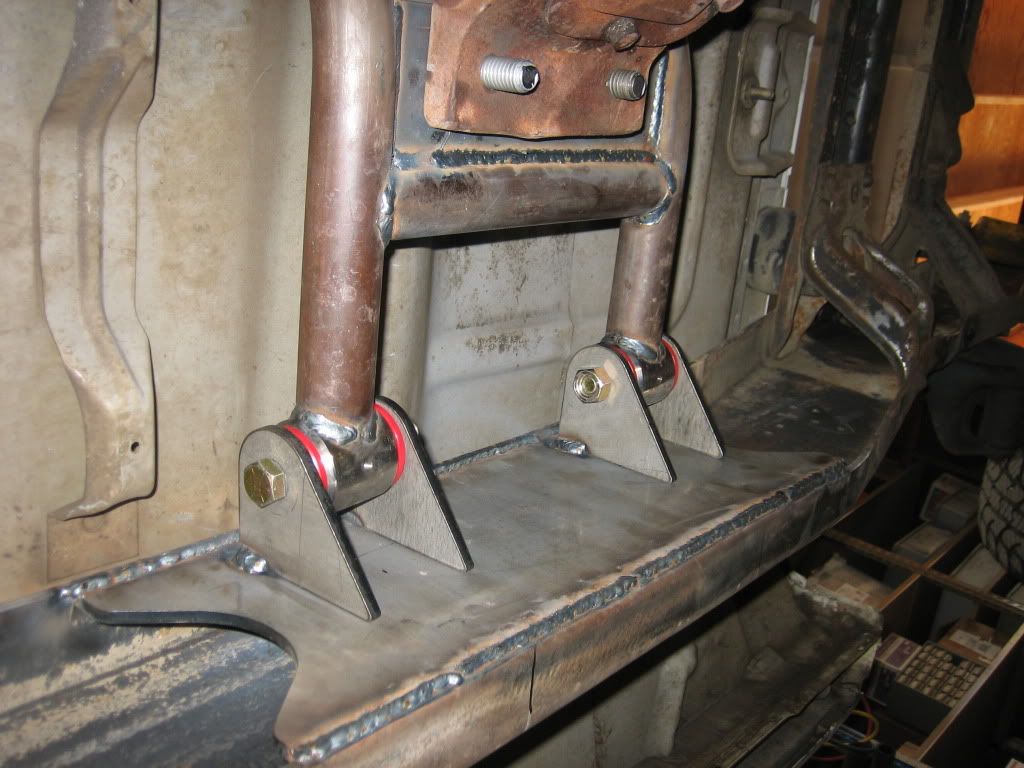
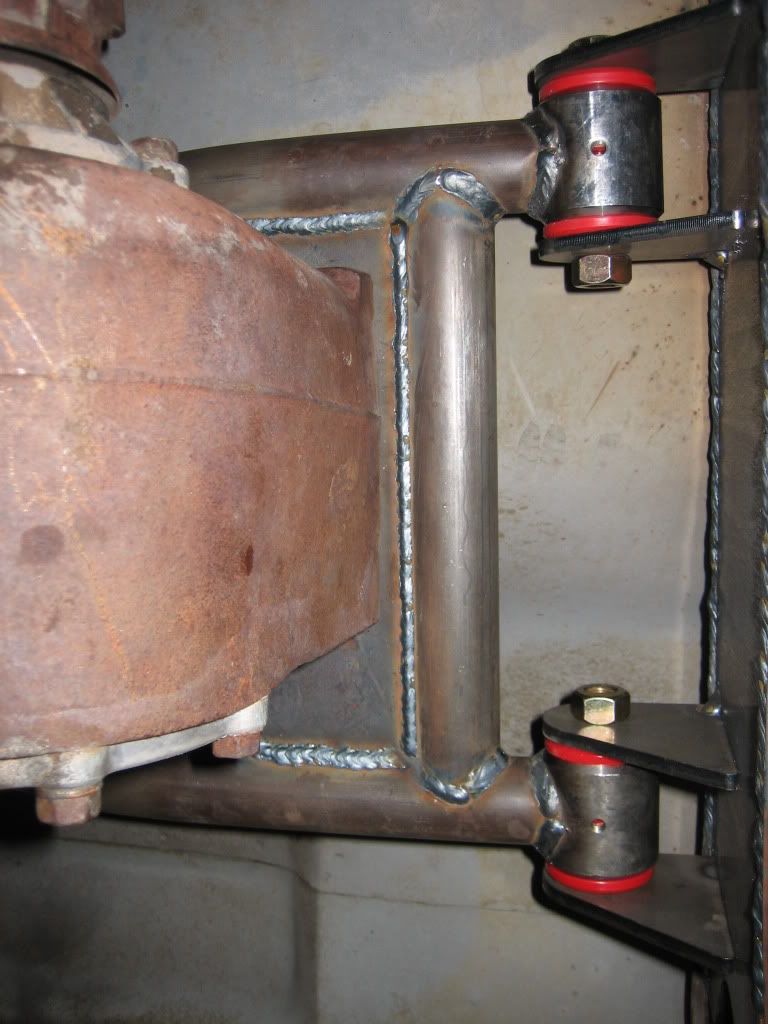
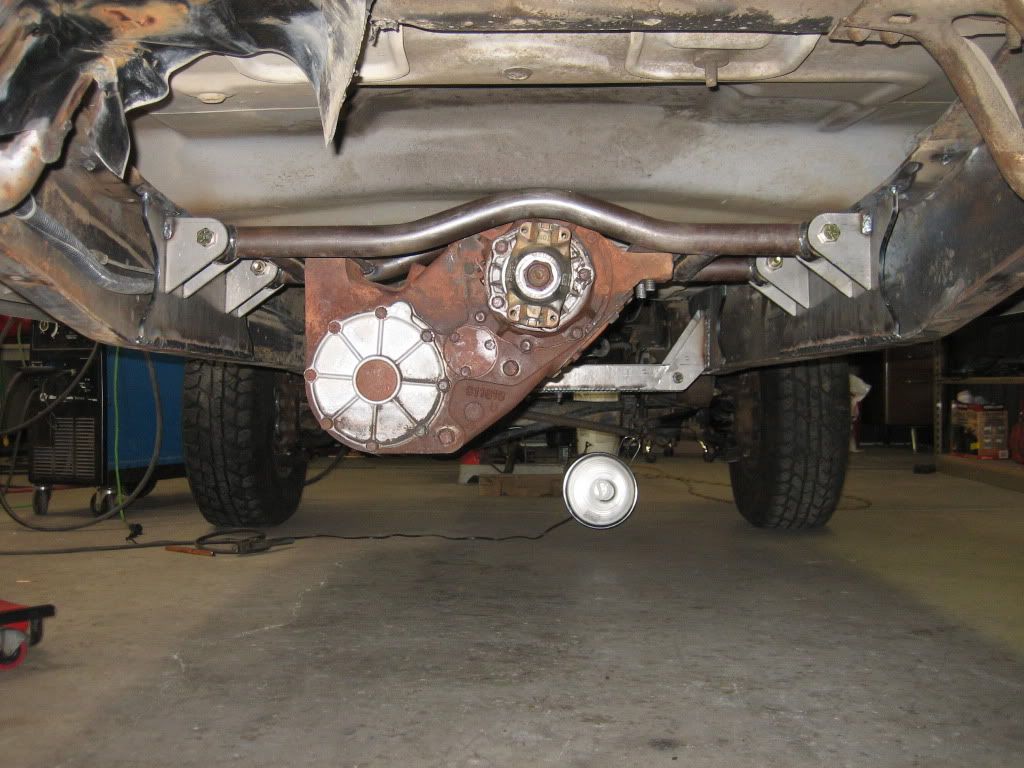
Pilot shaft will be ~8.5" long! Rear driveshaft 45", front 62. haha.
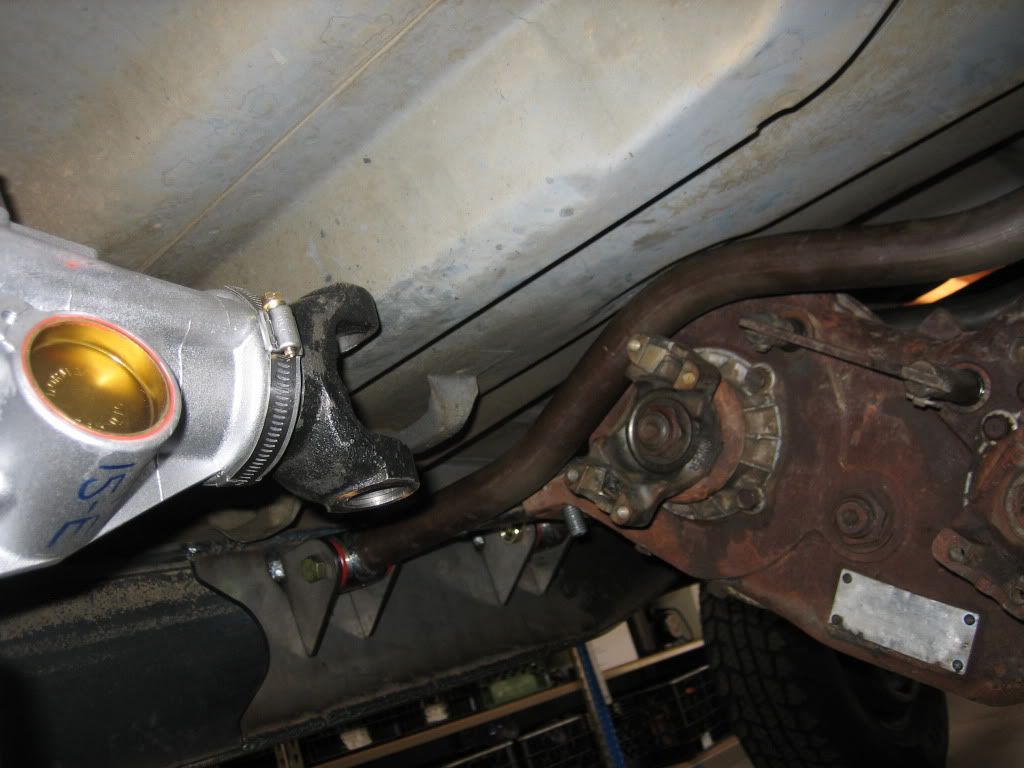
Strange place for a T-case.
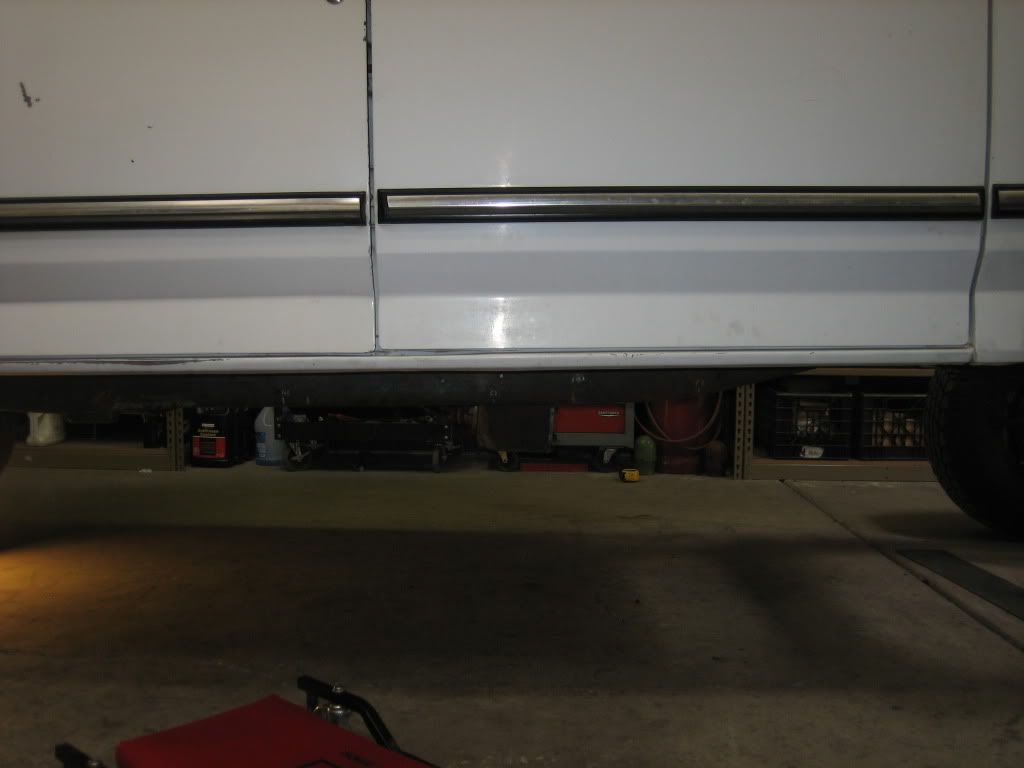
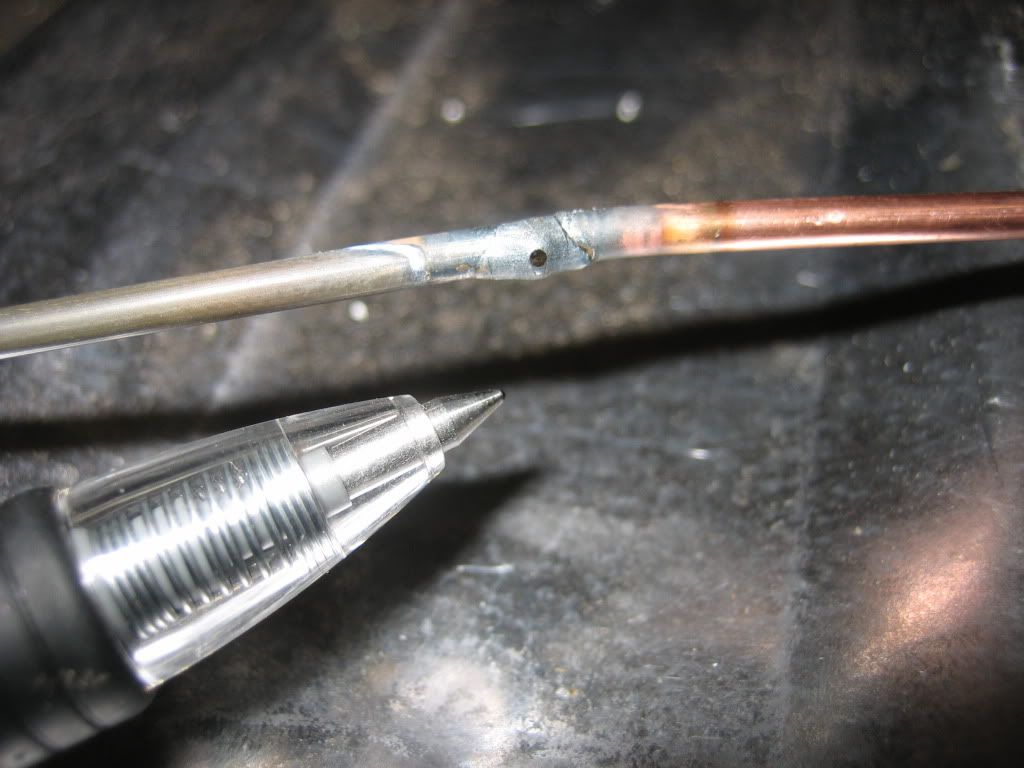
I had to ditch the front tank, so I got the spectra FD26 I believe, the 38 gallon one for the rear that allows the spare tire to be used. I had to make a new pickup, return and modify the sending unit quite a bit.
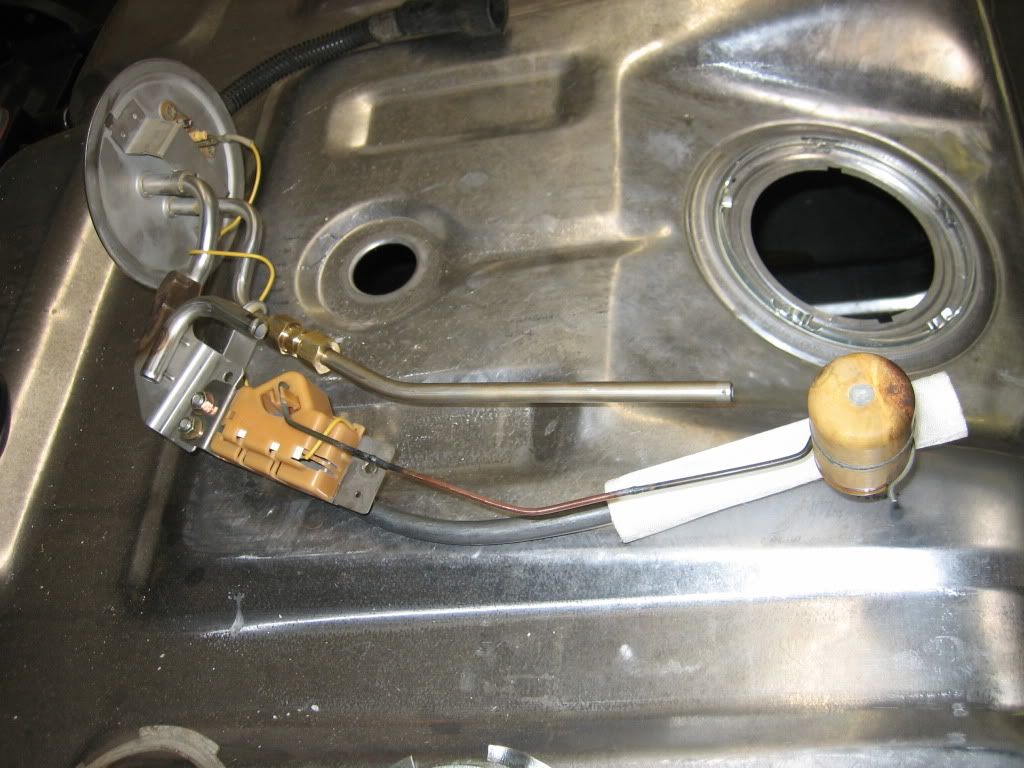
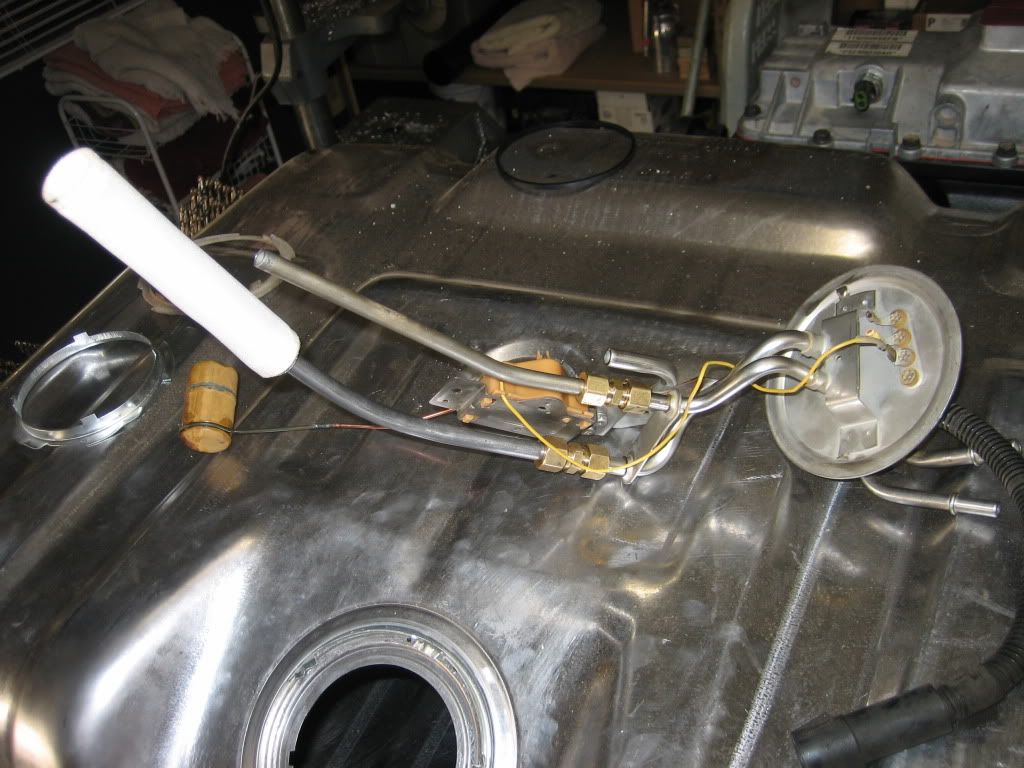
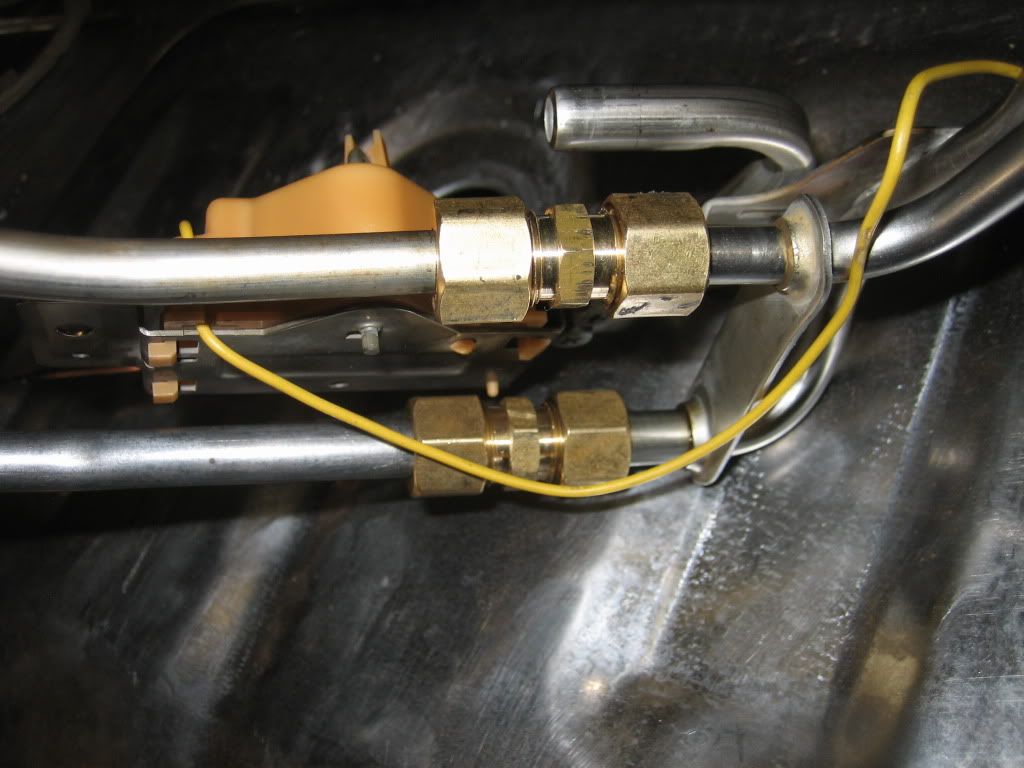
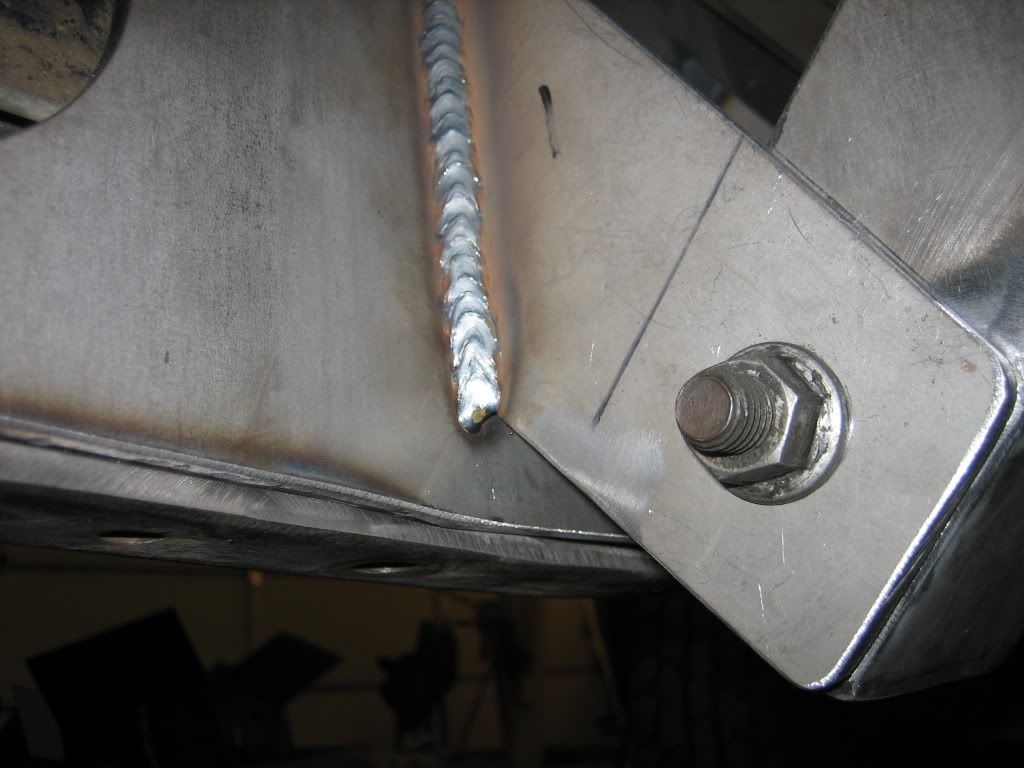
Monsterous tig weld, haha
Turbo flipped, waiting on a spacer and a rebuild kit. Going to rebuild everything I can afford to do, trying to make this a low maintenance truck...
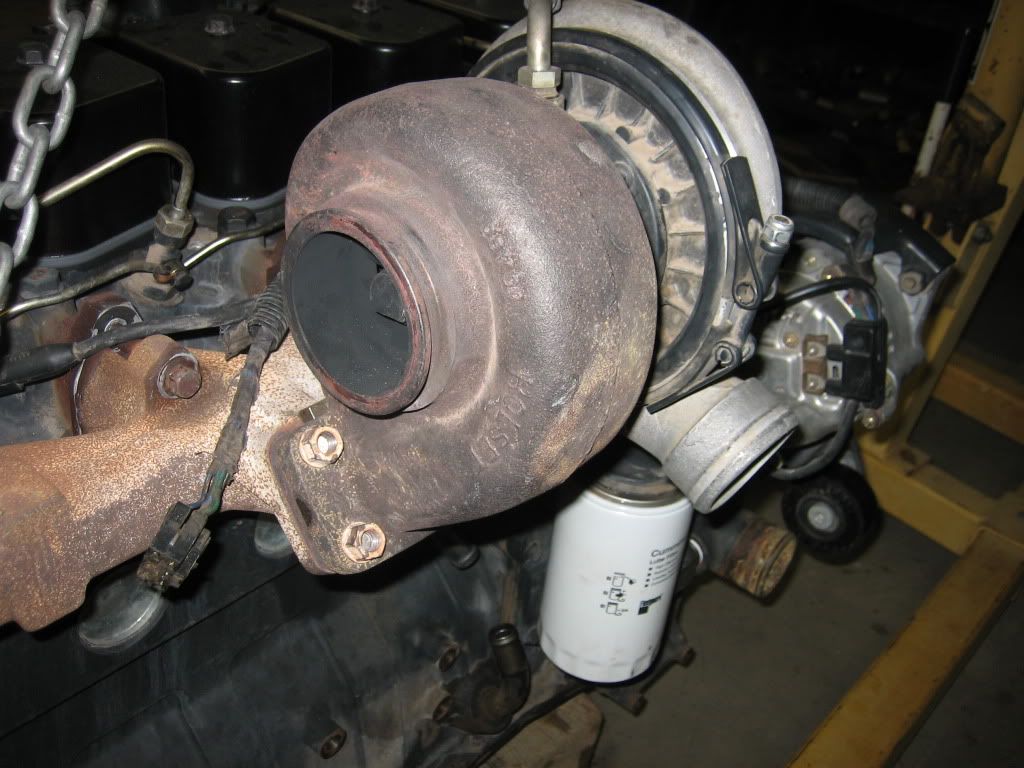
I was able to just heat up and bend/twist the drain pipe a few times to get it so it workes with the flipped turbo. I have some softwall oil hose on the way to connect the 2...
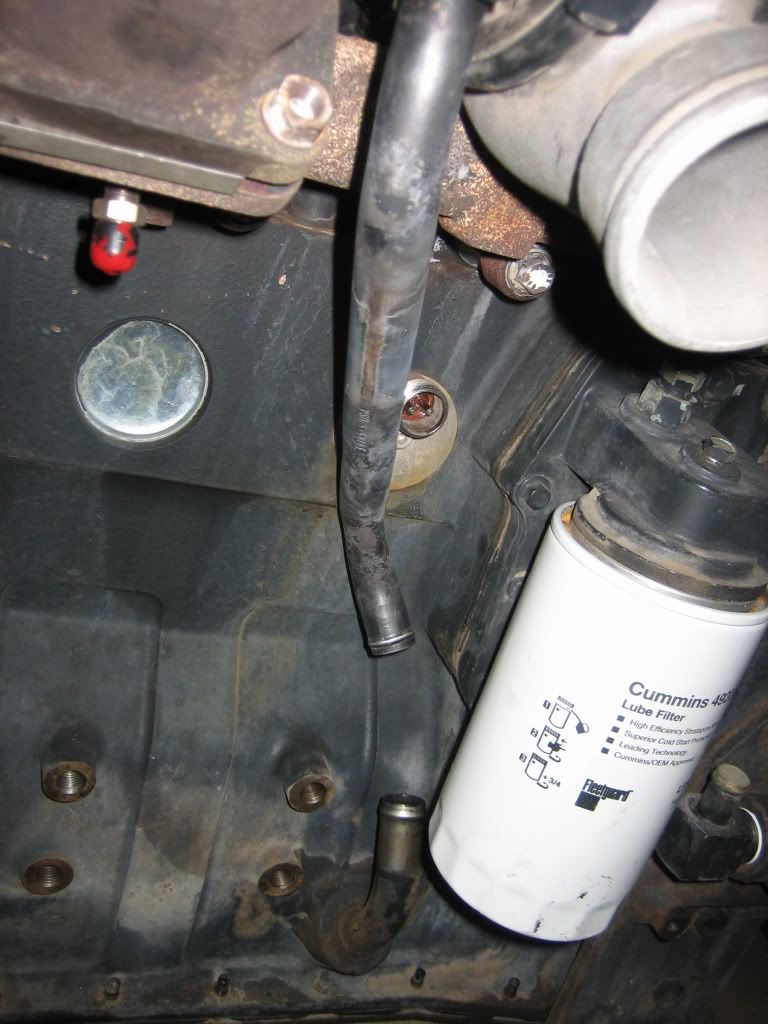
I pulled the dodge engine last friday (10 days ago), progress seems to be happening quickly! I have to get this thing out of my shop because I have more landcruisers on the way, they will slow progress down substantially. One is getting a Mercedes 6 cylinder turbo diesel, the other already has a brazillian 4 cylinder IHC engine.
The rest are just pics that my fiance or I took over the last couple weeks...
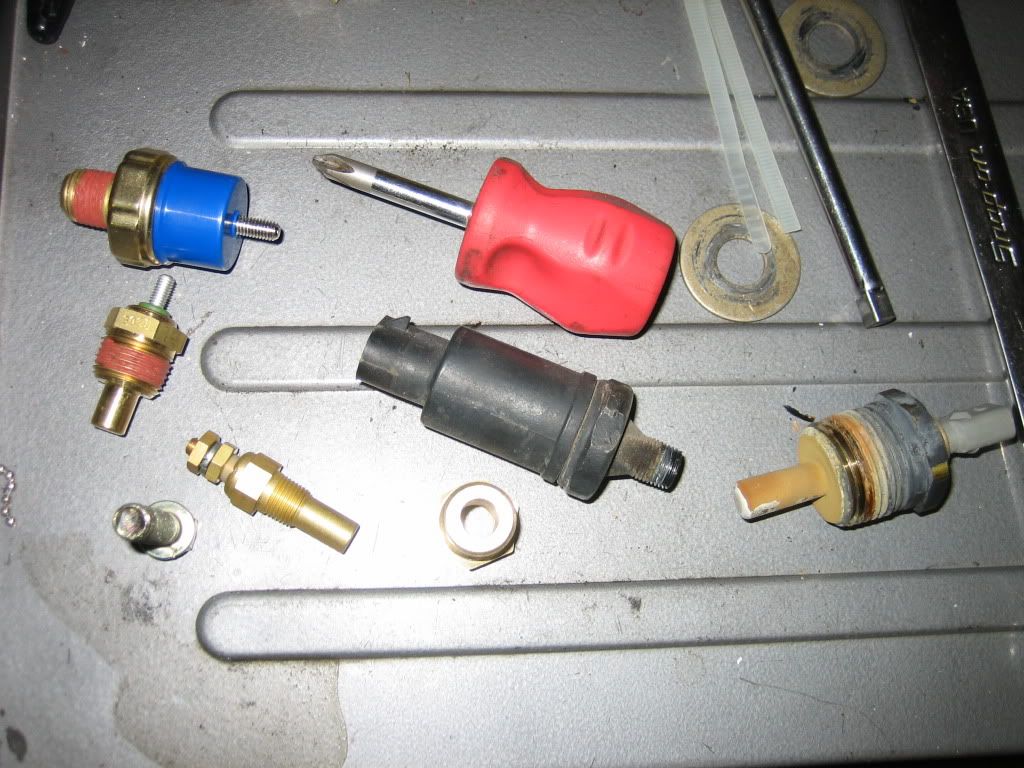
Sensors for the ferd:
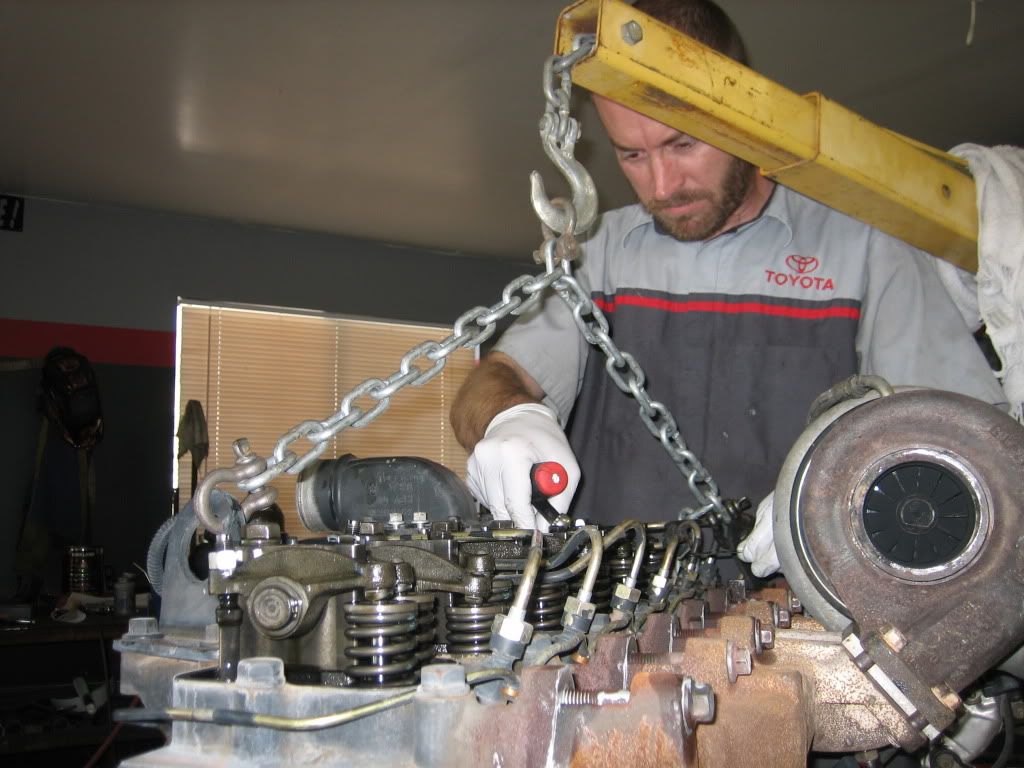
Adjusting valves:
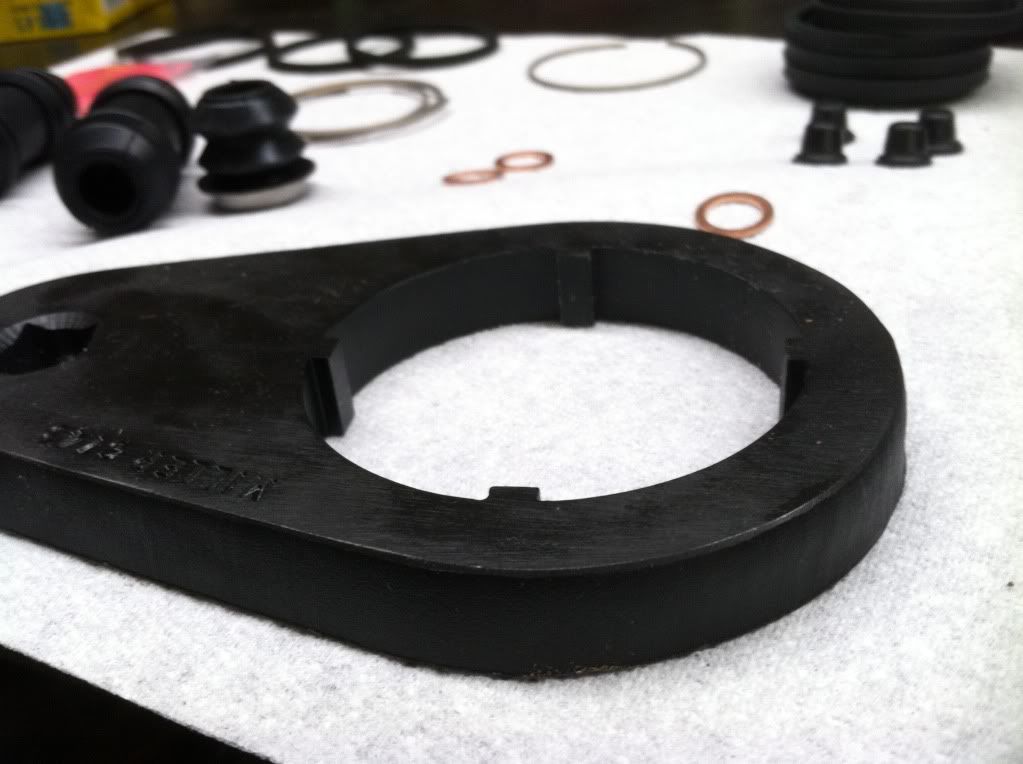
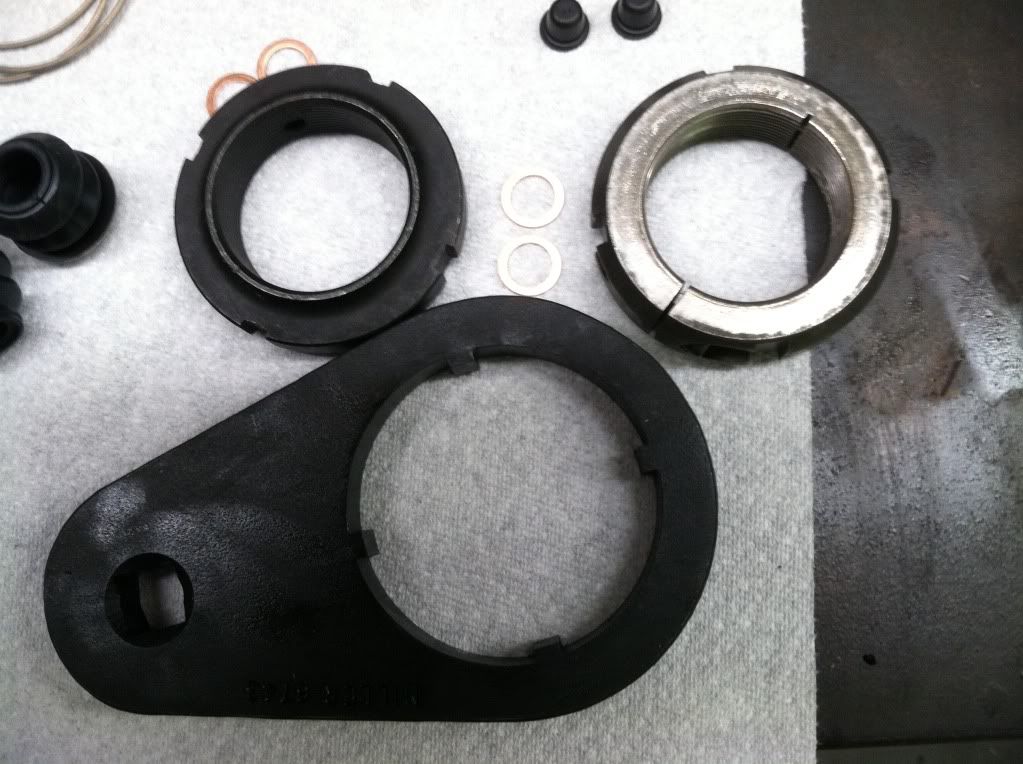
5th gear nut tool that ballistic is going to copy so guys like us don't have to spend $50 on a cheap plasma cut POS.
-Jake
Basically I'm trying to make a truck that me, my fiance and family can tow 6-10K, drive on a regular basis, be very reliable and get great mileage. I'm not looking for a lot of power, the engine has the HTT compressor wheel and housing, 4" exhaust and a custom fuel pin. I'm happy with its performance and I was getting ~21 mpg in the 93 2wd without a lockup converter. I'm hoping the conversion to manual and the gear vendors will allow similar mileage even with the added weight. I also really need 4wd since our move to Vail, I can't tow a trailer up a steep hill on our driveway without full throttle smokey launches. It will be nice to be able to click into 4 low and cruise up the driveway.
Here is the truck as I purchased it, 460 gasser, almost 200K miles, 4.10 gears. I picked it up for $3500 in Phoenix, but it had a gear vendors installed in it. Just clean enough to use on a regular basis.

First order is to cut the frame down. I can't stand how long these trucks are for daily driving. I'm going to shorten the bed and frame 20" to make the bed the same as most chevy short bed.


Welding prep to get full penetration...


Plate welded in opposite direction as initial cut, rosette welded opposite sides of cut, but left sides unwelded.


Out with that nasty old 460 and e40d, the thing got 10 mpg driving back from phoenix, haha


The NV4500 I got a killer deal on, $650 and it came with engine plate, flywheel, shifter, starter and all hardware. Came out of a 2002, but it was 2wd. Although I'm running a divorced t-case, I am putting a gear vendors on the back of the NV4500 so I need the trans as short as possible. The idea is that I can use the gearvendors in low range to combat the weak link of backing up a hill causing the clutch to burn up in the gear vendors. This way in low range the gear vendors has 1/2 the load versus being mounted after the t-case...


Old 2wd shaft and new 4wd shaft with updated split thrust washer to fix the 5th gear problem... Permanently I hope...

Fretting of old 5th gear trying to work it's way off...

Cast iron tailhousing from standard transmission, I checked bearing for center it was dead on.


Preload set right at .002


Gear vendors disassembled, damn thing has pitted gears in the annulus, going to have to get a rebuilt one... Still way cheaper than buying a new unit.

Gear vendors rebuilt unit installed, I had to drill and tap the adapter myself so the unit would sit flat, wasn't too bad though.

Valair 13" clutch, I hope it lasts for a long time. I'm not going to be very hard on it.

Time to get that Cummins out, poor old dodge, I loved that truck but it just doesn't fit the bill anymore. At least it's heart will go with me many more places.


So I pulled the oil pan off to re-seal it and found a busted plastic piston cooling squirter. Got some billet aluminum ones on the way, but the crank has to come out. Bummer, gonna set me back a week.

Time to start working on the motor mounts. I used ones from a 24 valve on accident- the holes are cast back further on those engines so these are far forward on the 12 valve. It actually ended up working really well, putting the mounts right in the middle of the crossmember. It was a lot more work but I like how they turned out. The p/s pump is really close but it does clear.


Gusseting while trying to stay clear of a/c compressor


Engine and dynamat installed, going to have to come back out to fix oil nozzle but I have to keep moving forward...

Meanwhile finishing up helping a customer restore a 1974 FJ40 TLC. Had the truck down to the frame, powdercoated just about everything steel, rebuilt the entire drivetrain- most all mechanical work I did. I don't do body work though!

Time to mount the transmission. Many many thanks to Ballistic Fabrication - Manufacturers of Precision Offroad Fabrication Supplies for the laser cut parts. The crossmember was for a superduty that I cut up and modified. Great guys, Allen the engineer can do just about anything you want for a reasonable price.


Trans looks like it was meant to fit in there!

Time to mount up the divorced 205, I will be taking everything back out to finish welding and rebuild the 205. Also that pesky oil nozzle keeps haunting me...


Laser cut frame plates, beautiful stuff.


Pilot shaft will be ~8.5" long! Rear driveshaft 45", front 62. haha.

Strange place for a T-case.

I had to ditch the front tank, so I got the spectra FD26 I believe, the 38 gallon one for the rear that allows the spare tire to be used. I had to make a new pickup, return and modify the sending unit quite a bit.


Monsterous tig weld, haha

Turbo flipped, waiting on a spacer and a rebuild kit. Going to rebuild everything I can afford to do, trying to make this a low maintenance truck...

I was able to just heat up and bend/twist the drain pipe a few times to get it so it workes with the flipped turbo. I have some softwall oil hose on the way to connect the 2...

I pulled the dodge engine last friday (10 days ago), progress seems to be happening quickly! I have to get this thing out of my shop because I have more landcruisers on the way, they will slow progress down substantially. One is getting a Mercedes 6 cylinder turbo diesel, the other already has a brazillian 4 cylinder IHC engine.
The rest are just pics that my fiance or I took over the last couple weeks...
Sensors for the ferd:

Adjusting valves:

5th gear nut tool that ballistic is going to copy so guys like us don't have to spend $50 on a cheap plasma cut POS.

-Jake
#6
I made some more progress, I had a couple customers cars come in that slowed things down but still moving forward. Motivation is lacking at times, I need a damn vacation from wrenching...
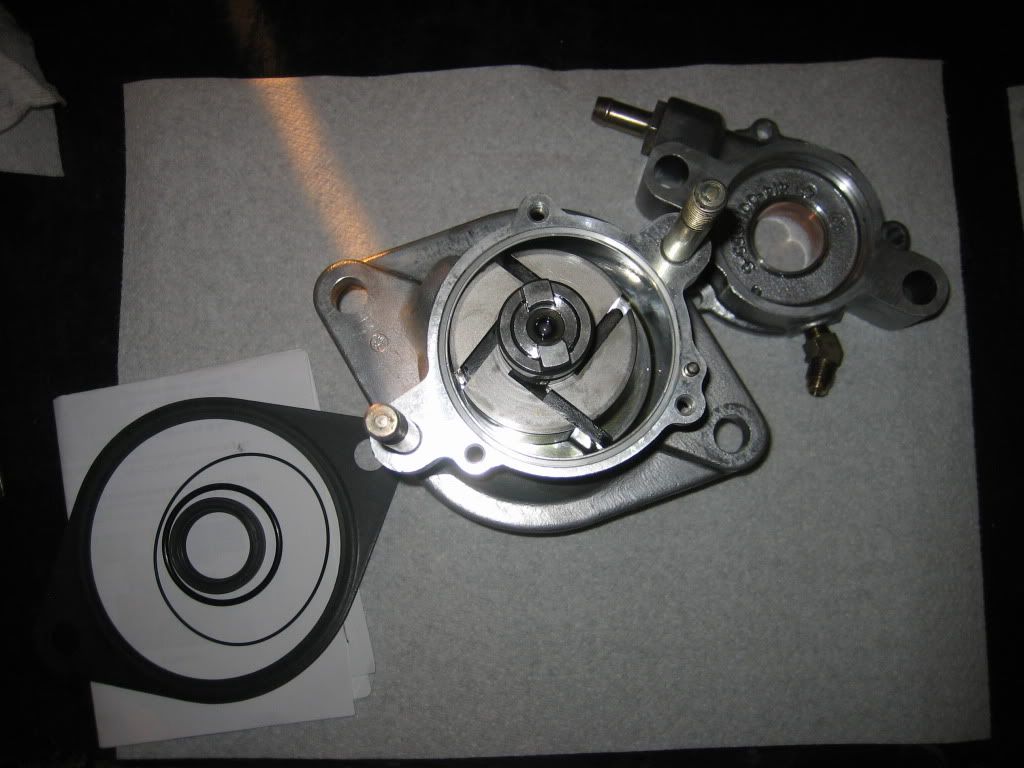
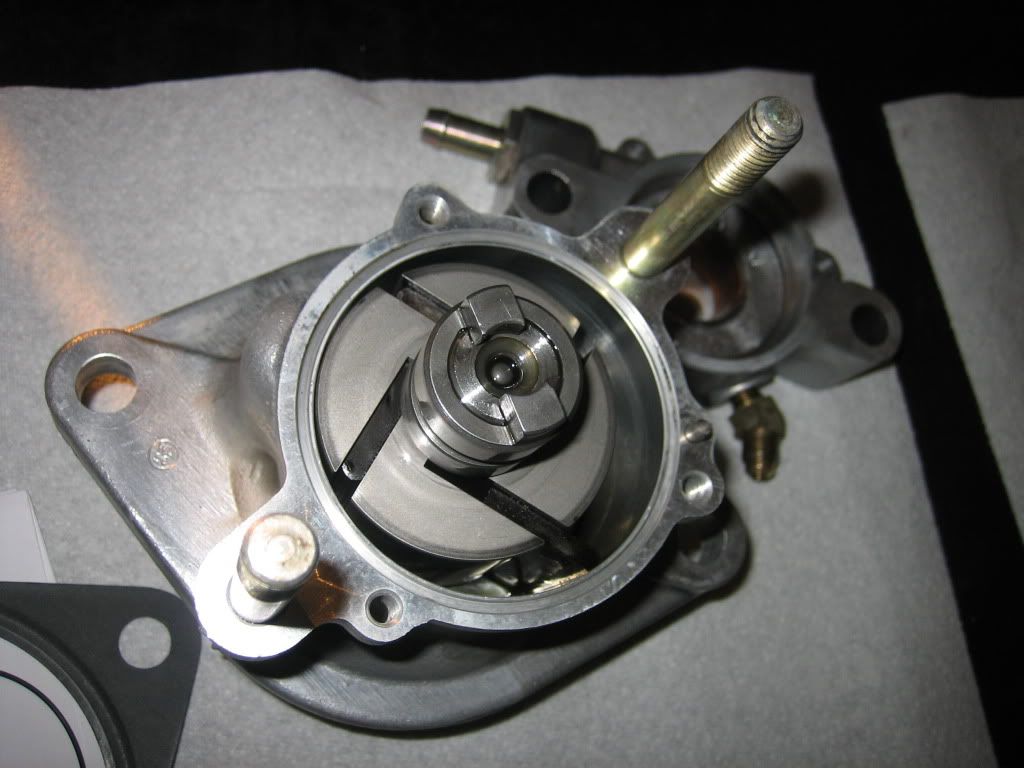
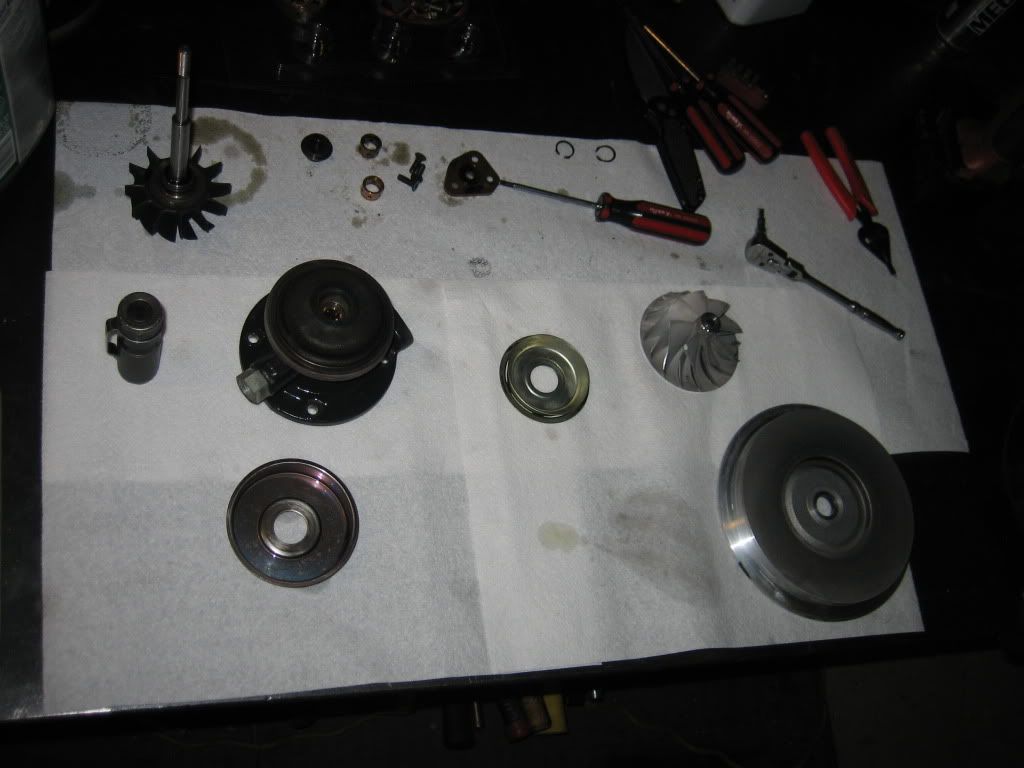
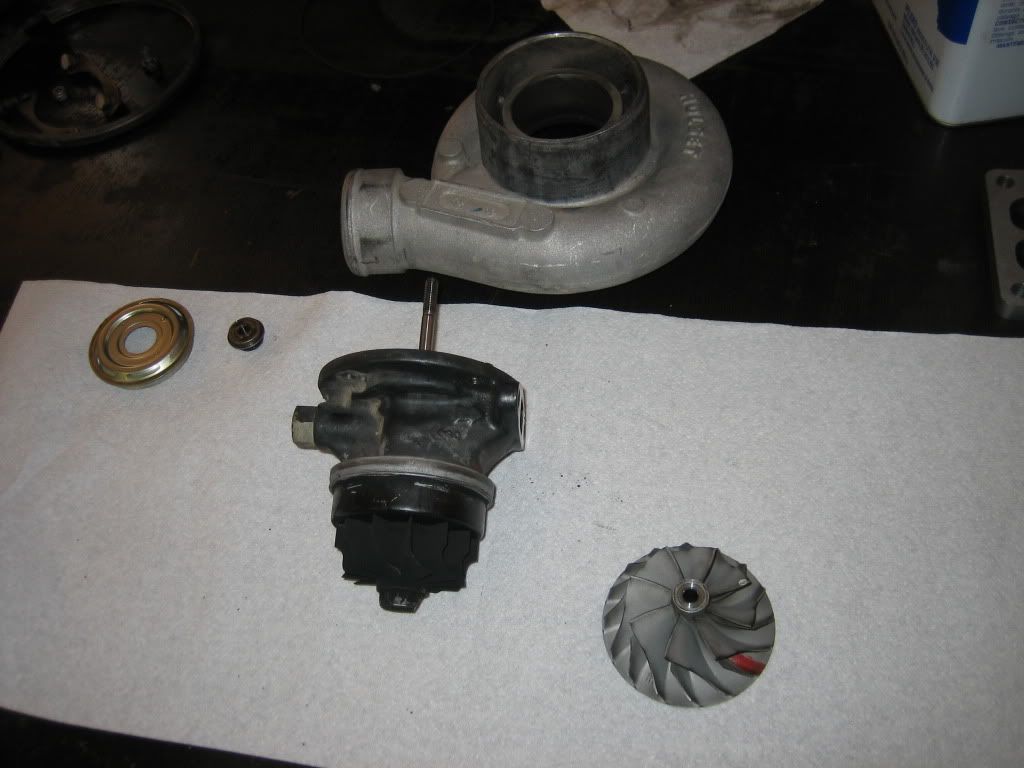
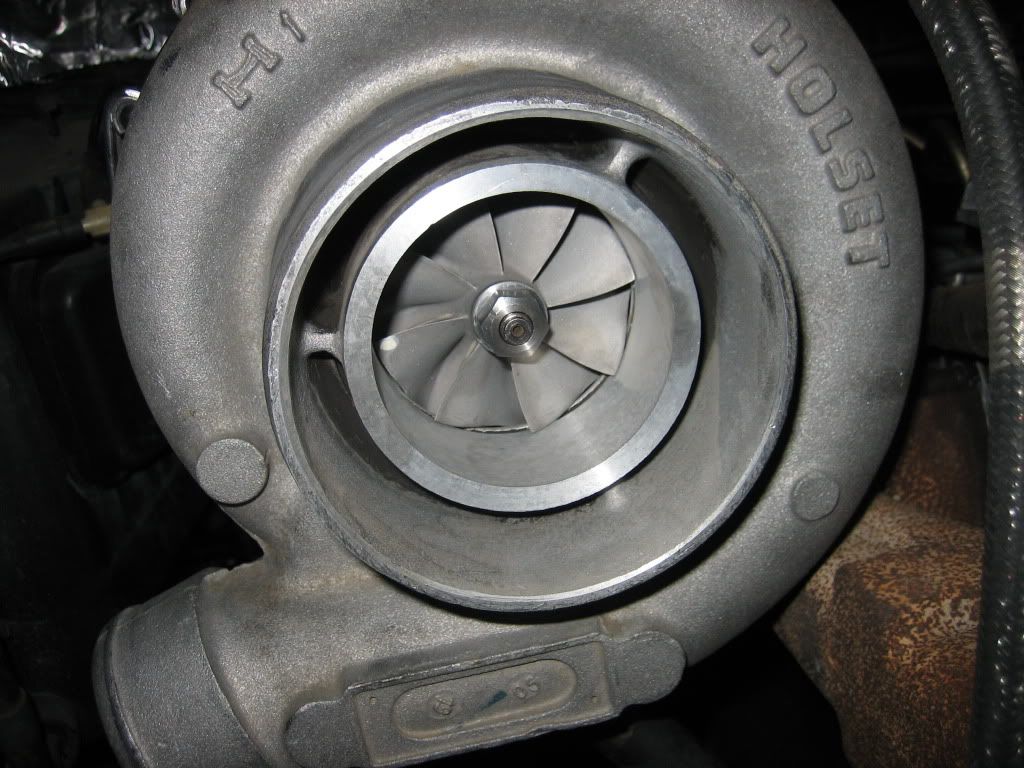
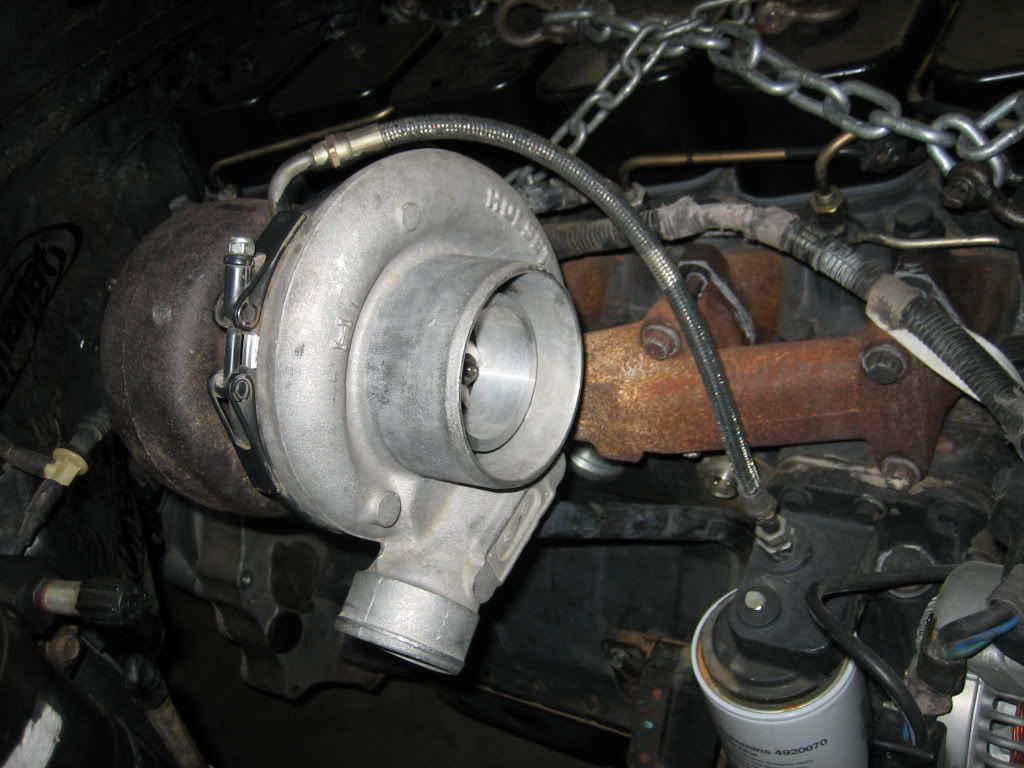
I rebuilt the starter, vacuum pump, turbo and re-sealed the p/s pump. I sealed what I could on the p/s pump but a special puller is needed to remove the drive dog/hub and I don't see anyone that sells it. I think most just buy a rebuilt pump but I'd rather do it myself. I have trust issues, haha
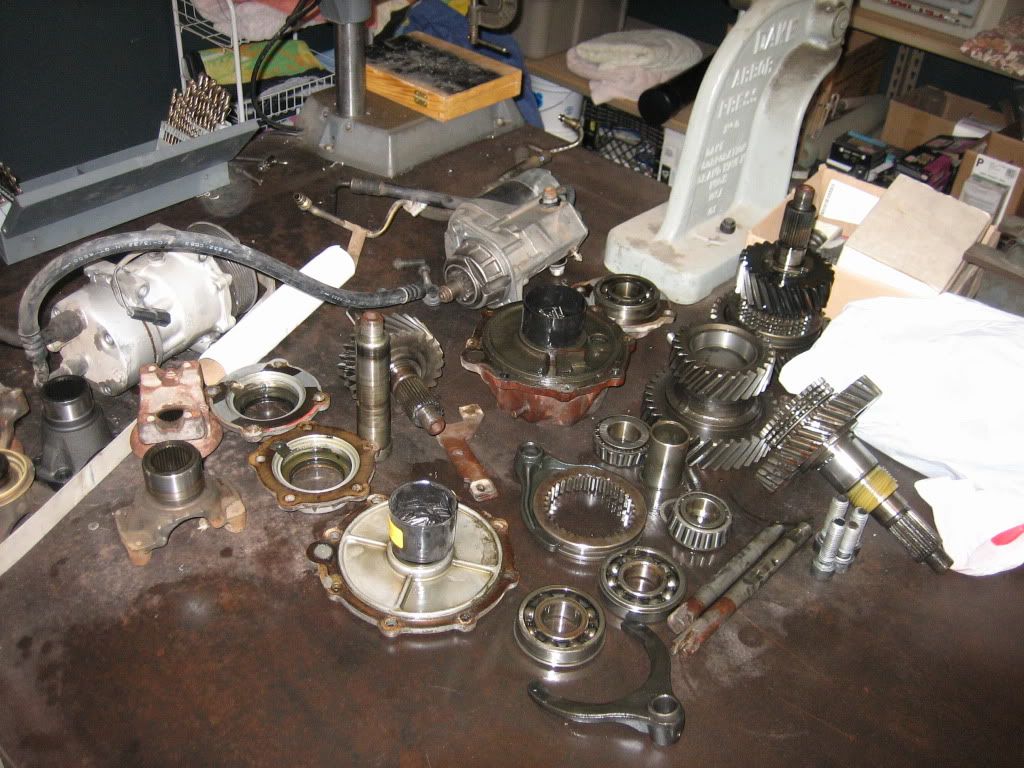
Tore the NP205 down and ordered the bearings and seals needed to rebuild that.
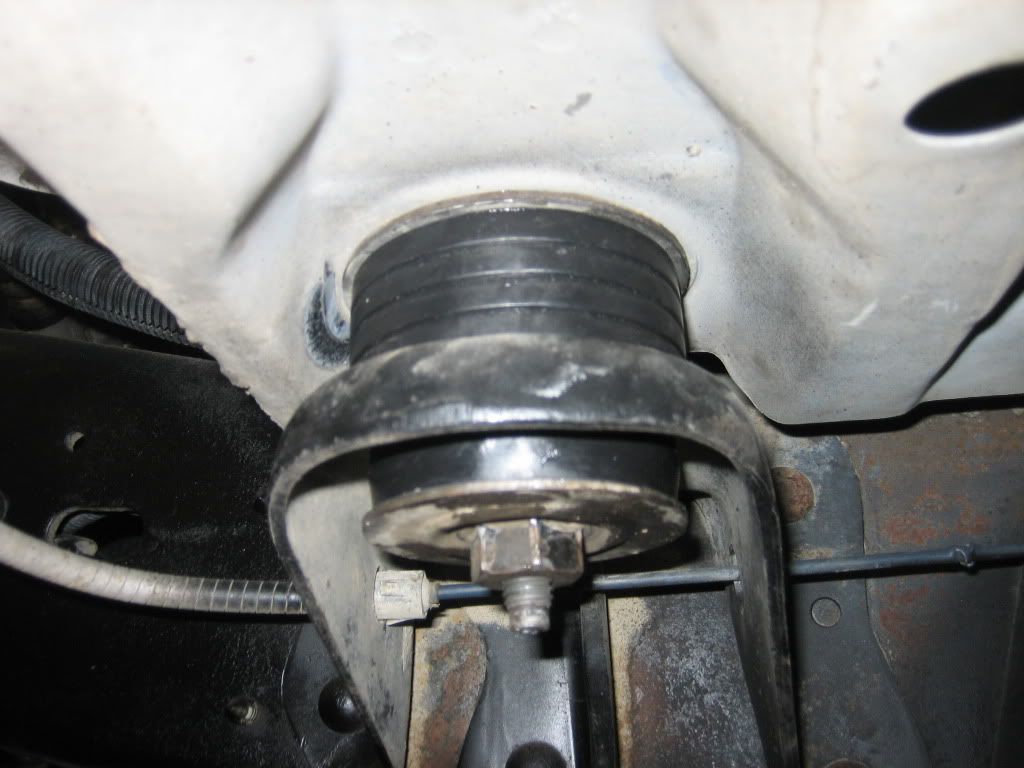
Replaced the body mounts with Poly ones, I hope I don't regret it... The OEM ones were really blow out and new Ford ones were ~$500, at cost + 10%! These were $50 so I'll try it. If you do this, make a puller out of some 3" exhaust tube, I don't know how else you could do it.. Lots online about how to, even the poly instructions had a note on it...
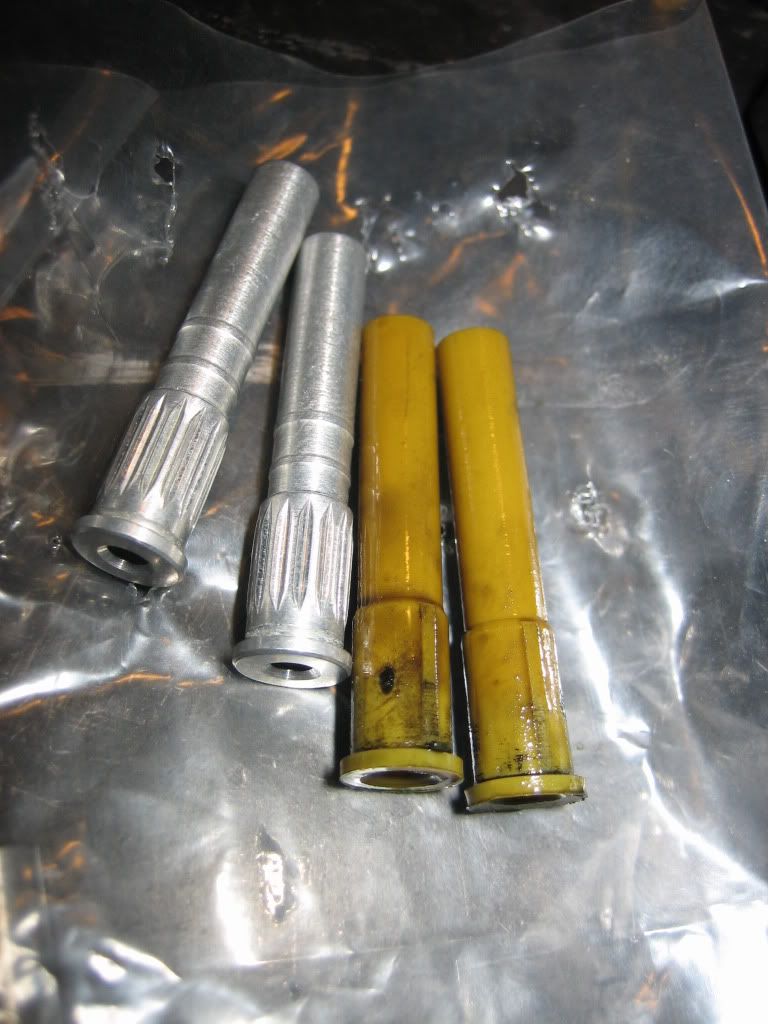
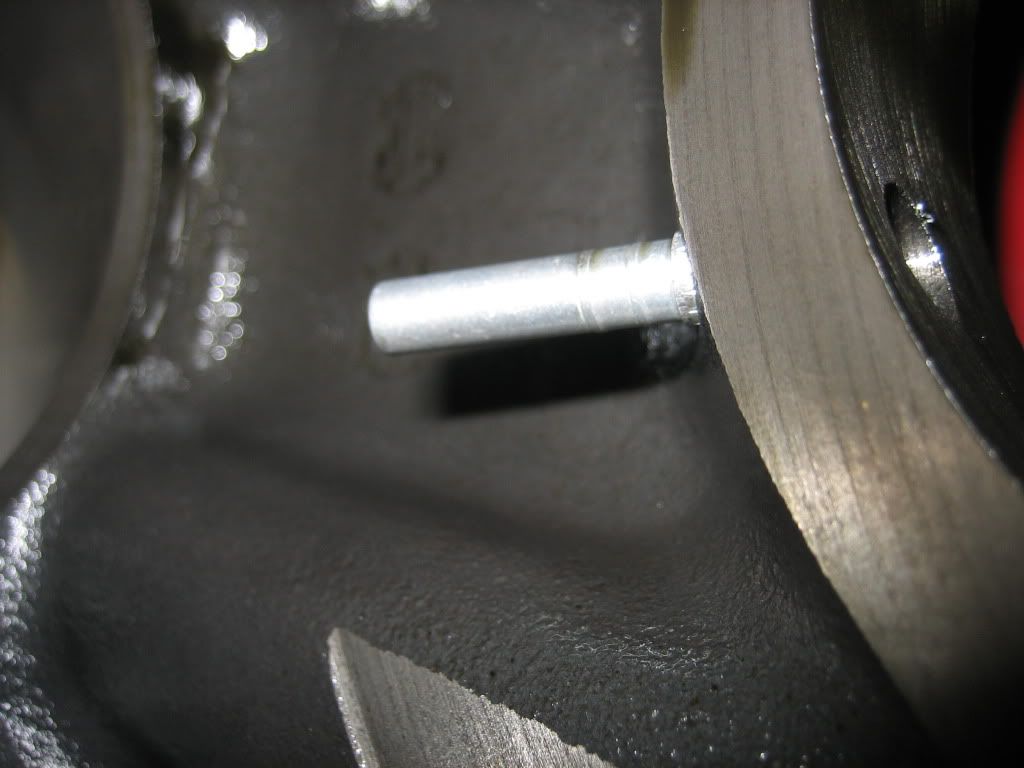
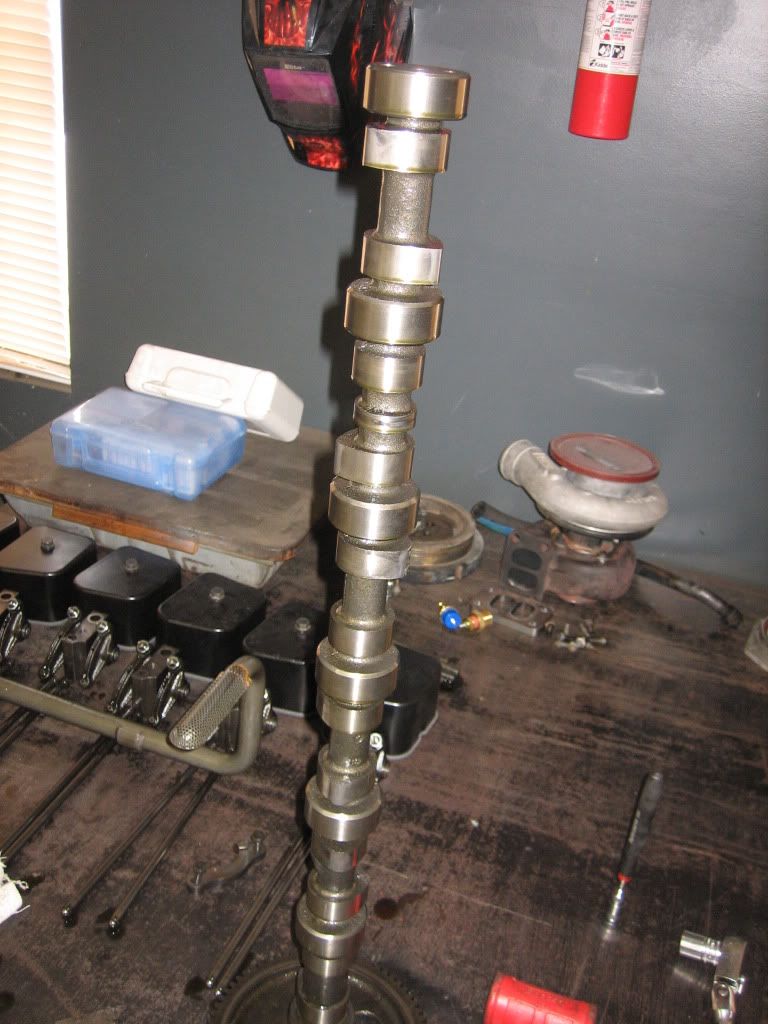
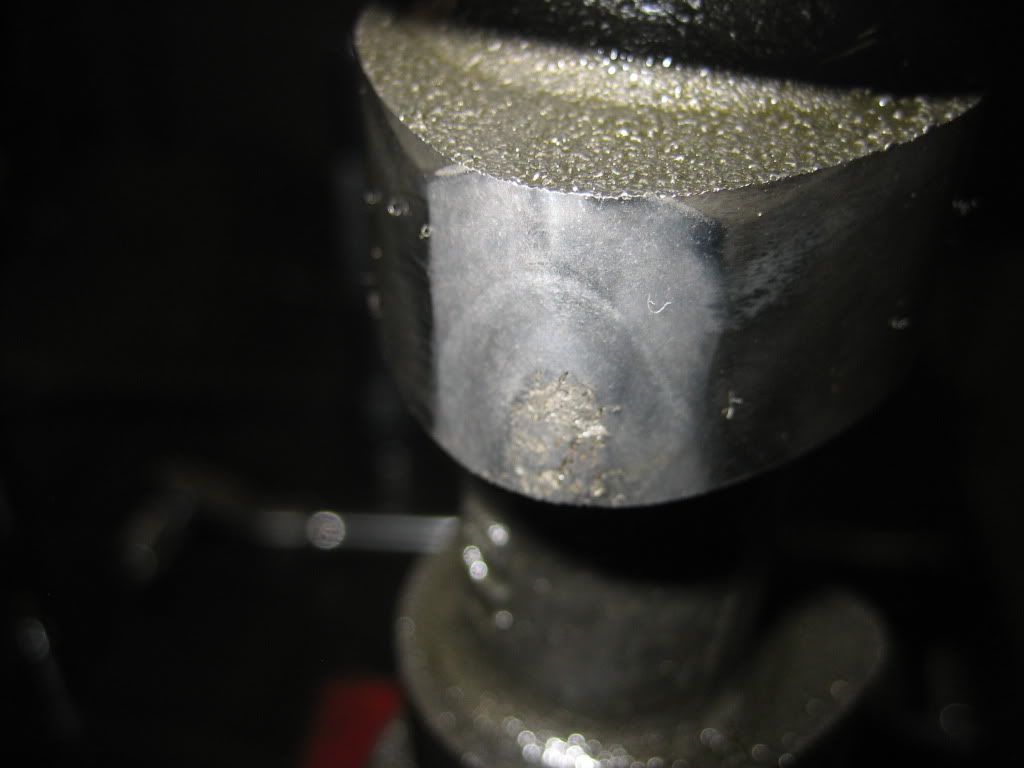
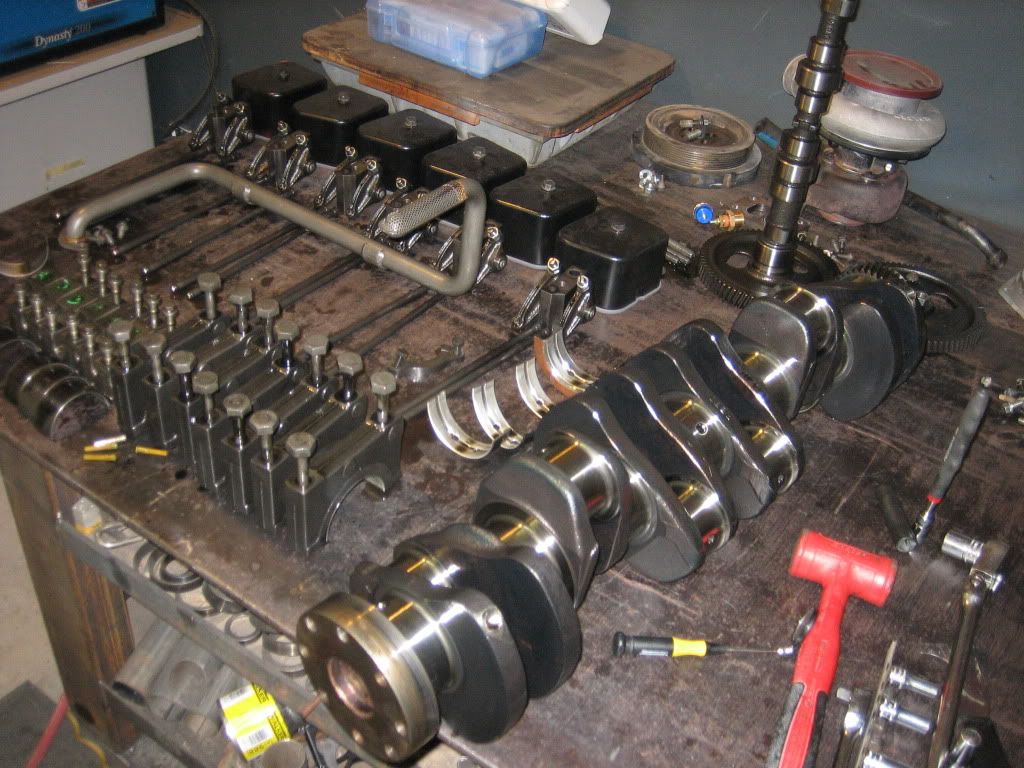
I also tore the engine down to replace the plastic oil nozzles with the billet aluminum ones, then found that I need a camshaft The rest of the engine looks really good but I'm going to put new bearings in since the old ones are out.
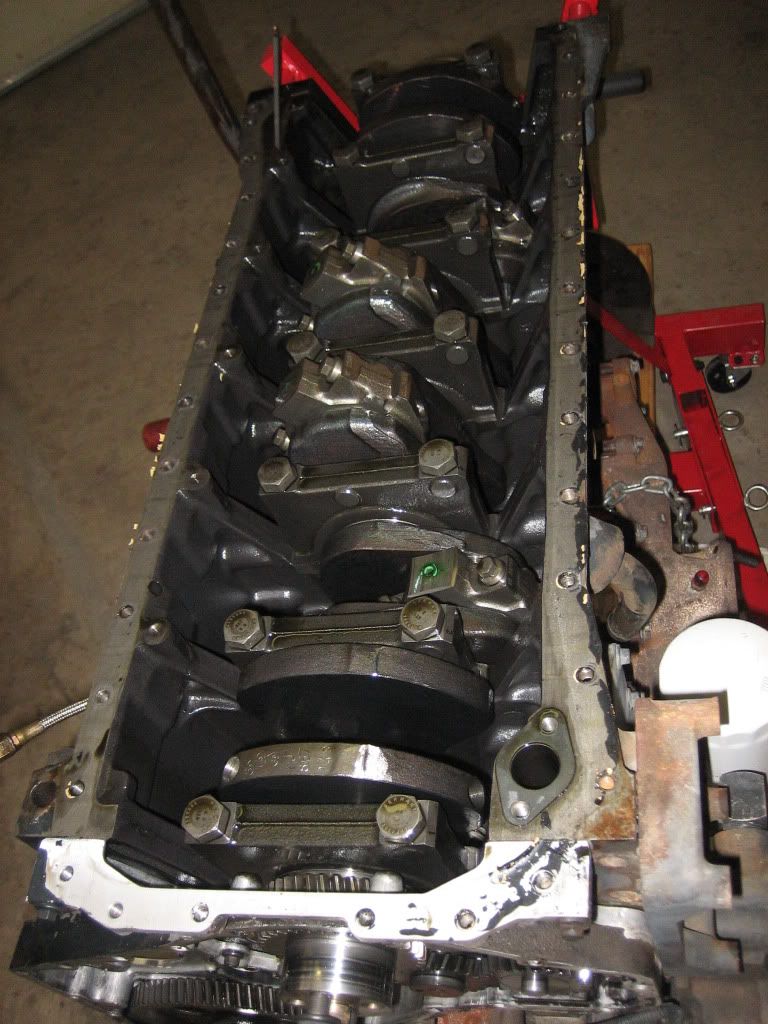
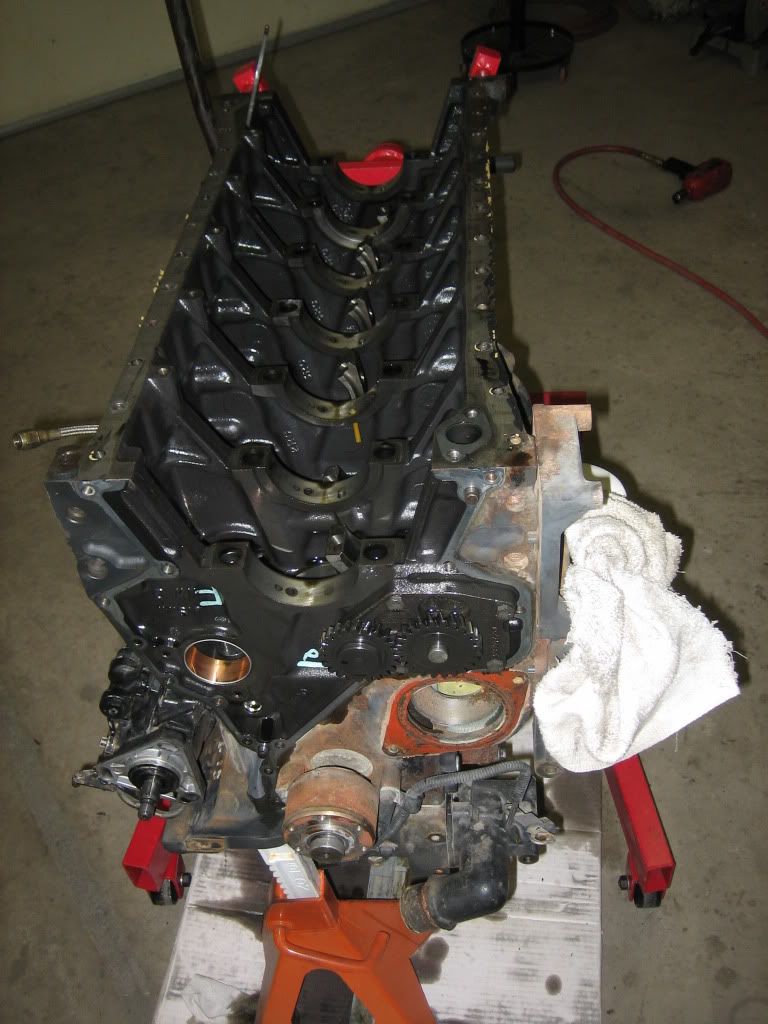
Soon it should be drivable, I keep saying that but it looks like at least a week off...
I rebuilt the starter, vacuum pump, turbo and re-sealed the p/s pump. I sealed what I could on the p/s pump but a special puller is needed to remove the drive dog/hub and I don't see anyone that sells it. I think most just buy a rebuilt pump but I'd rather do it myself. I have trust issues, haha


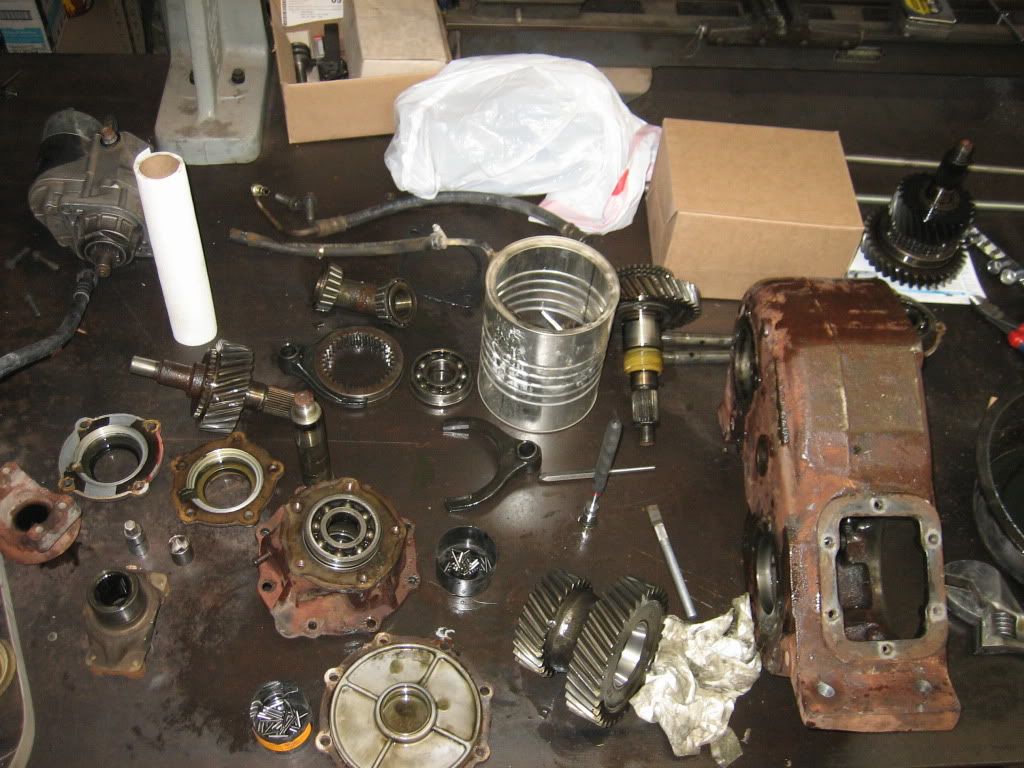
Tore the NP205 down and ordered the bearings and seals needed to rebuild that.


Replaced the body mounts with Poly ones, I hope I don't regret it... The OEM ones were really blow out and new Ford ones were ~$500, at cost + 10%! These were $50 so I'll try it. If you do this, make a puller out of some 3" exhaust tube, I don't know how else you could do it.. Lots online about how to, even the poly instructions had a note on it...

I also tore the engine down to replace the plastic oil nozzles with the billet aluminum ones, then found that I need a camshaft The rest of the engine looks really good but I'm going to put new bearings in since the old ones are out.


Soon it should be drivable, I keep saying that but it looks like at least a week off...

#7
More progress:
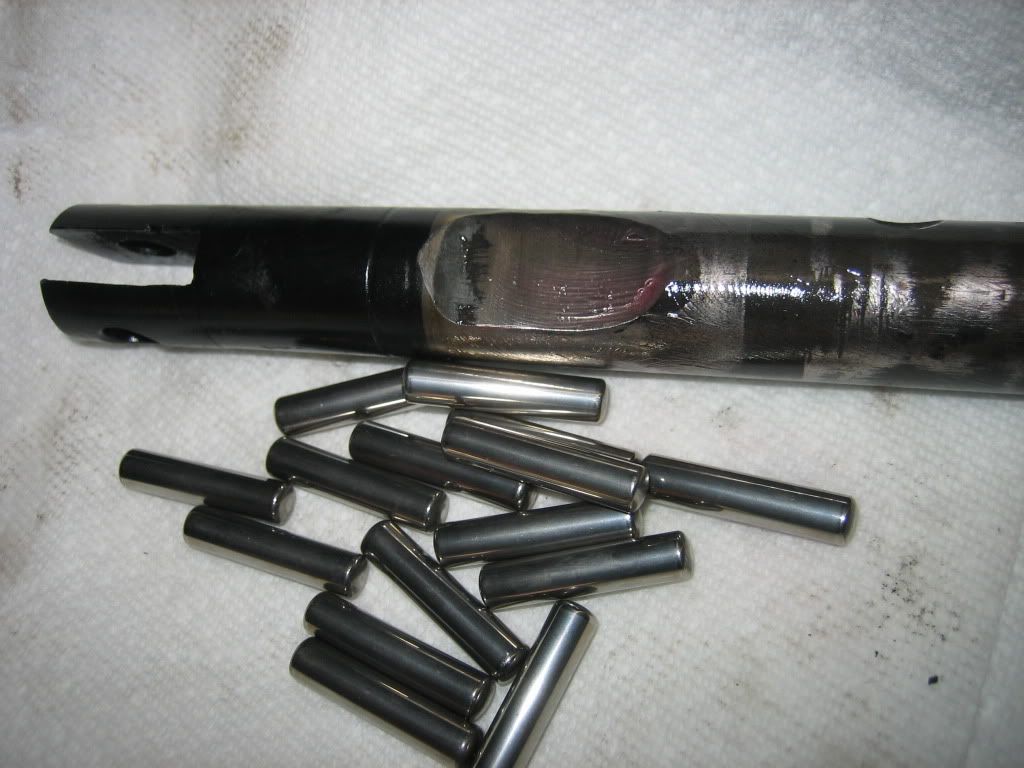
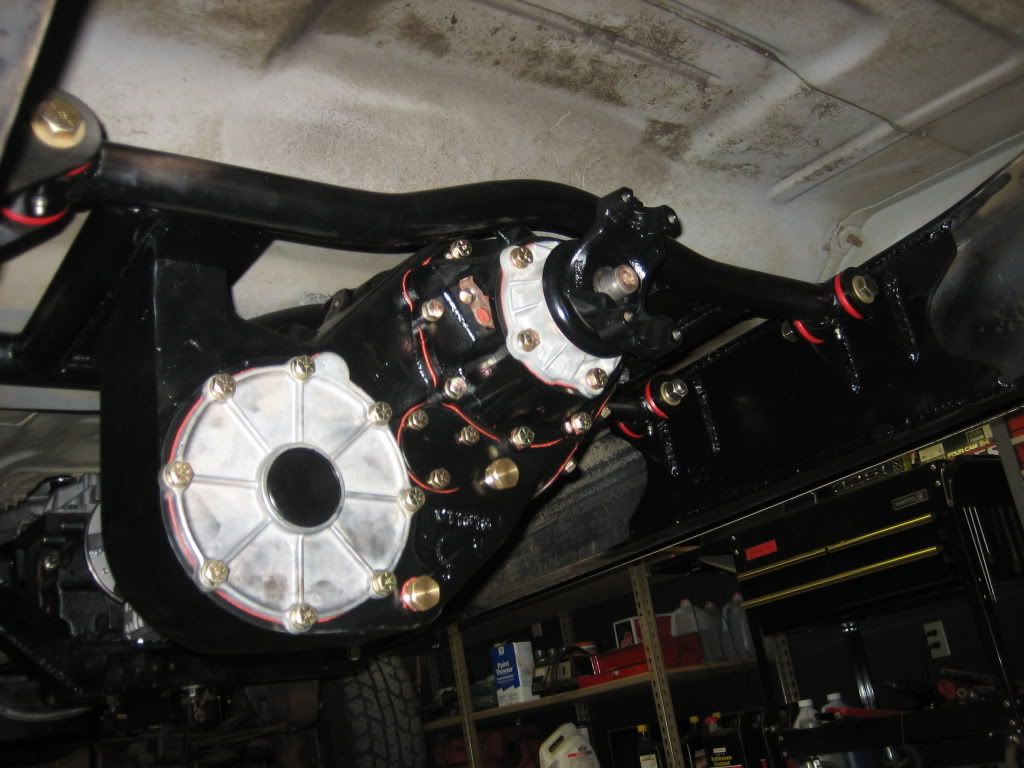
NP205 rebuilt and converted to twin stick:
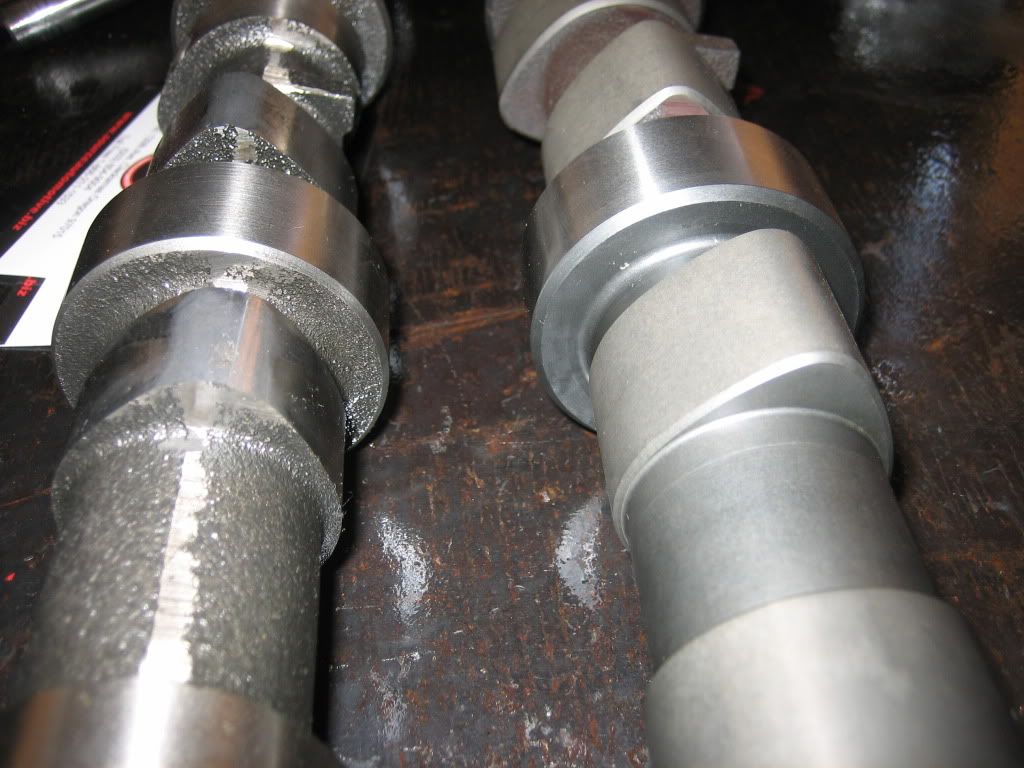
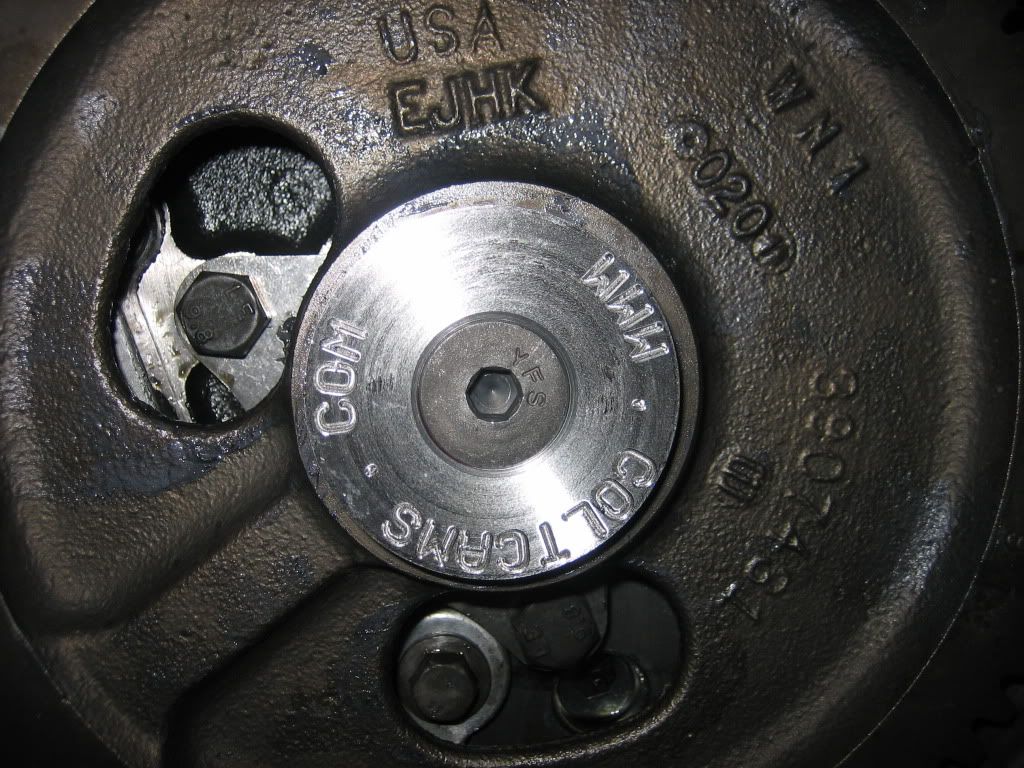
Camshaft installed, went with a Colt stage III, I think it might run a bit differently!
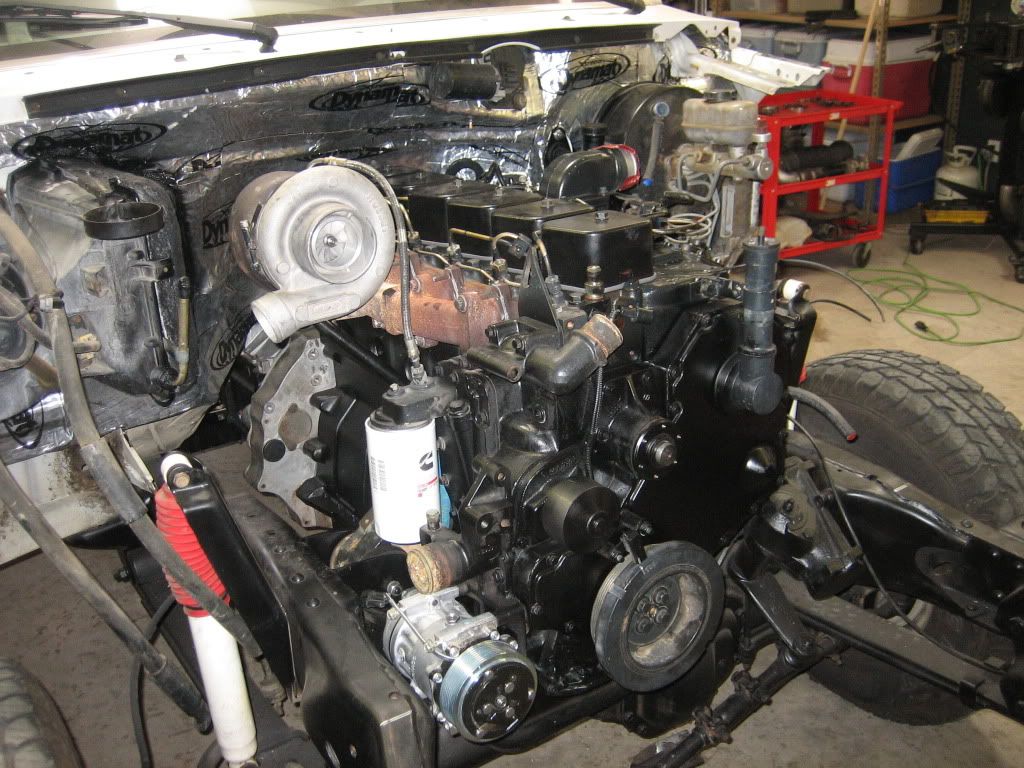
Engine and trans installed until it drives, not coming back out again! arty018: I hope.
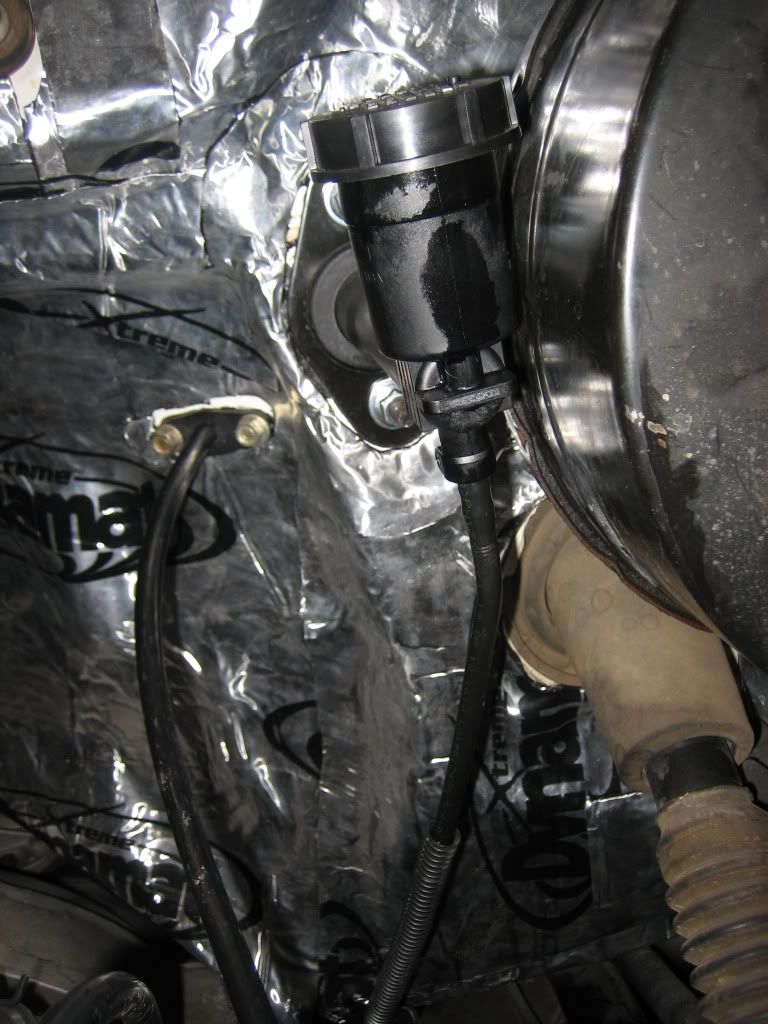
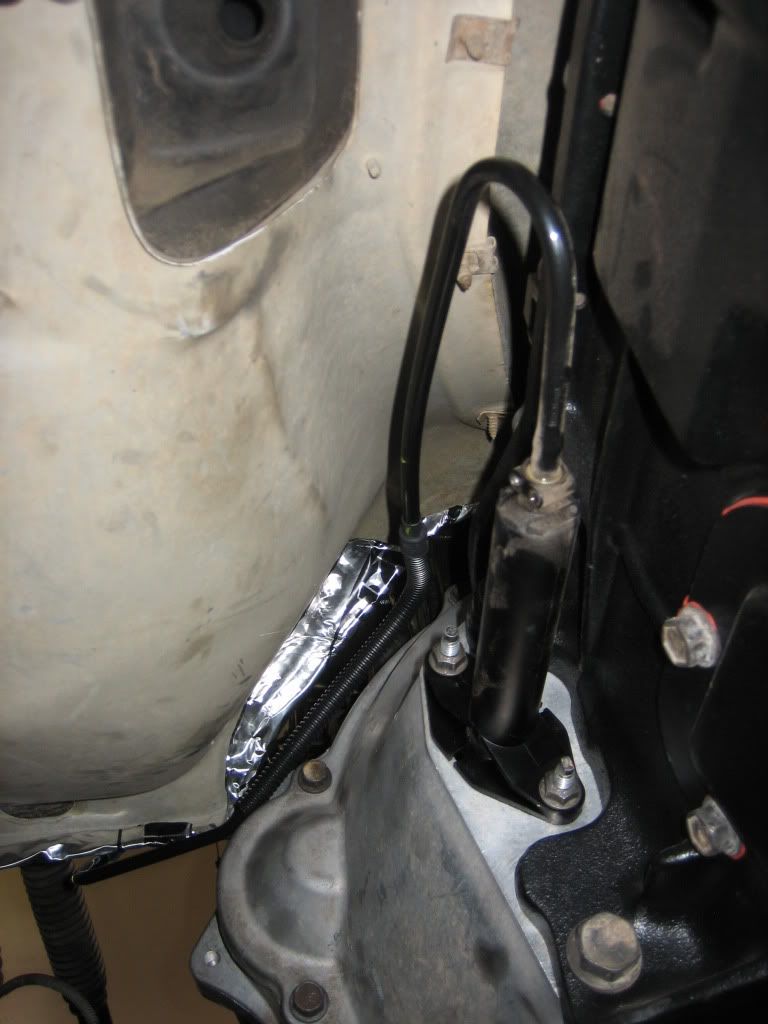
Clutch hydraulics installed, I used a Ford master cylinder and a 2000 dodge slave/master- removed dodge master and replaced with Ford master. Was fairly straight forward, press roll pin out, switch units out. Be sure to bench bleed the master first.
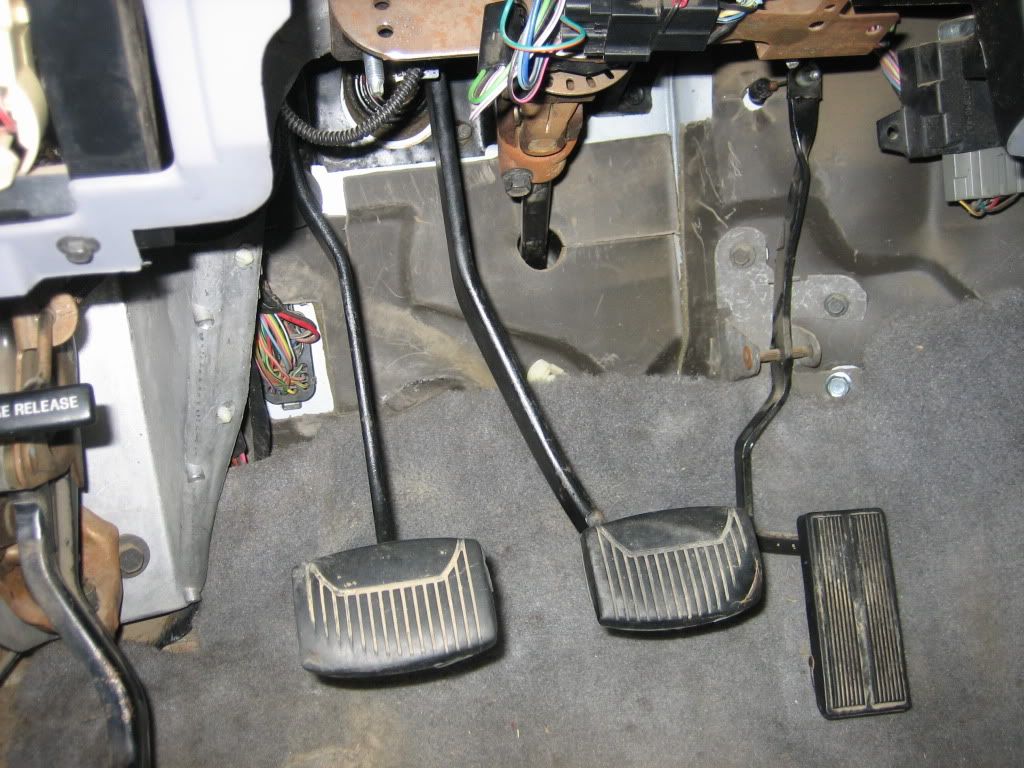
Pedals converted from auto to manual:
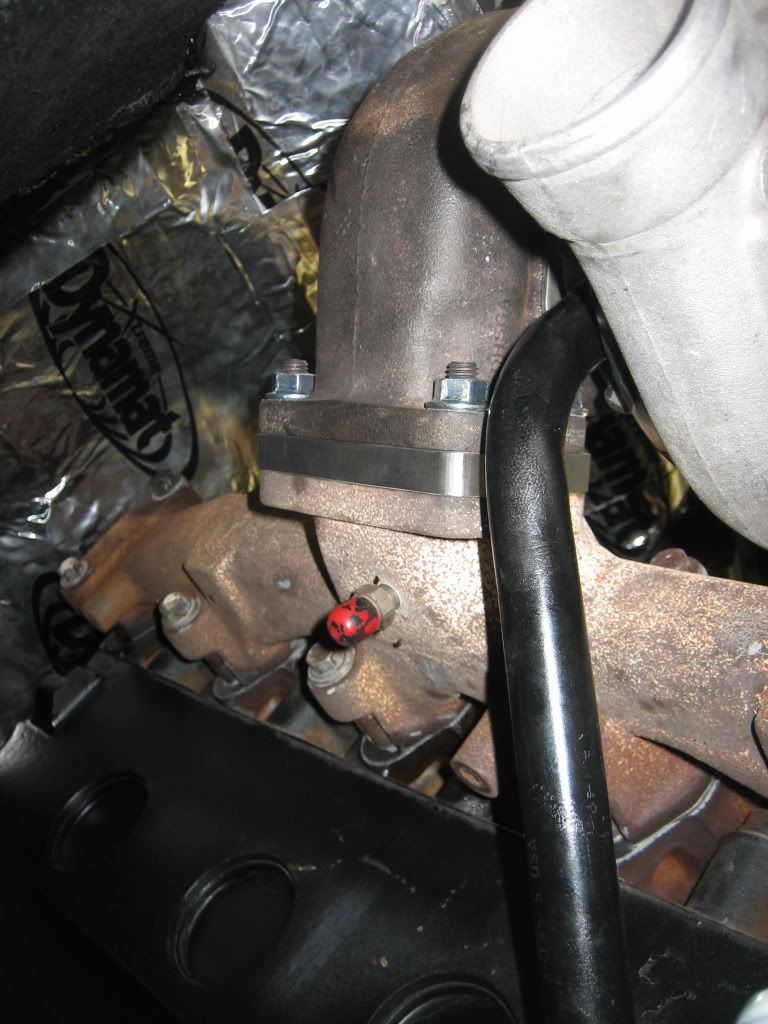
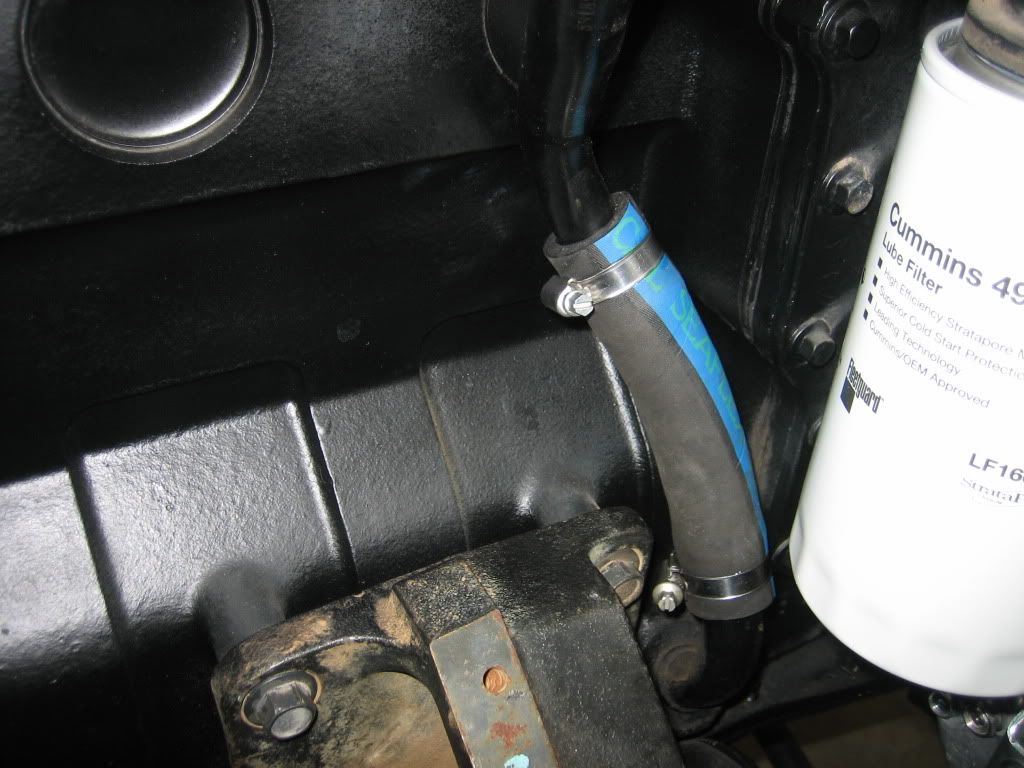
Turbo flipped, spaced, drain hose finished:
I installed the starter with the spacer for the 13" flywheel, I had to flatten out the spacer it was 20 thou off on one side. I had to grind out the inside a bit so it would fit over the starter too. Annoying...
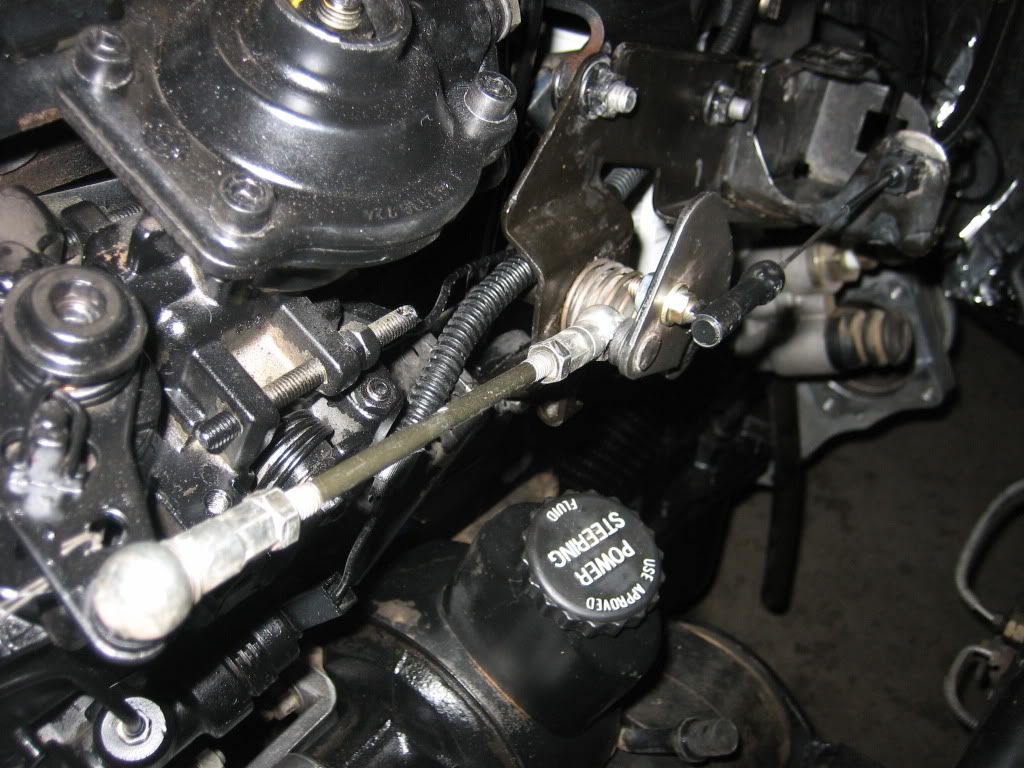
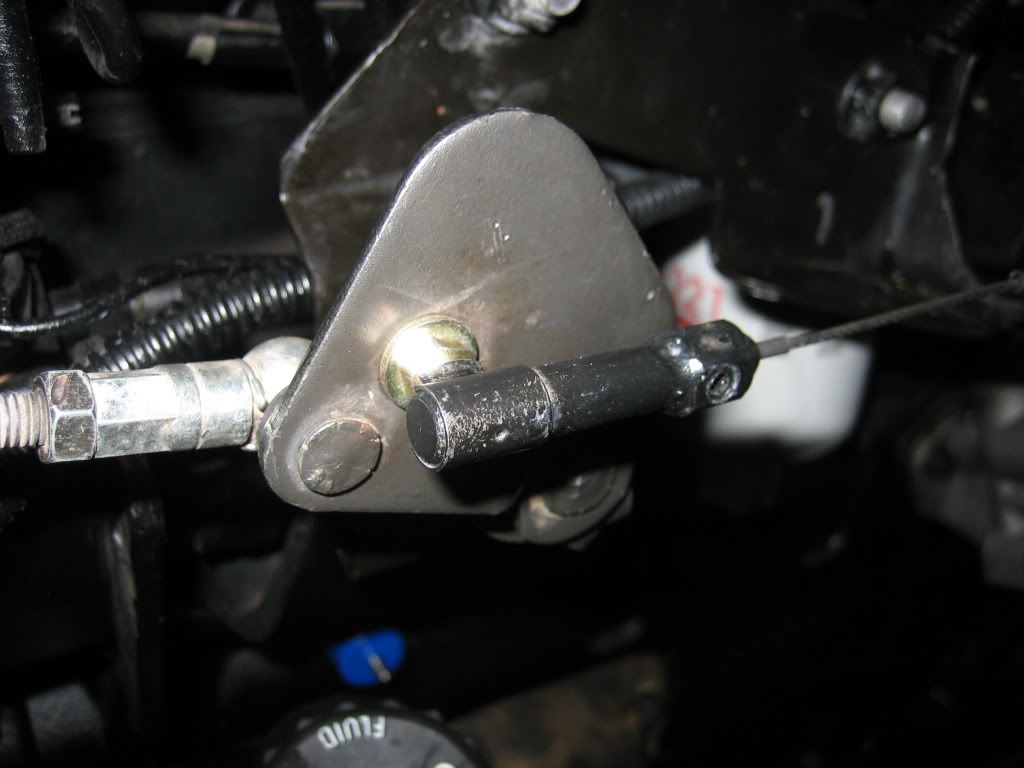
Throttle all sorted out, I used a combination of custom and factory parts. The factory ford sheath is definitely the best for the ford body...
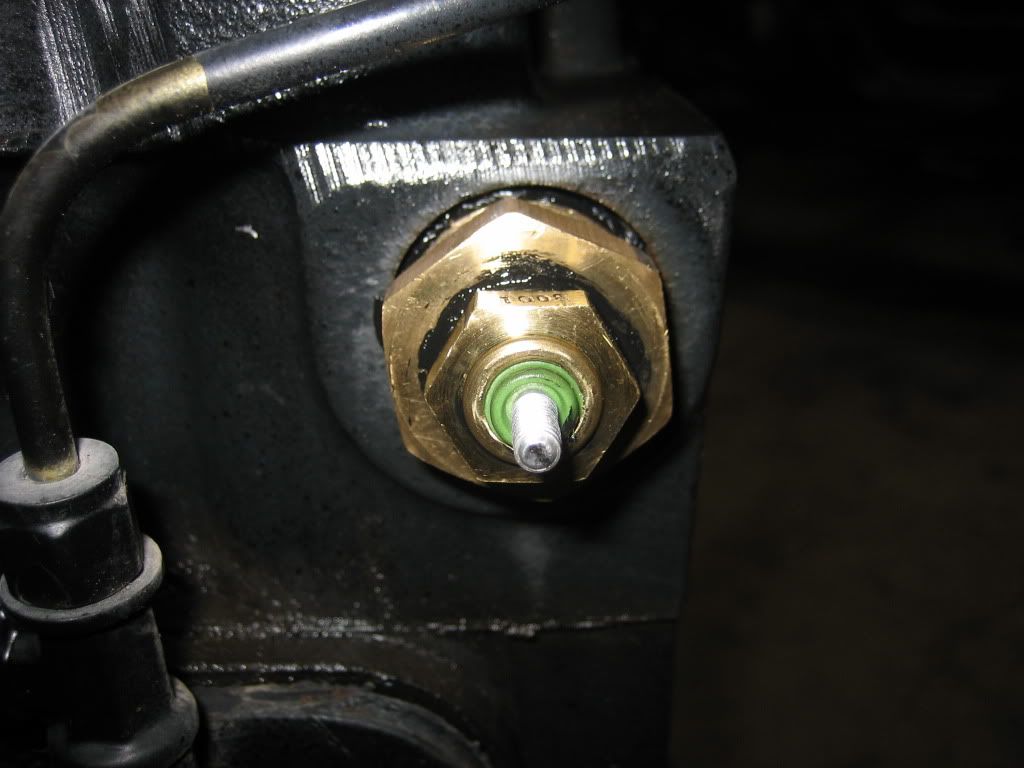
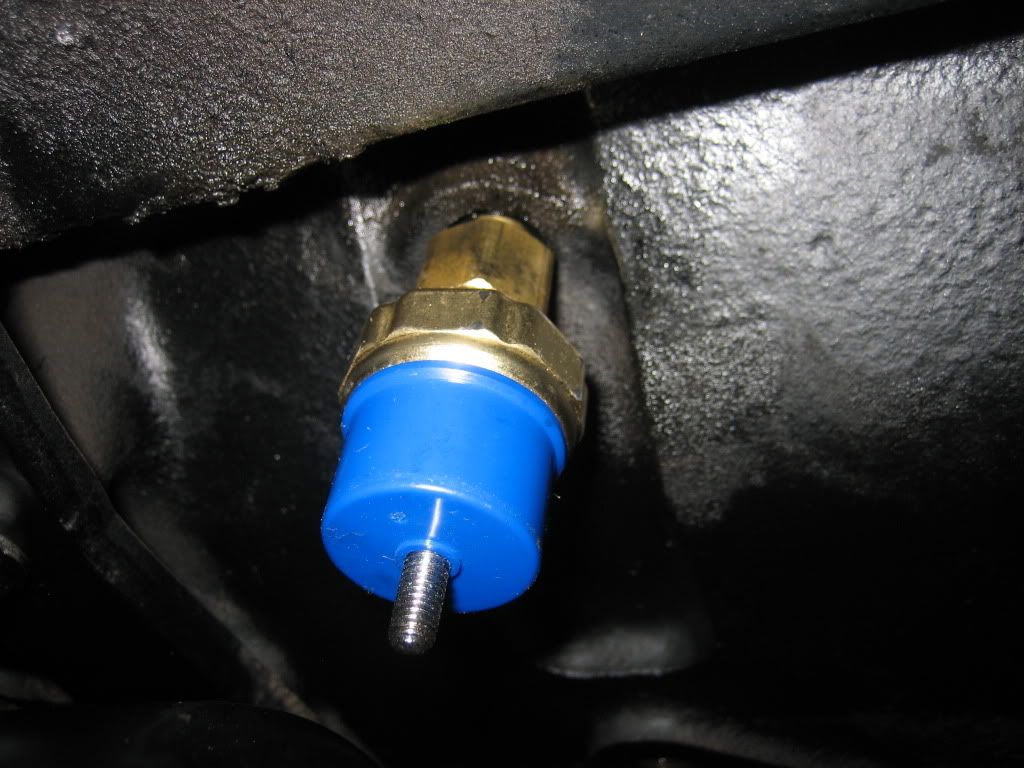
New ford sending units installed, coolant and oil (Hint, go to local hardware store):
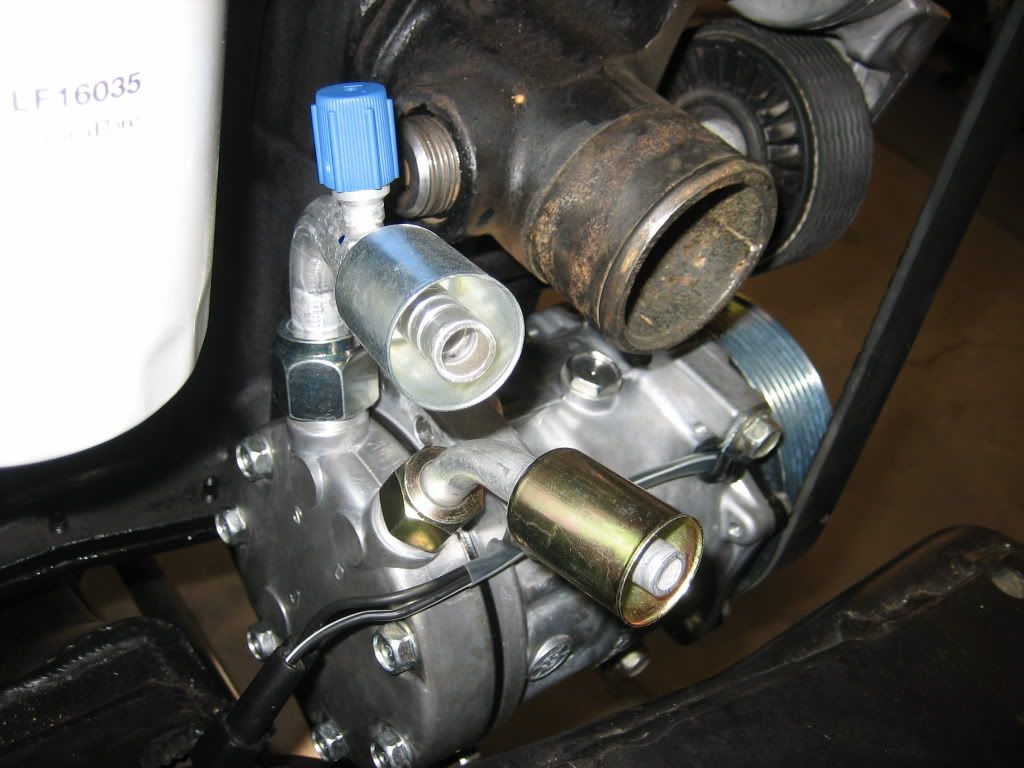
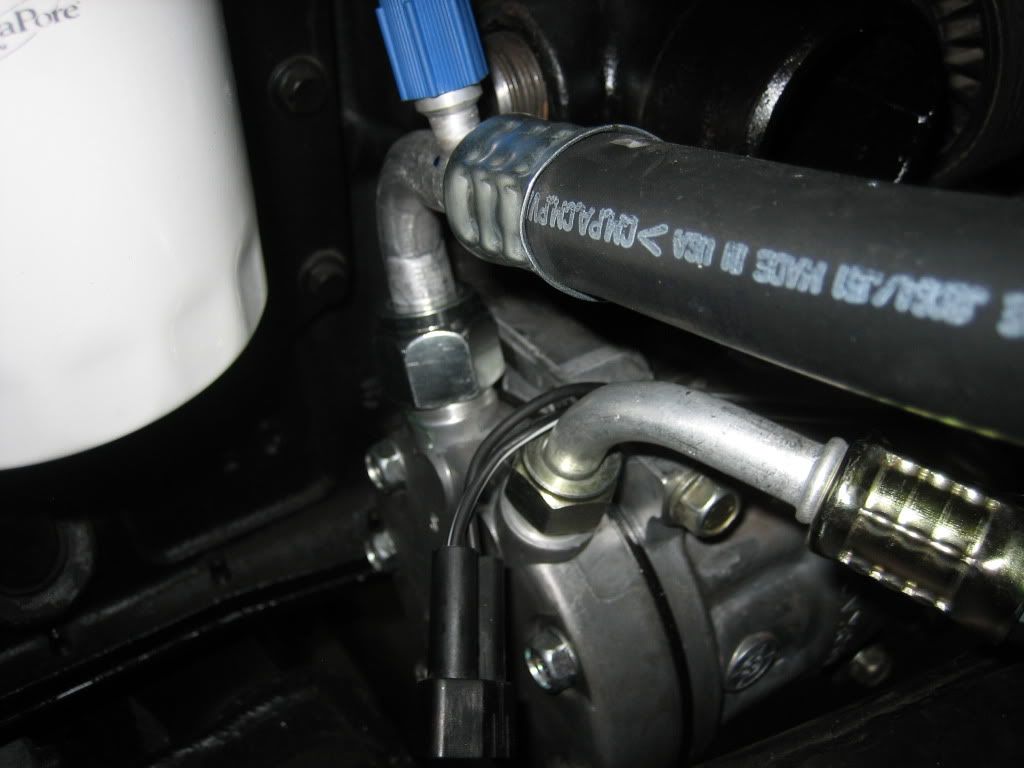
Started working on the a/c compressor. I bought a new unit for a 94 because my clutch hub bearing was bad, and converting to R134; then used the rear cap/manifold off a John Deere tractor. Bought a lot of fittings/hose at nostalgic air parts, used them for TLC's in the past:
I'll update as it progresses, probably 3/4 finished now 3 weeks after taking the engine out of the dodge...
NP205 rebuilt and converted to twin stick:


Camshaft installed, went with a Colt stage III, I think it might run a bit differently!


Engine and trans installed until it drives, not coming back out again!
 arty018: I hope.

Clutch hydraulics installed, I used a Ford master cylinder and a 2000 dodge slave/master- removed dodge master and replaced with Ford master. Was fairly straight forward, press roll pin out, switch units out. Be sure to bench bleed the master first.


Pedals converted from auto to manual:

Turbo flipped, spaced, drain hose finished:


I installed the starter with the spacer for the 13" flywheel, I had to flatten out the spacer it was 20 thou off on one side. I had to grind out the inside a bit so it would fit over the starter too. Annoying...

Throttle all sorted out, I used a combination of custom and factory parts. The factory ford sheath is definitely the best for the ford body...


New ford sending units installed, coolant and oil (Hint, go to local hardware store):


Started working on the a/c compressor. I bought a new unit for a 94 because my clutch hub bearing was bad, and converting to R134; then used the rear cap/manifold off a John Deere tractor. Bought a lot of fittings/hose at nostalgic air parts, used them for TLC's in the past:

I'll update as it progresses, probably 3/4 finished now 3 weeks after taking the engine out of the dodge...
Trending Topics
#8
#9
You are making great progress, good to see all the pics that keep me motivated to do mine. If only I had not injured my shoulder I would be working on the 74. Been going stir crazy trying to heal up. Thanks for the update, bet you are really looking forward to driving it.
#10
Well it's been a while since an update. I've been driving it, getting better with each drive and haven't had too many issues. The divorced t-case has proven to be quite difficult to setup, the driveline angles need to be perfect or damn close... I also fought with a bent input shaft in the NP205, worn out output shaft causing play and an improperly machined 1410 sterling 10.25 yoke.

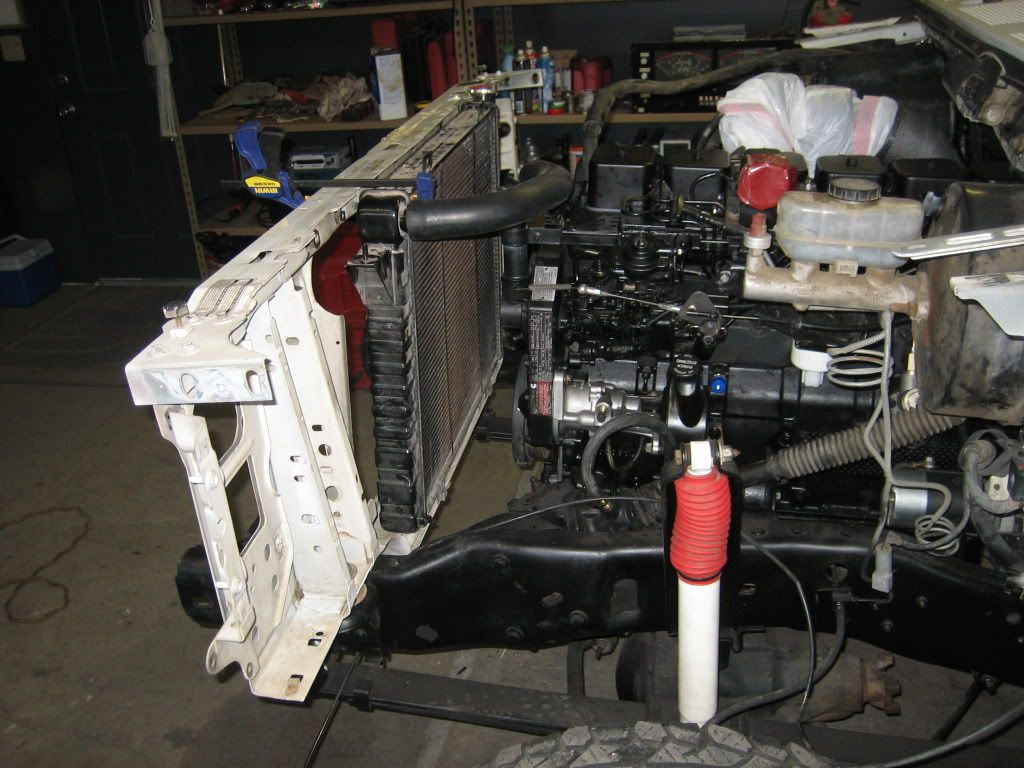
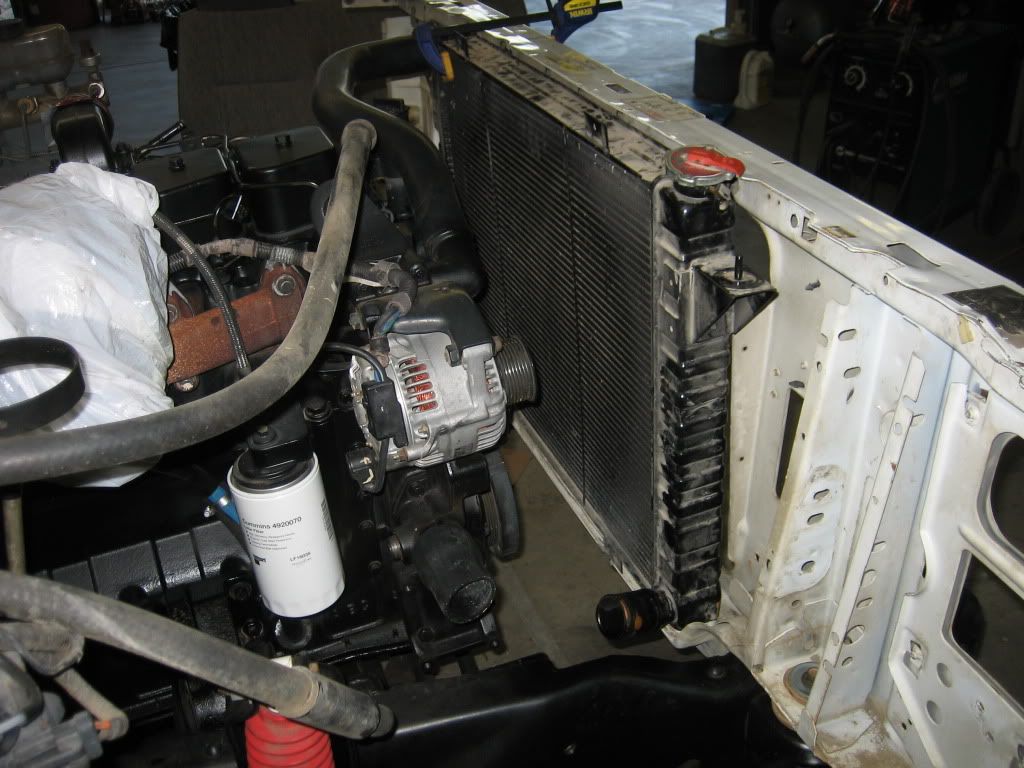
Lower radiator hose proved to be the tightest and worst. Don't know if I would have used the 1st gen rad again if I had the choice...
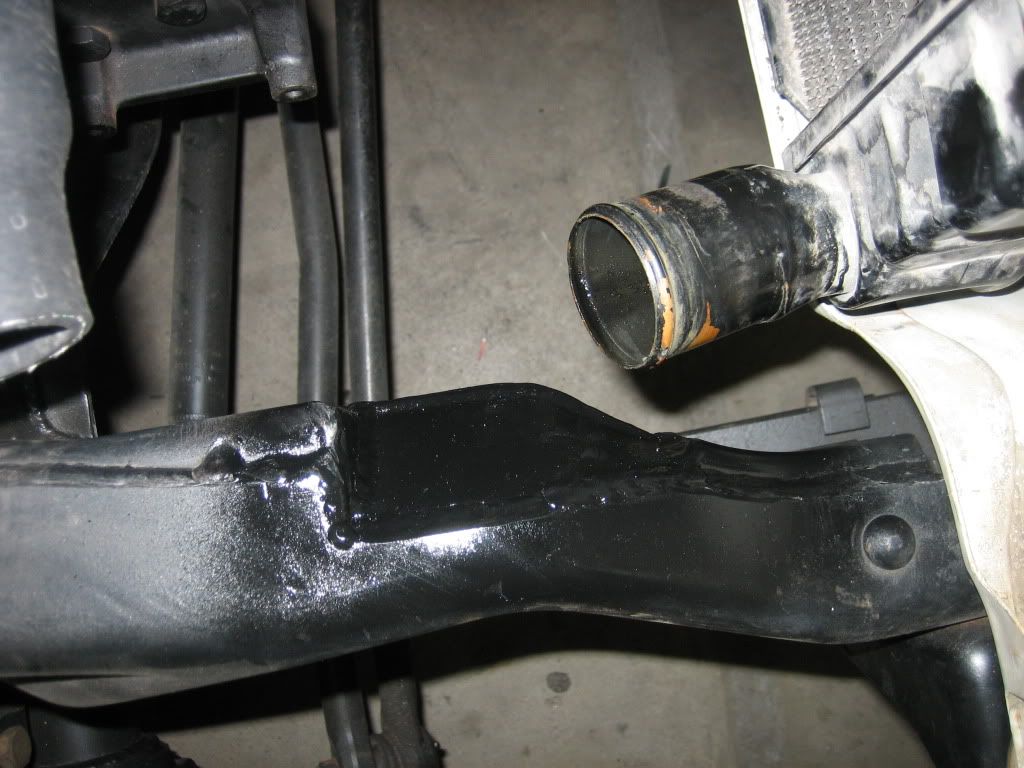
Heater pipe I made because the fitting on the engine was in the way of the a/c hoses
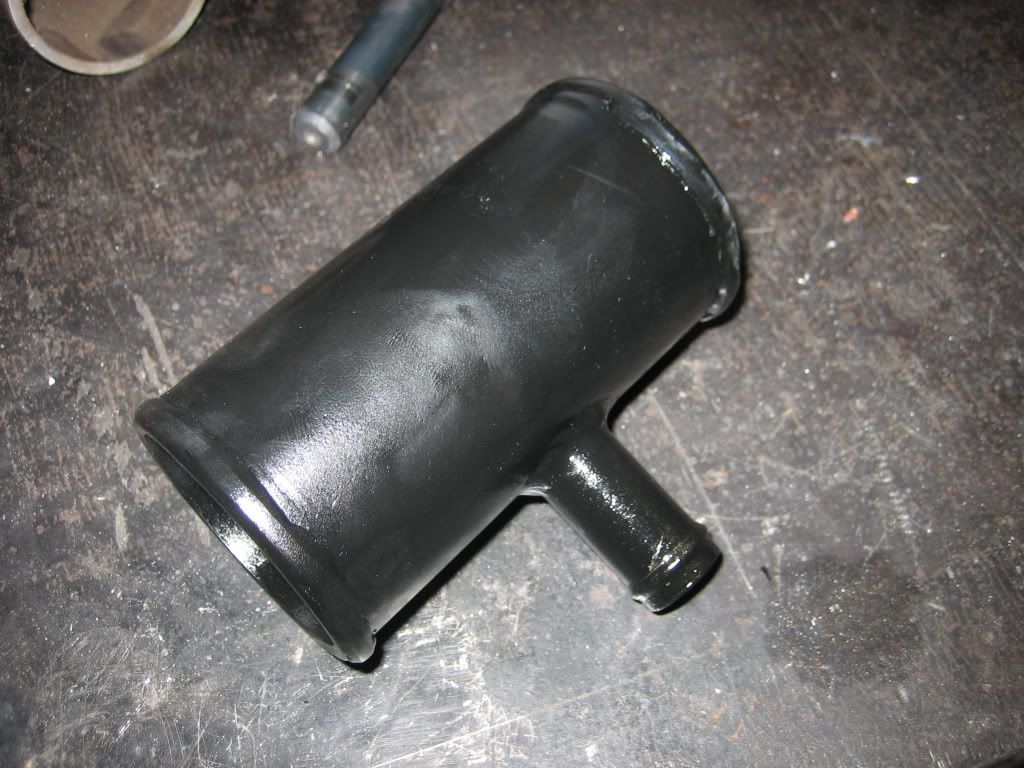
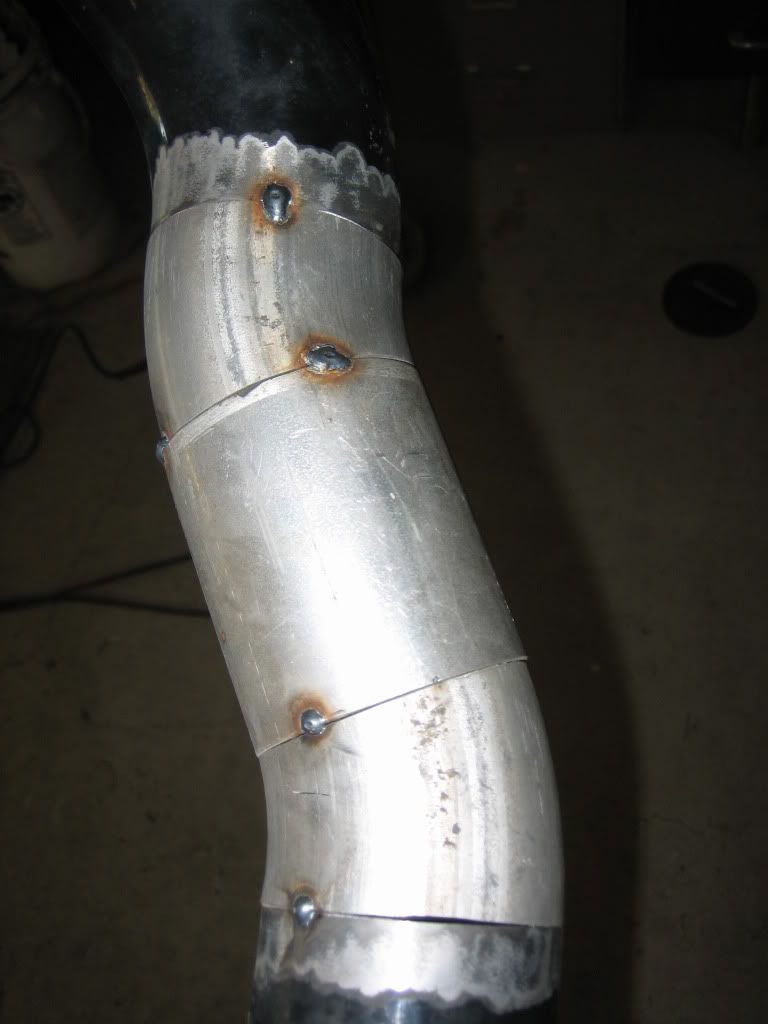
Intercooler plumbing modifications
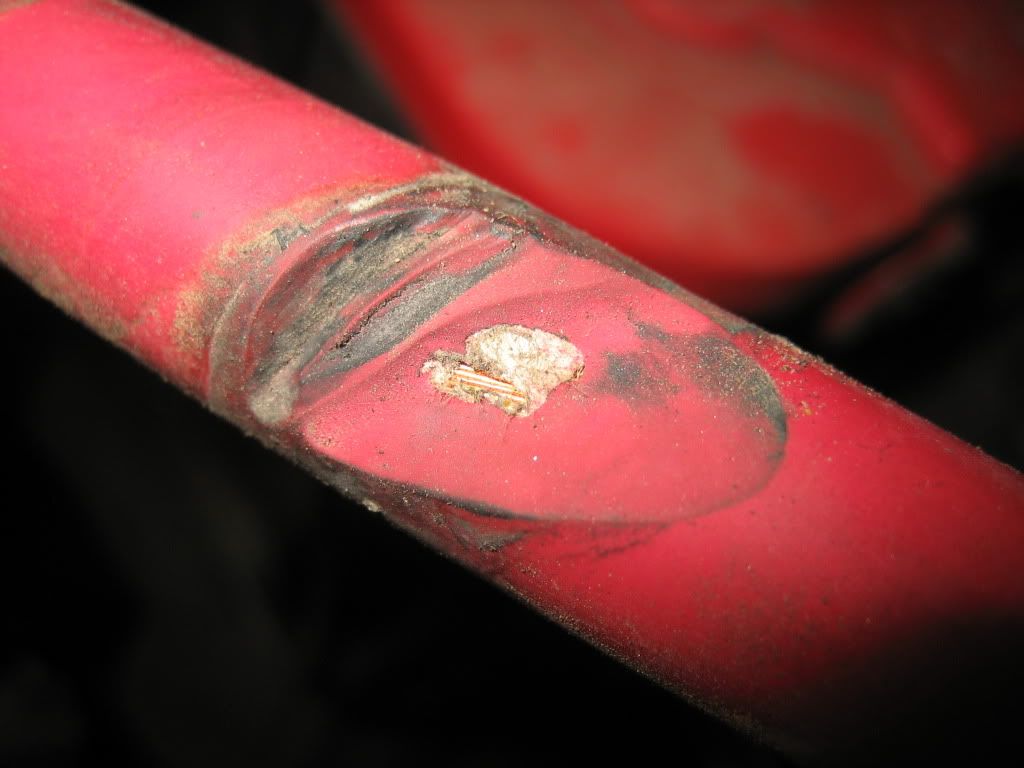
The battery cable on the dodge was resting on the frame, that was a close one!
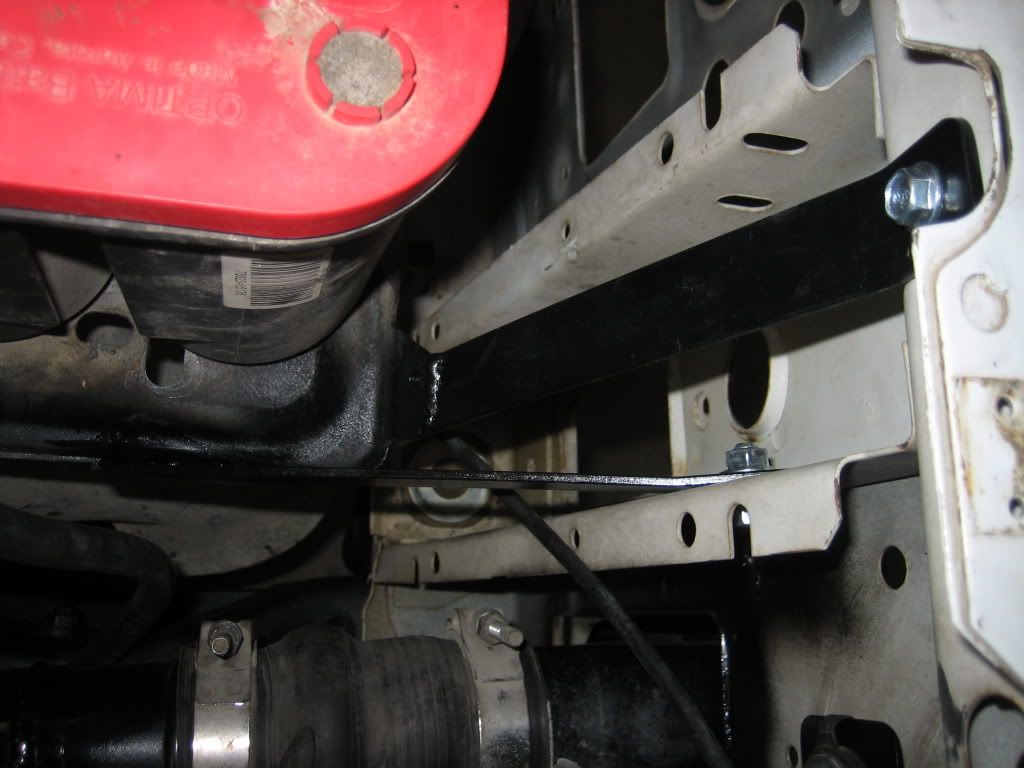
I had to relocate the battery to the drivers side
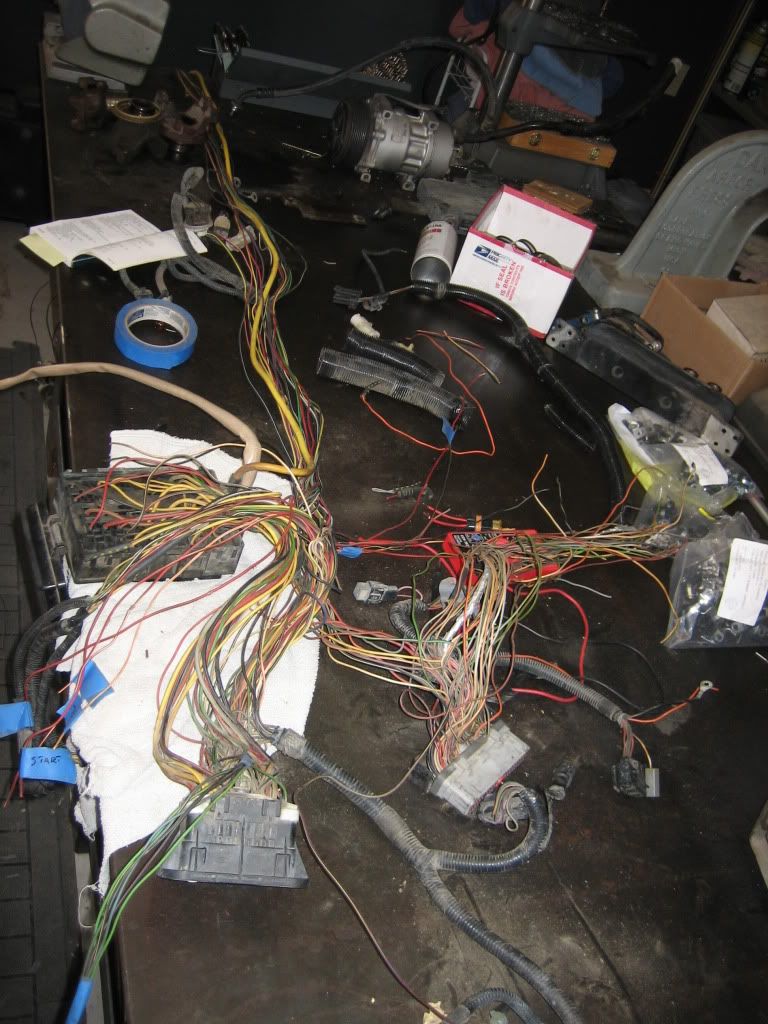
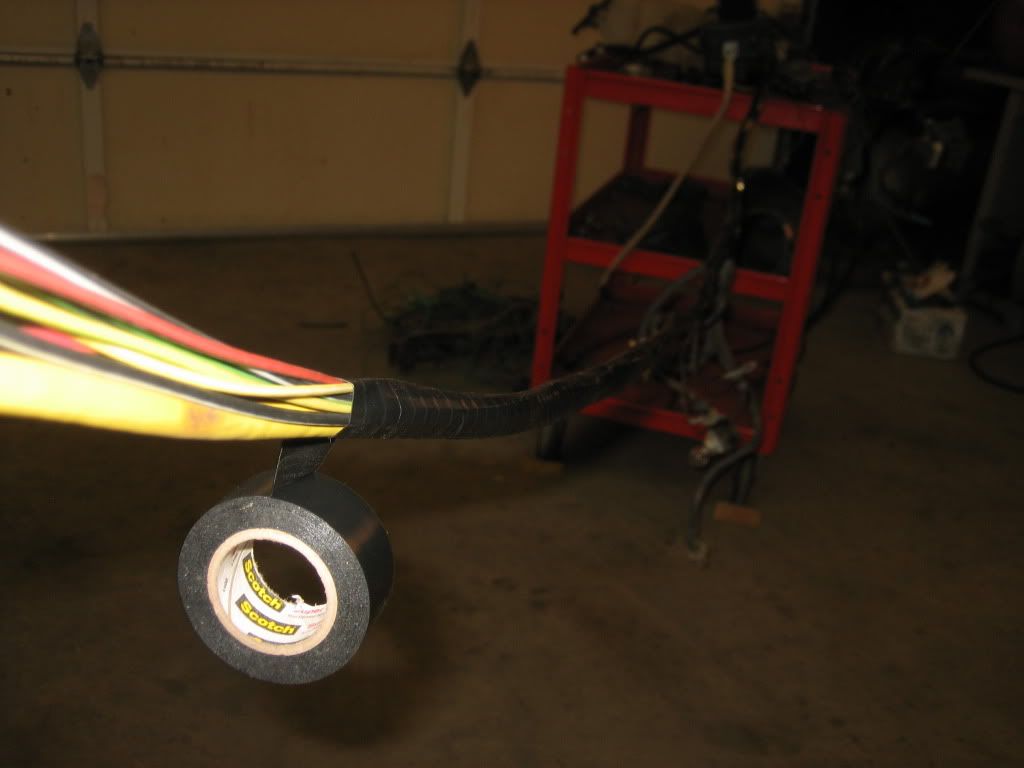
I then took the entire wiring harness apart and deleted all the gasser stuff. Then integrated the cummins into the factory harness, the old fuel pump relay is now the starter relay, ECU relay is now the gear vendors relay etc...
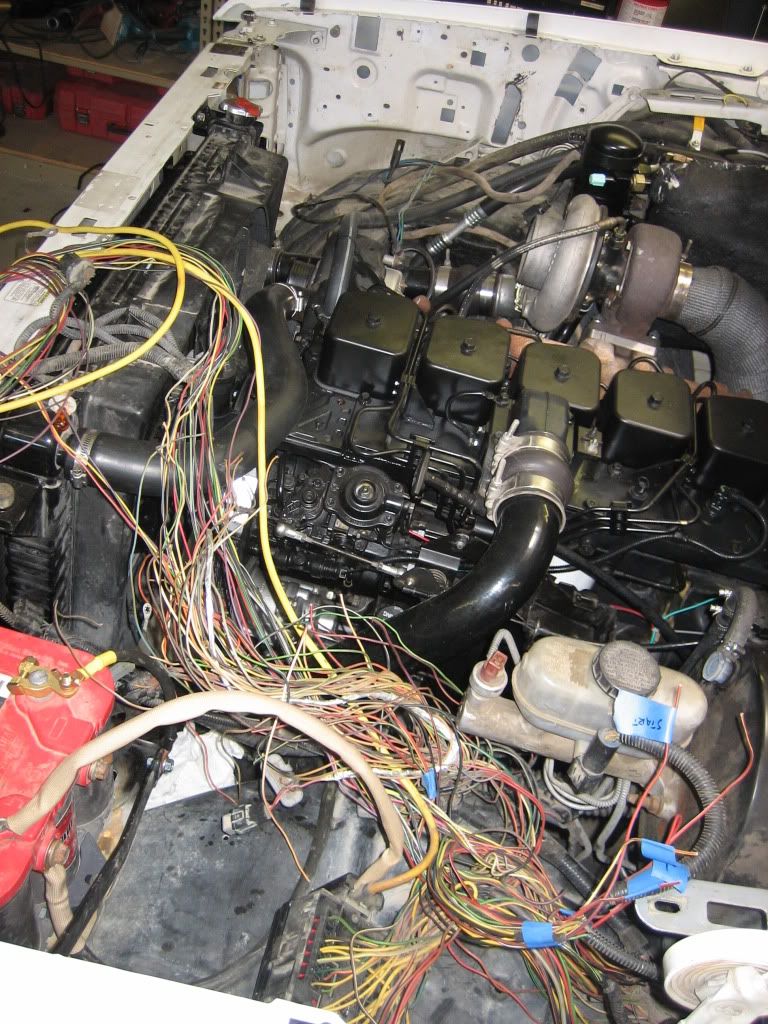
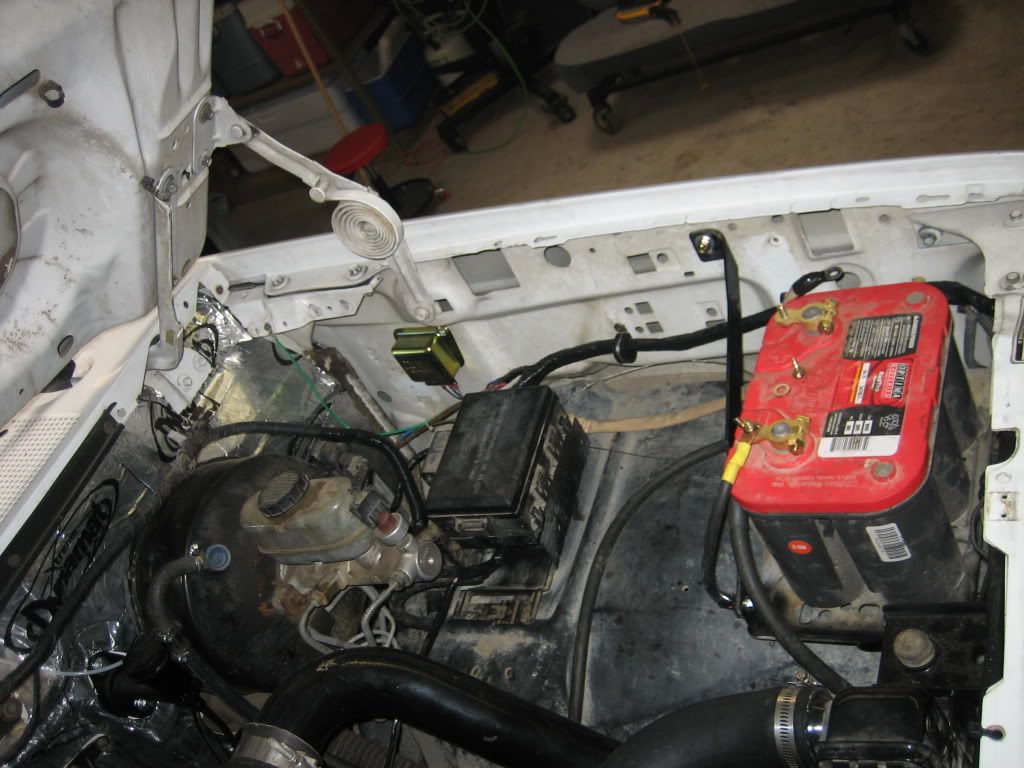
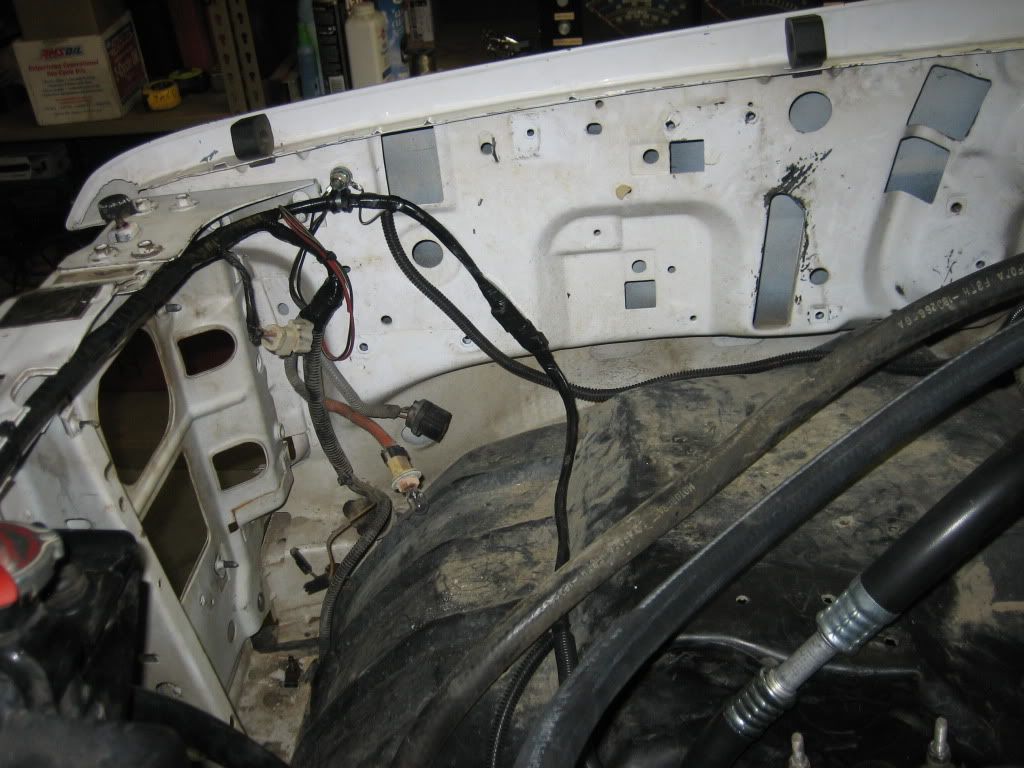
gasser engine ECU is not even hooked up anymore, and everything works! Still need to hook cruise up.
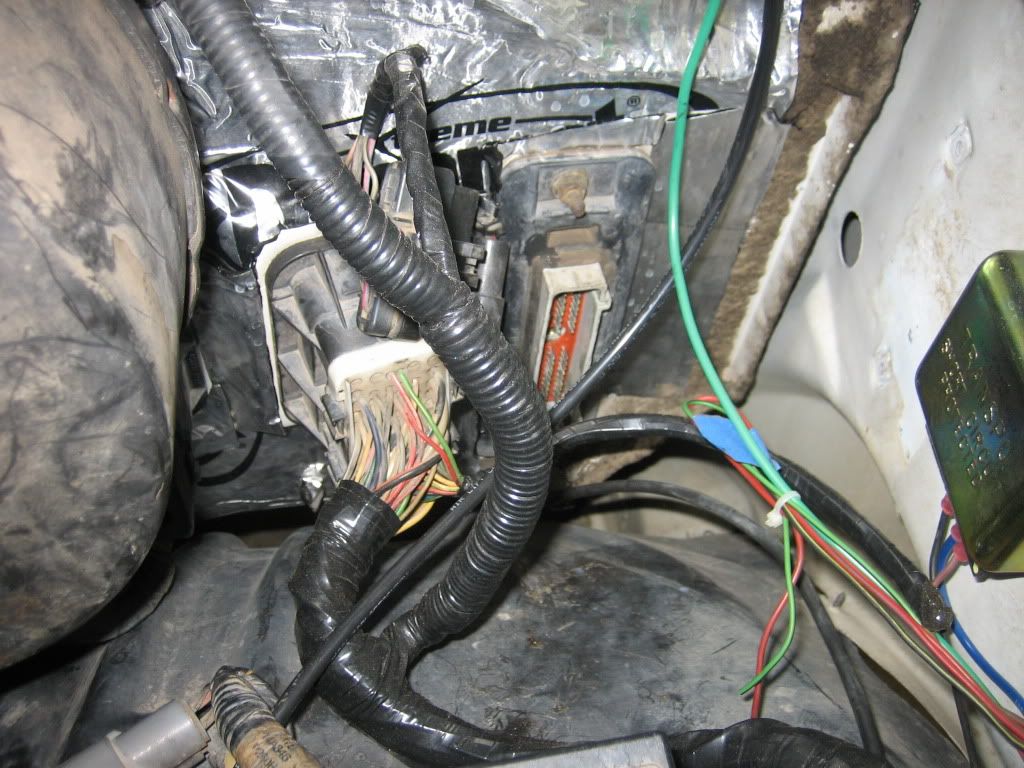
Various shots of details... Details, details...
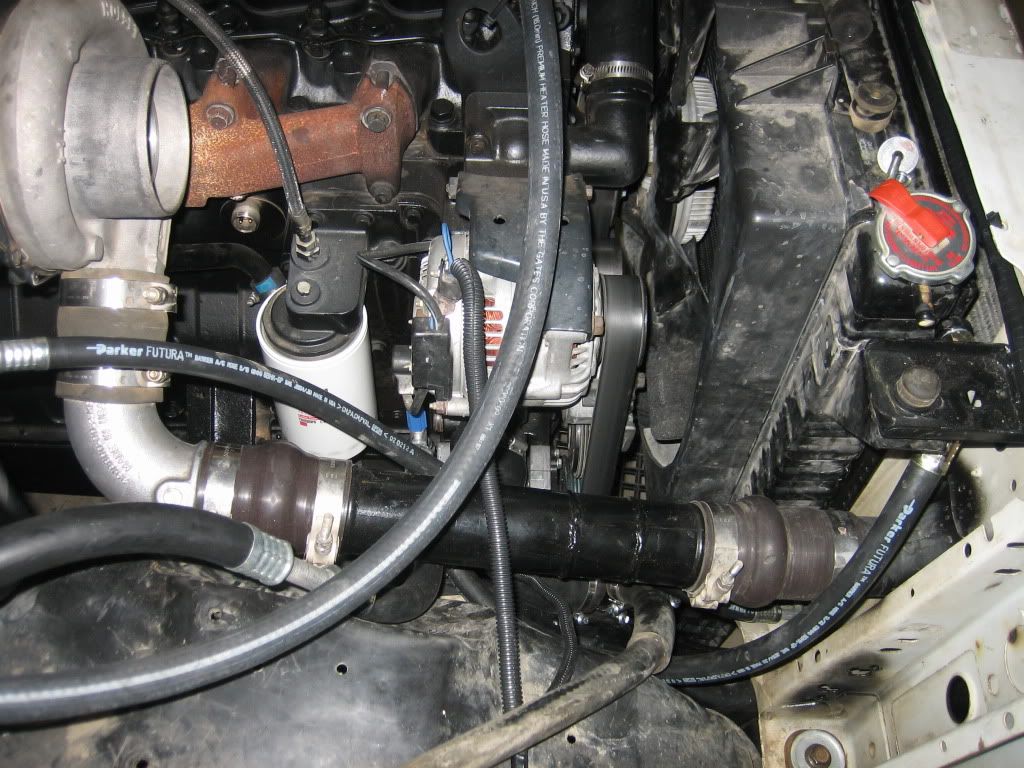
Lower radiator hose, what a pain that was.
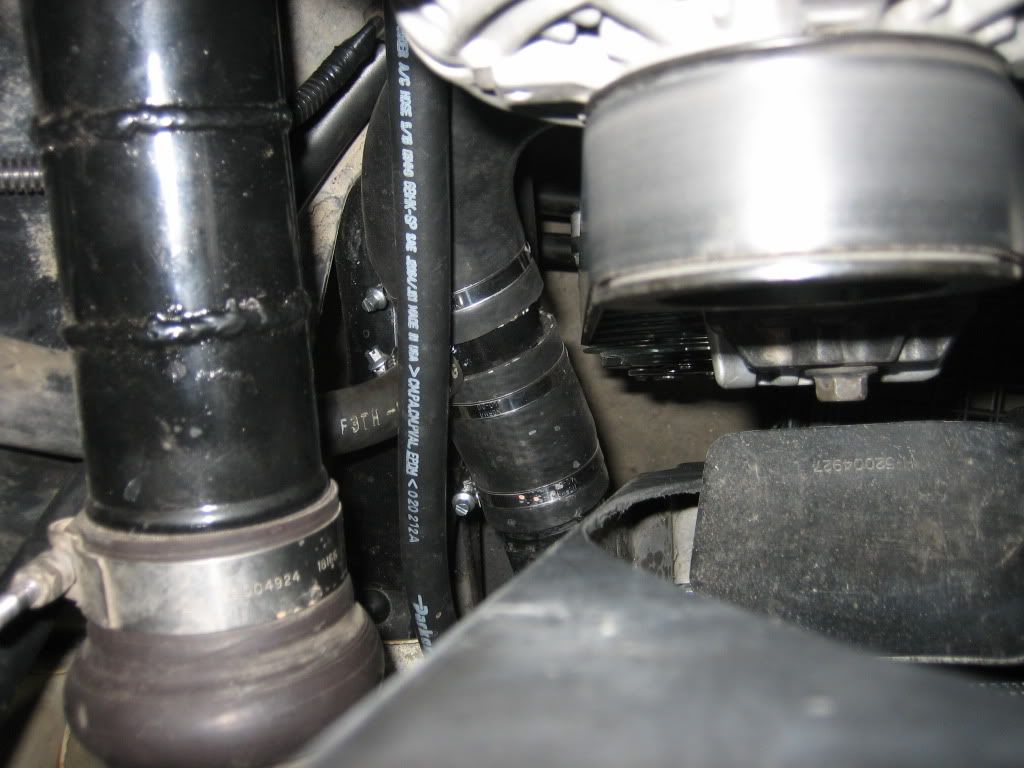
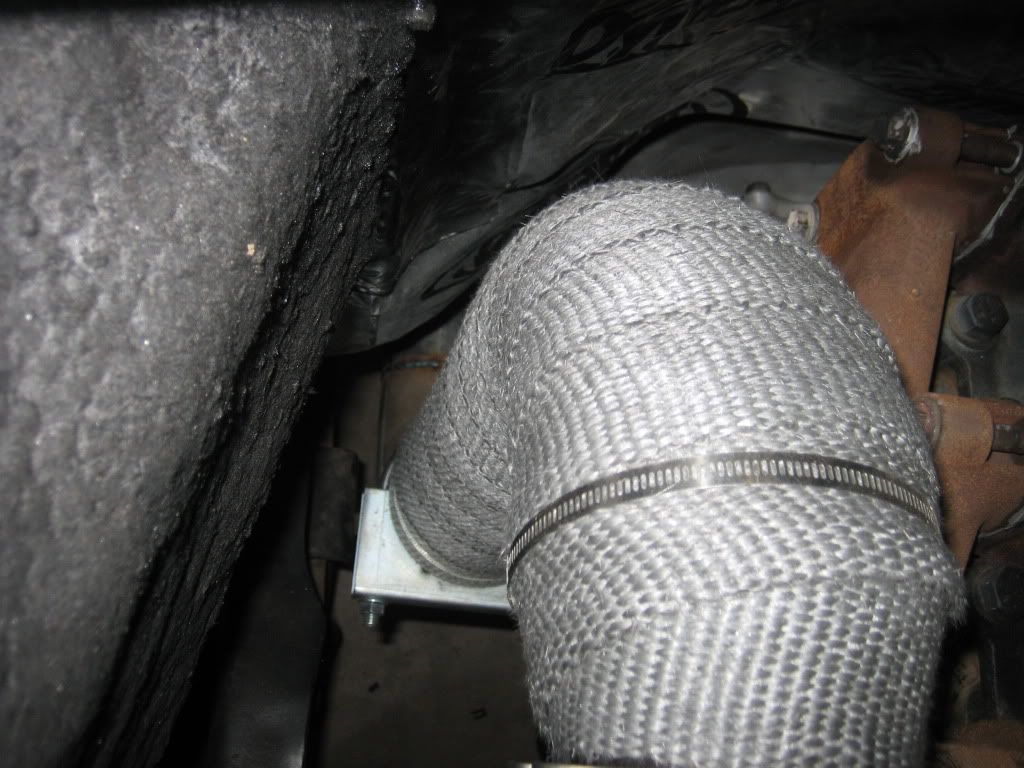
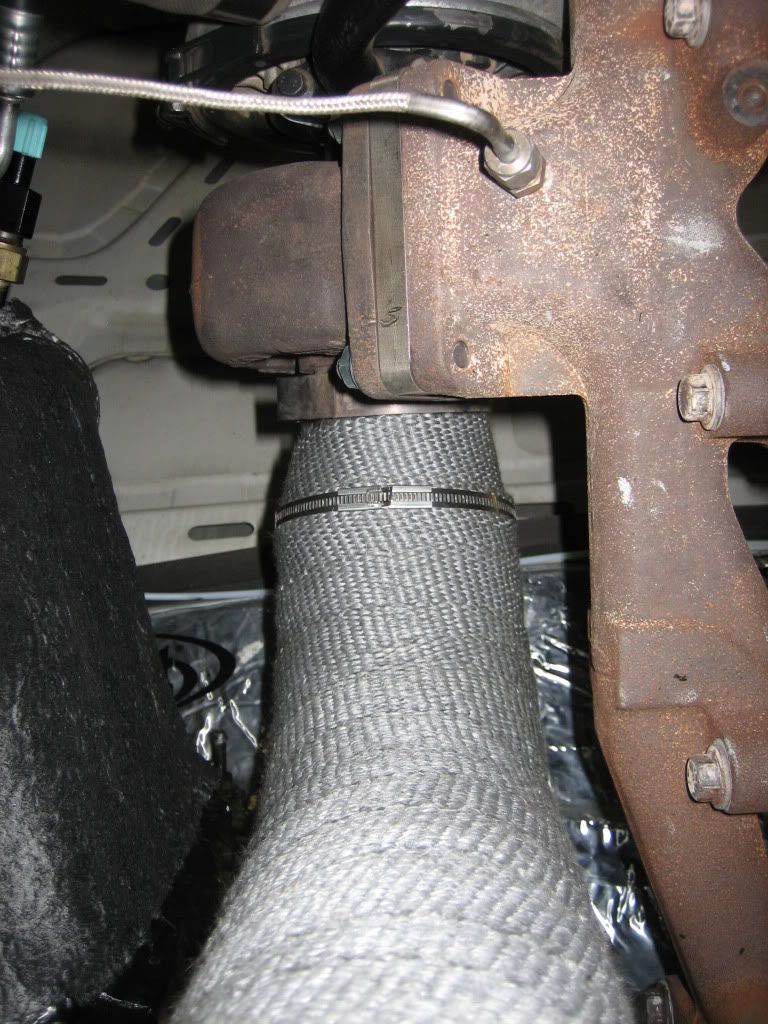
4" downpipe wrapped, a/c box double insulated.
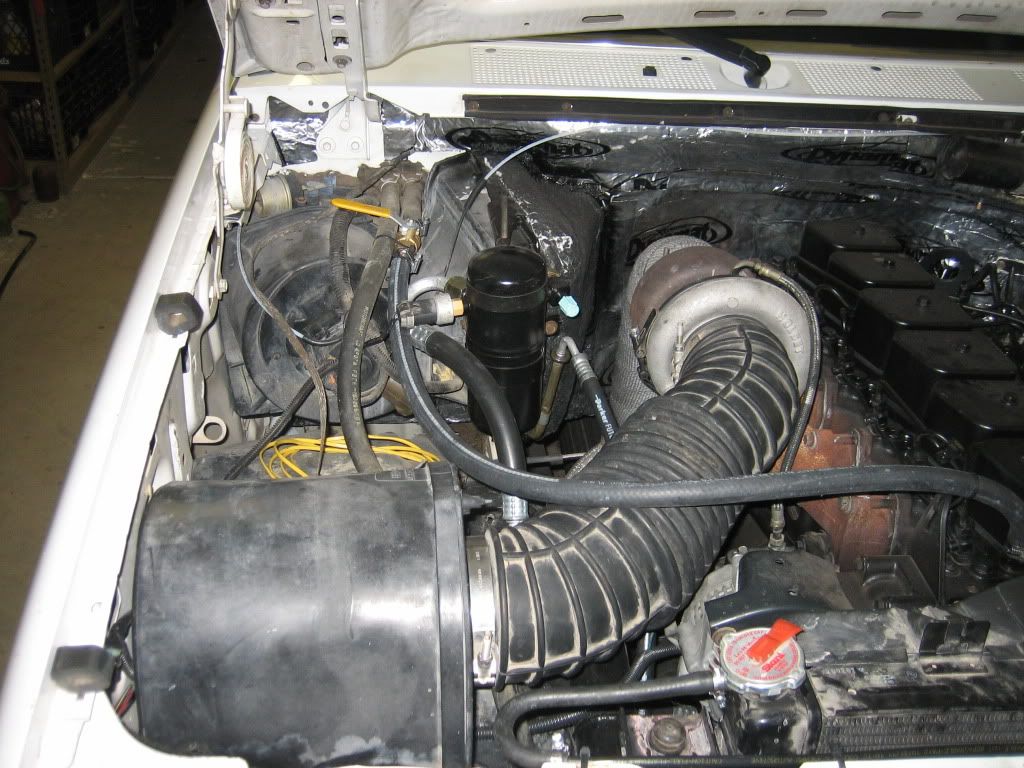
Used the first gen intake for now
8" pilot shaft to t-case
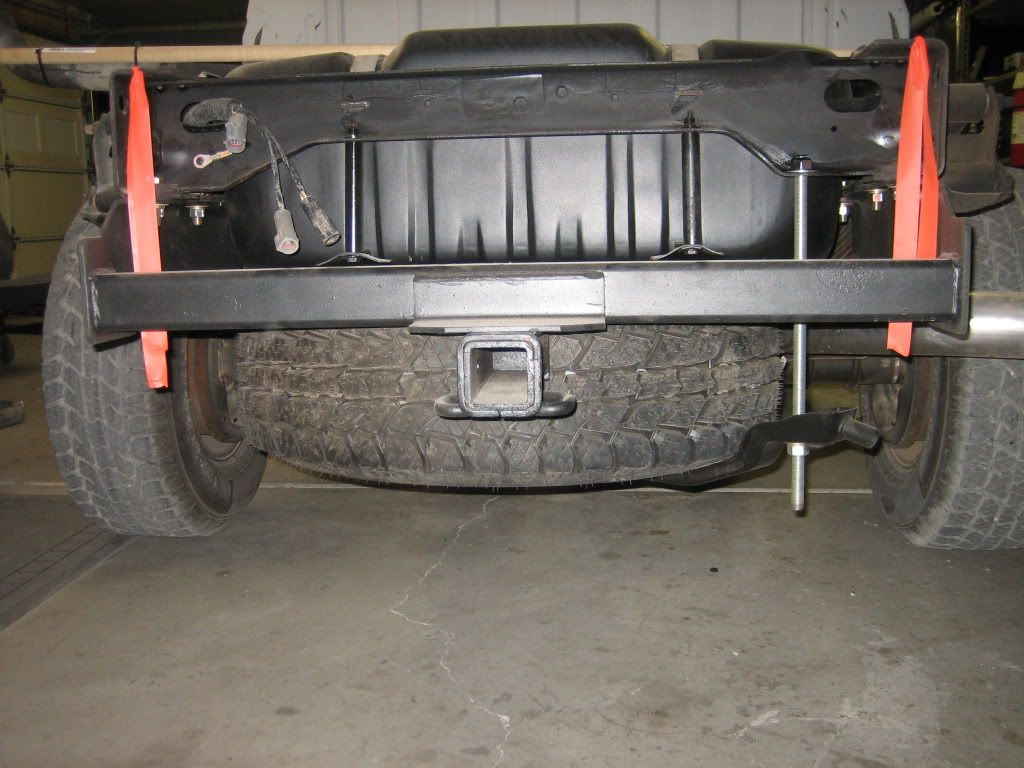
38 gallon tank with spare mounted, the spare hangs a bit low but works for now..
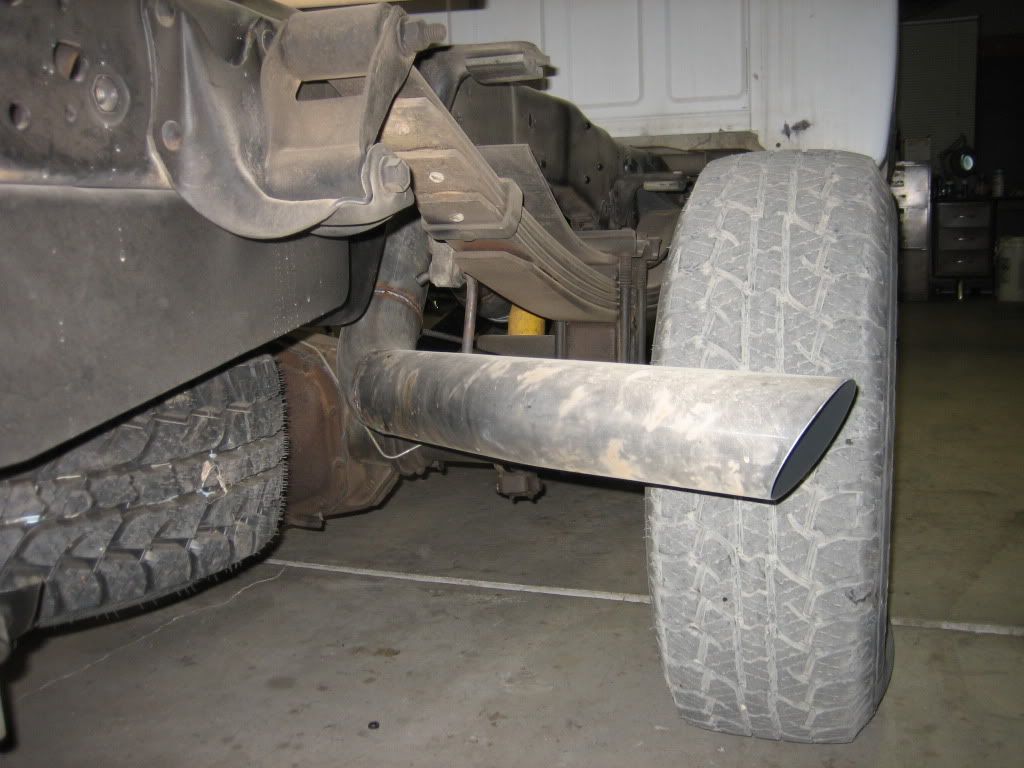
Exhaust pics, I bought a stainless system for a powerstroke of the same era, but ended up having to modify it completely...
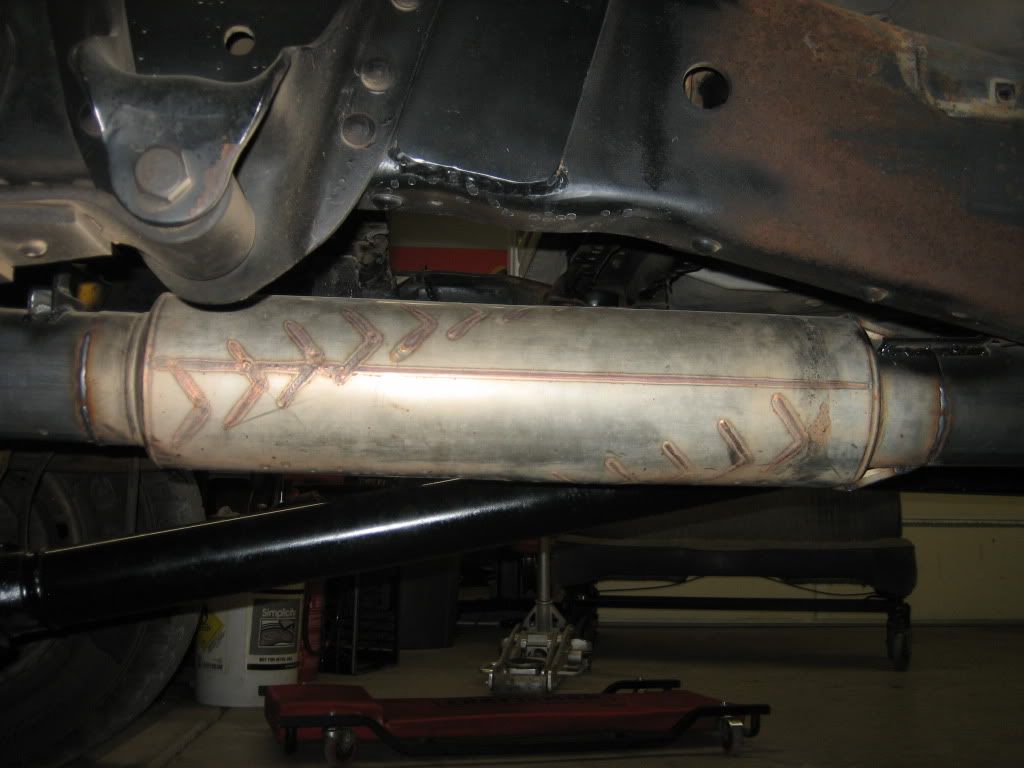
Muffler from dodge, I love this muffler!
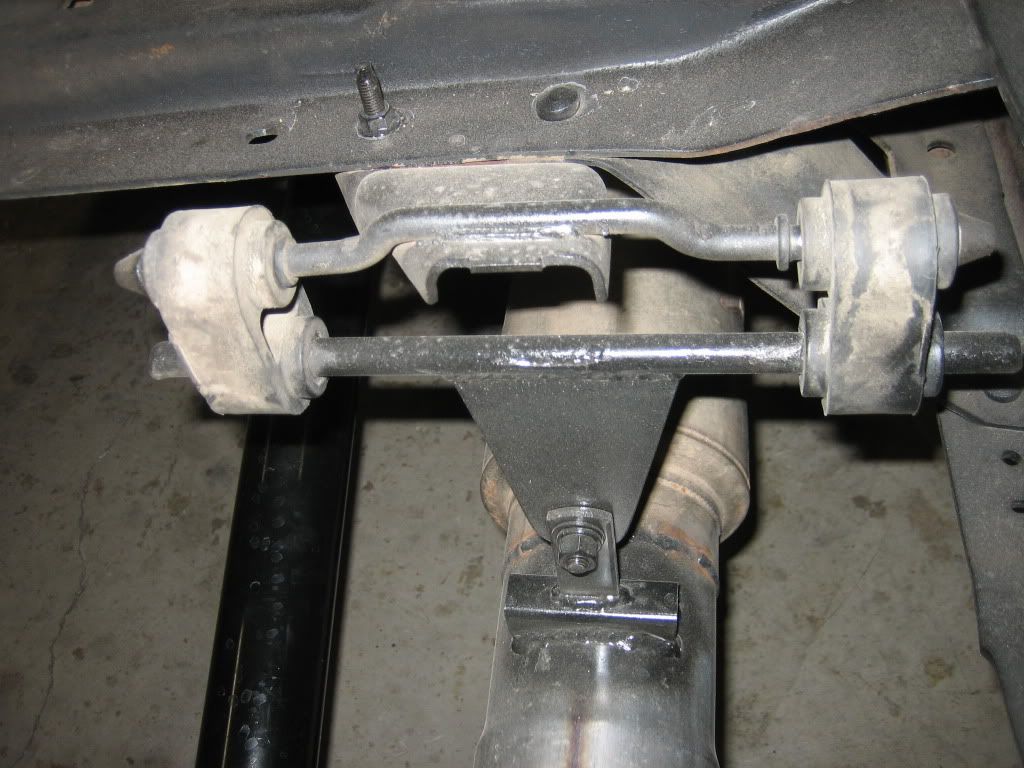
Various exhaust mounts, etc
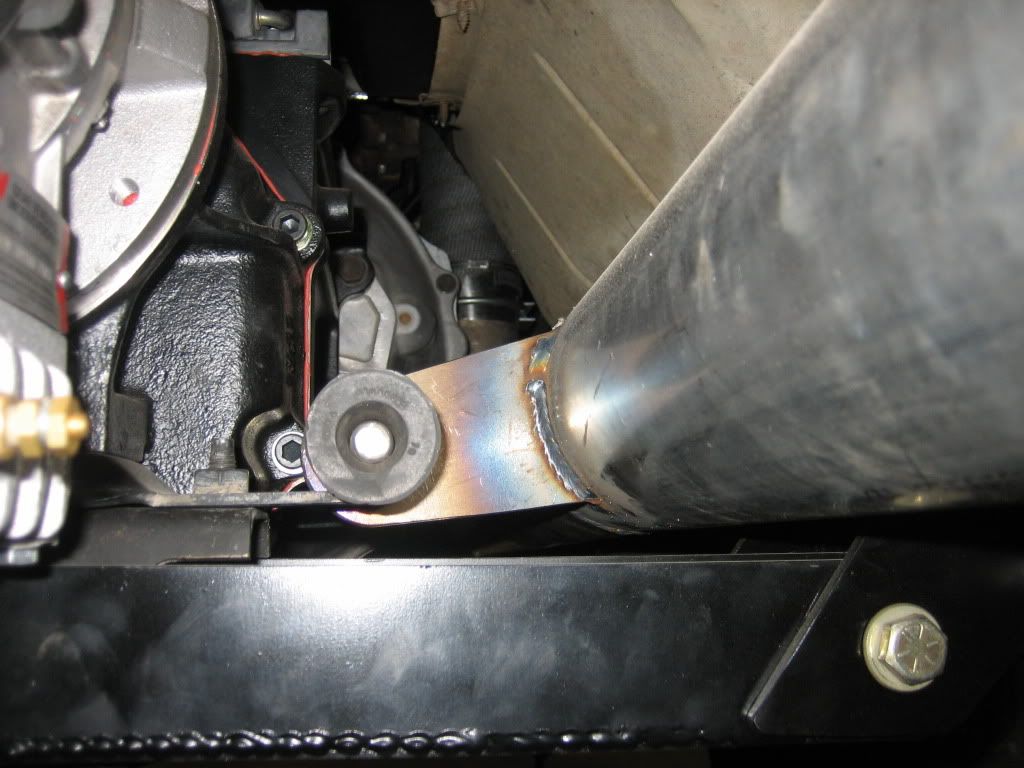
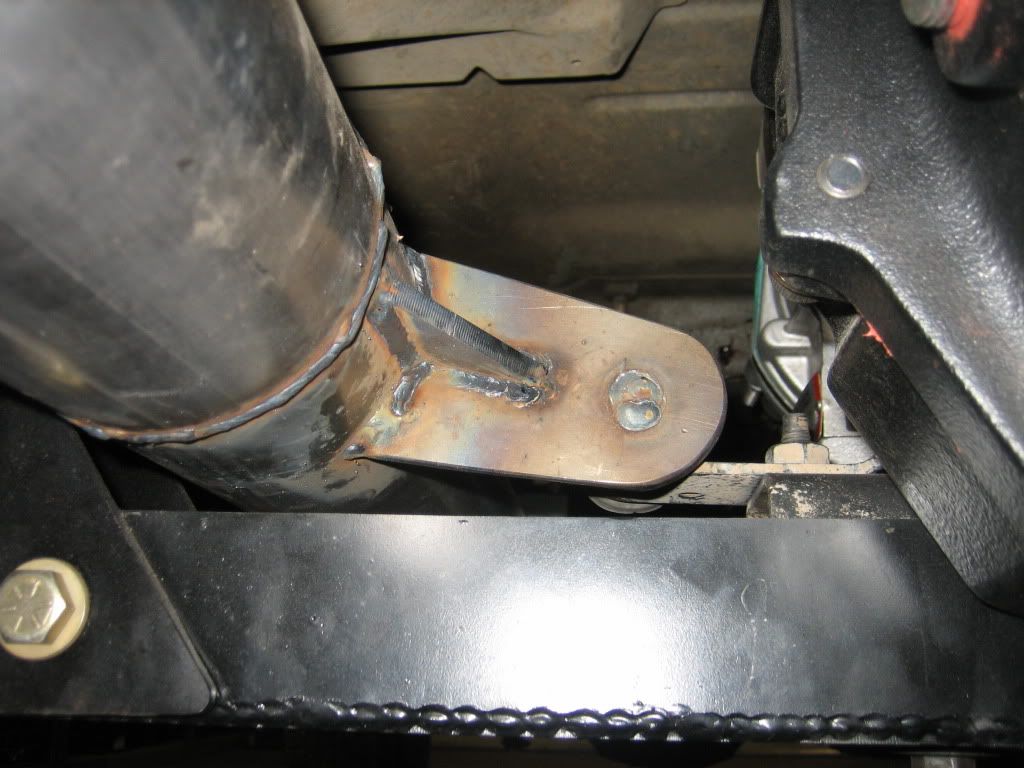
Manifold is now upside down but egt probe still works
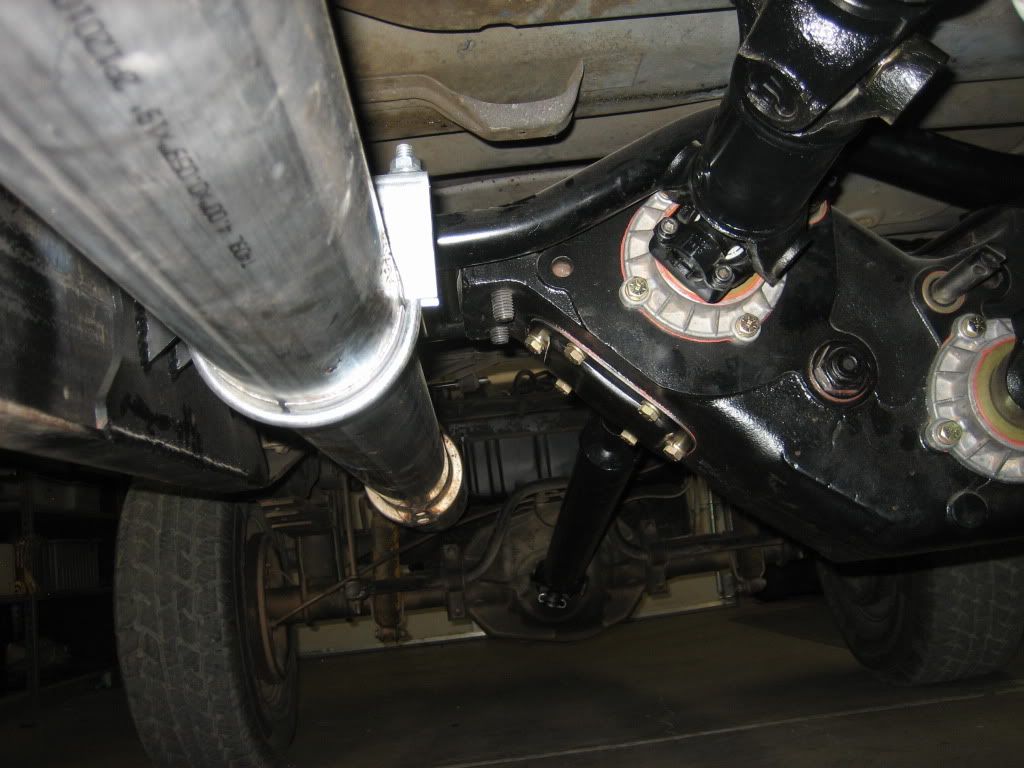
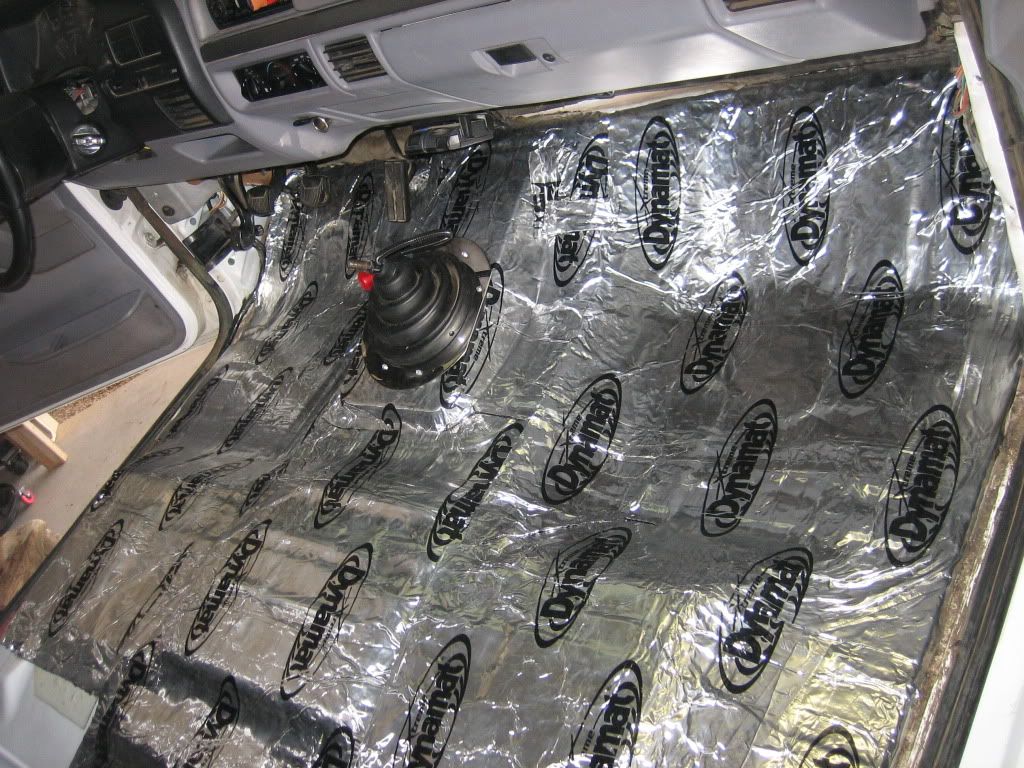
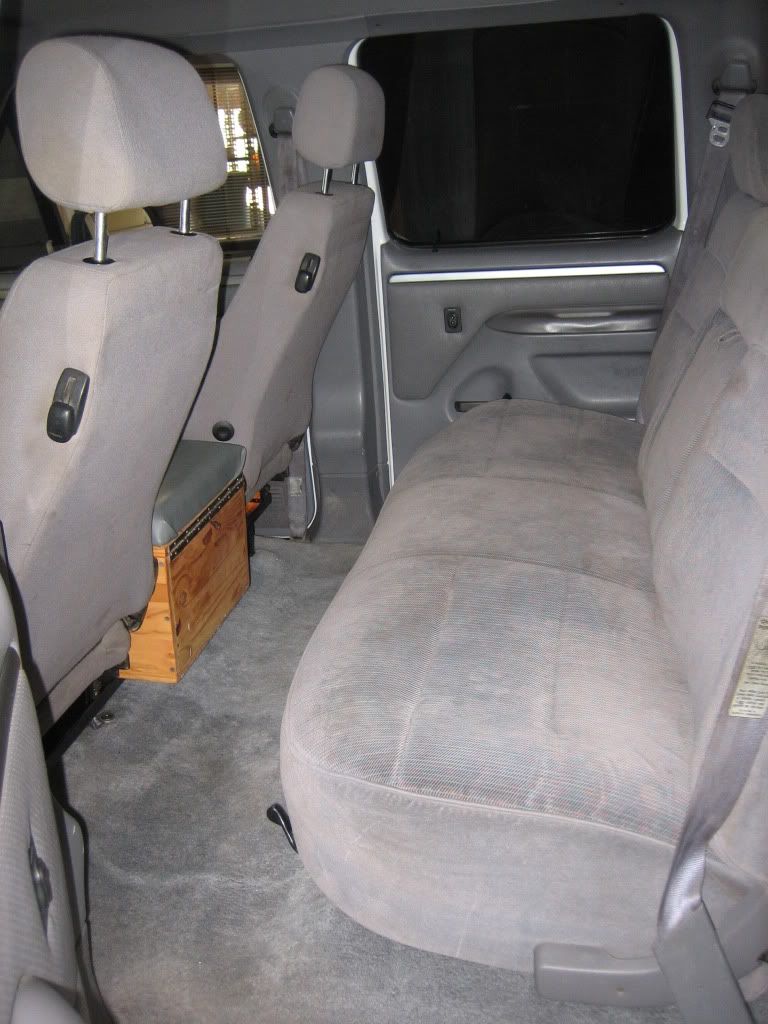
Seats and center console stolen from dodge, most every good part that was on the dodge went into this truck. I feel better about doing what I did knowing a lot of the parts are going onto the new truck.
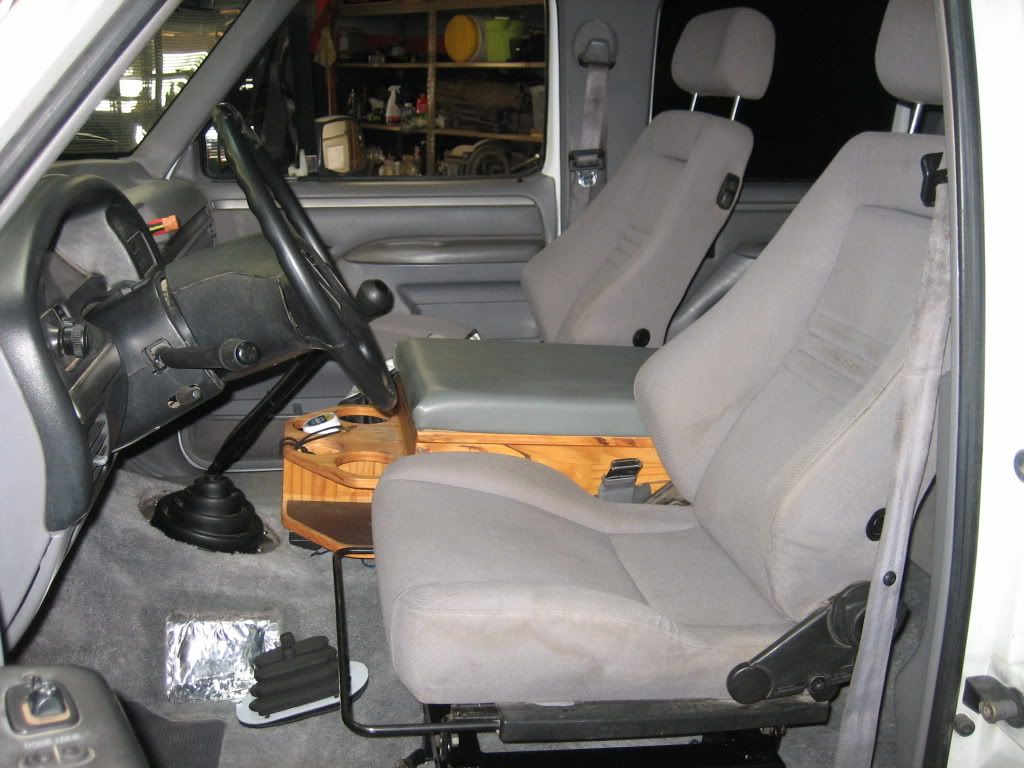
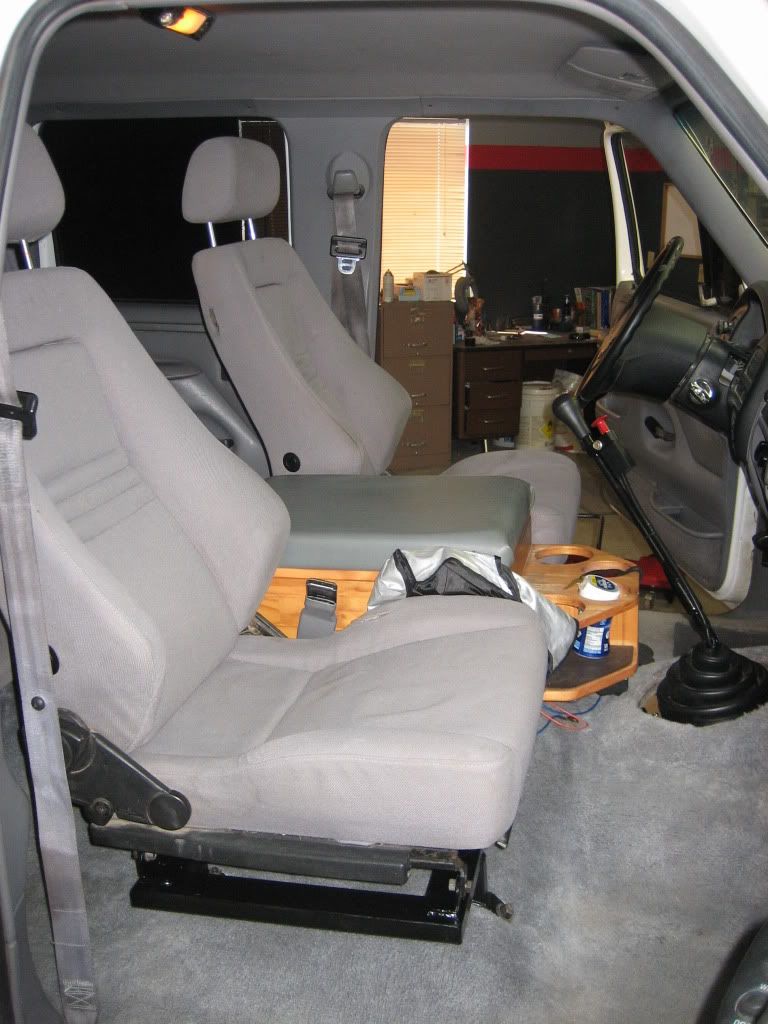
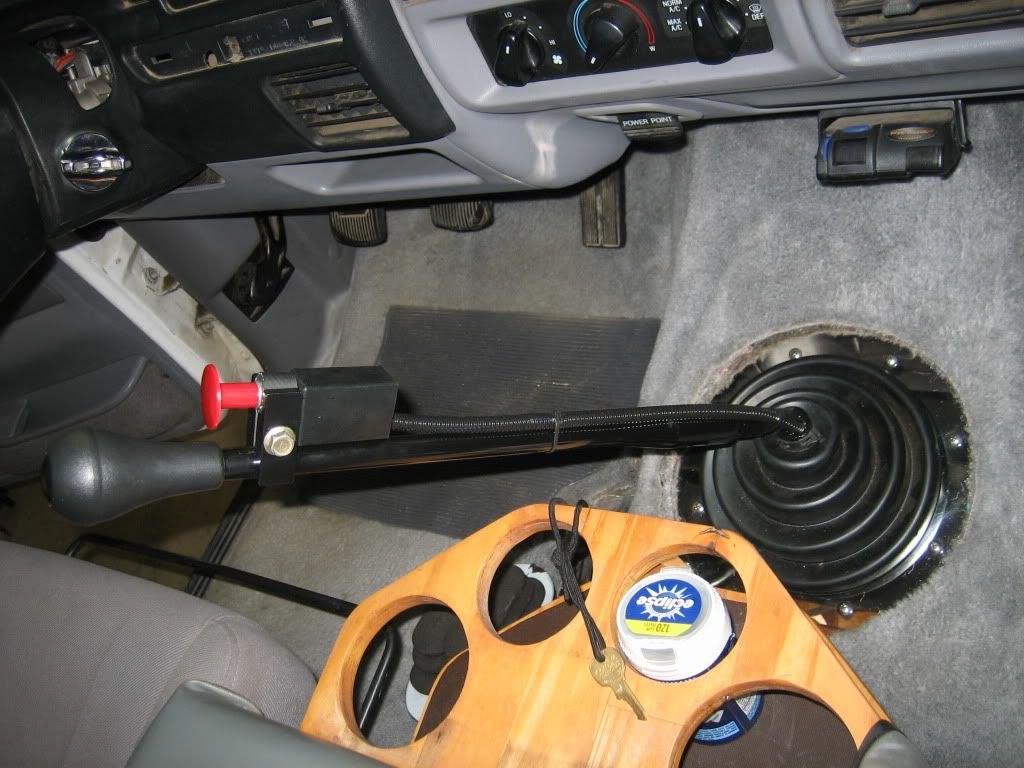
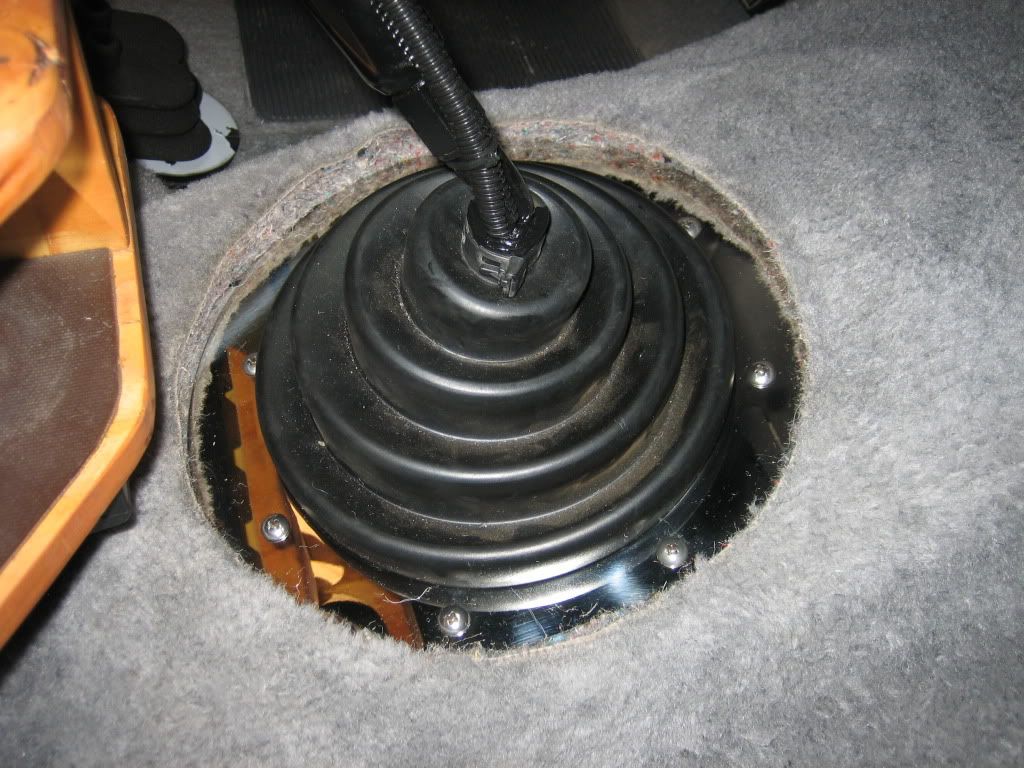
Shifter boot and ring are off an older kenworth, fit really nicely.
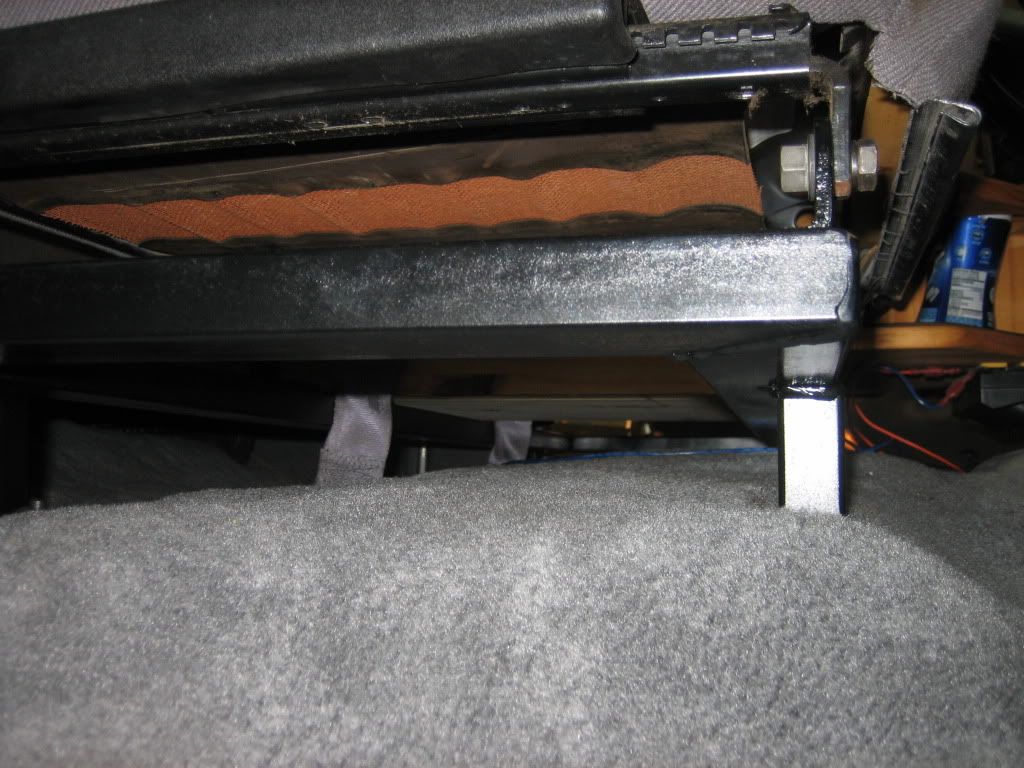
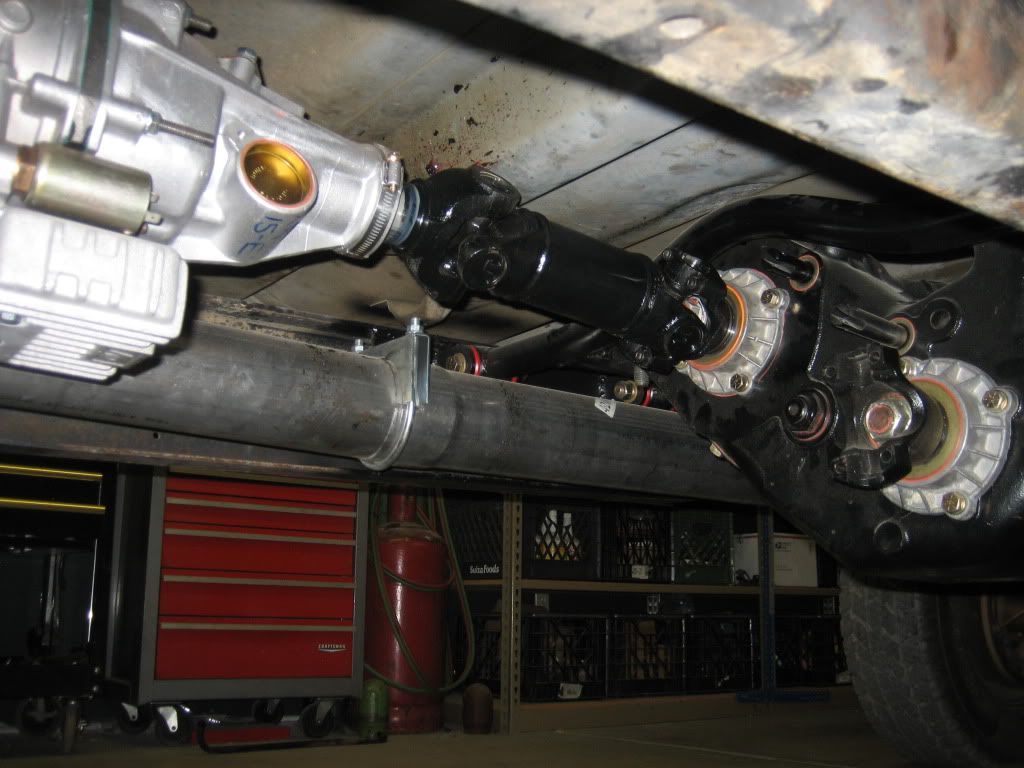
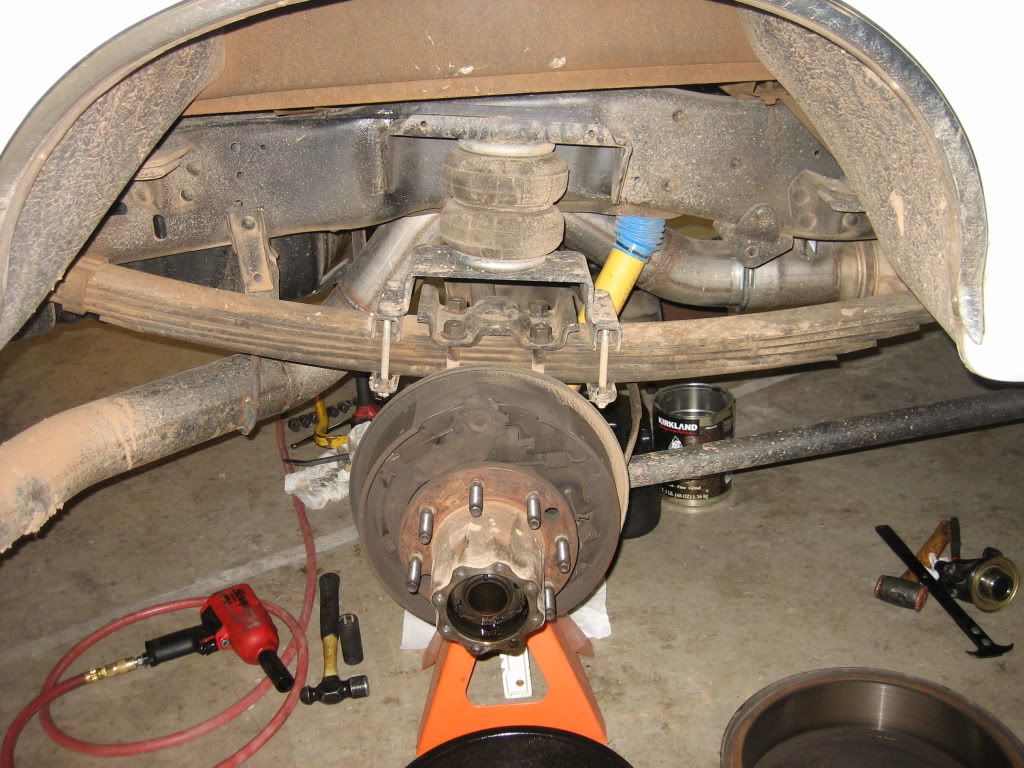
Added traction bars, and working on the rear diff right now. Pinion bearings are running hot...
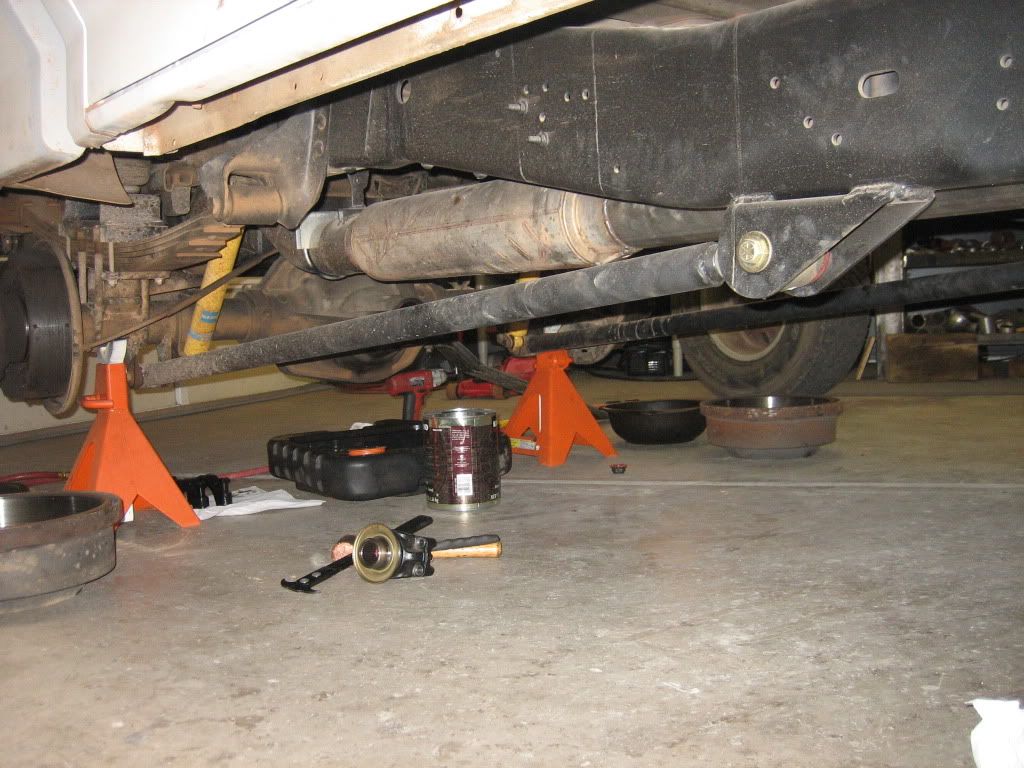
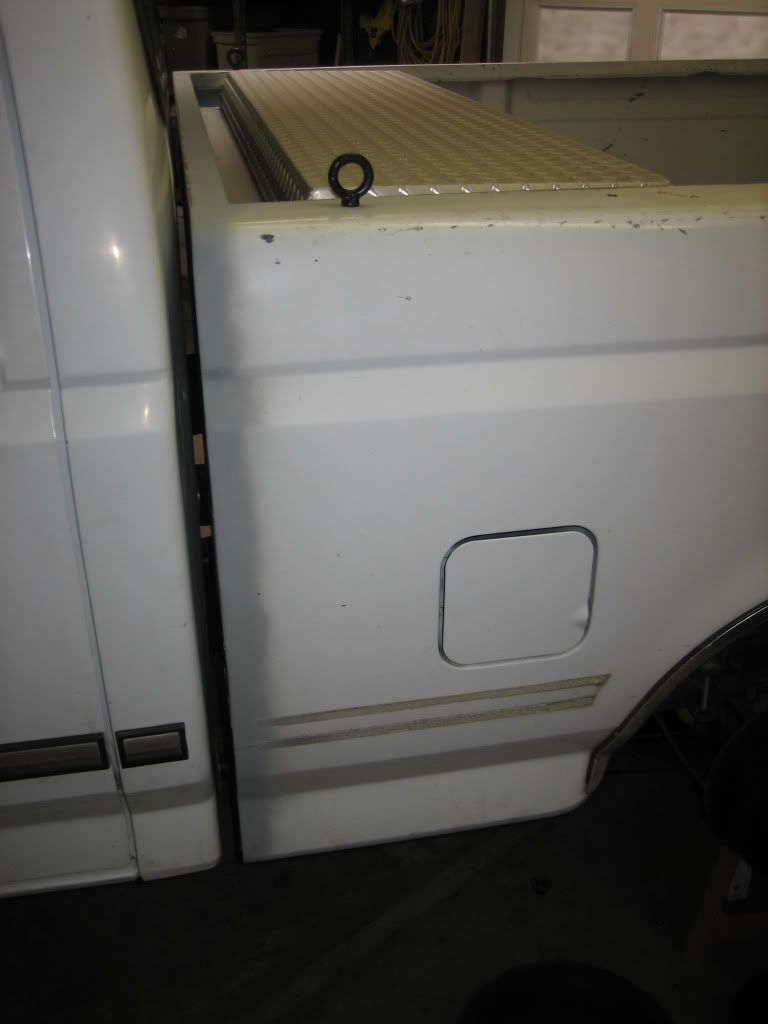
Bed on for now, I'll pull off for finishing touches but I love the new length. Surprised they didn't make these trucks this length.
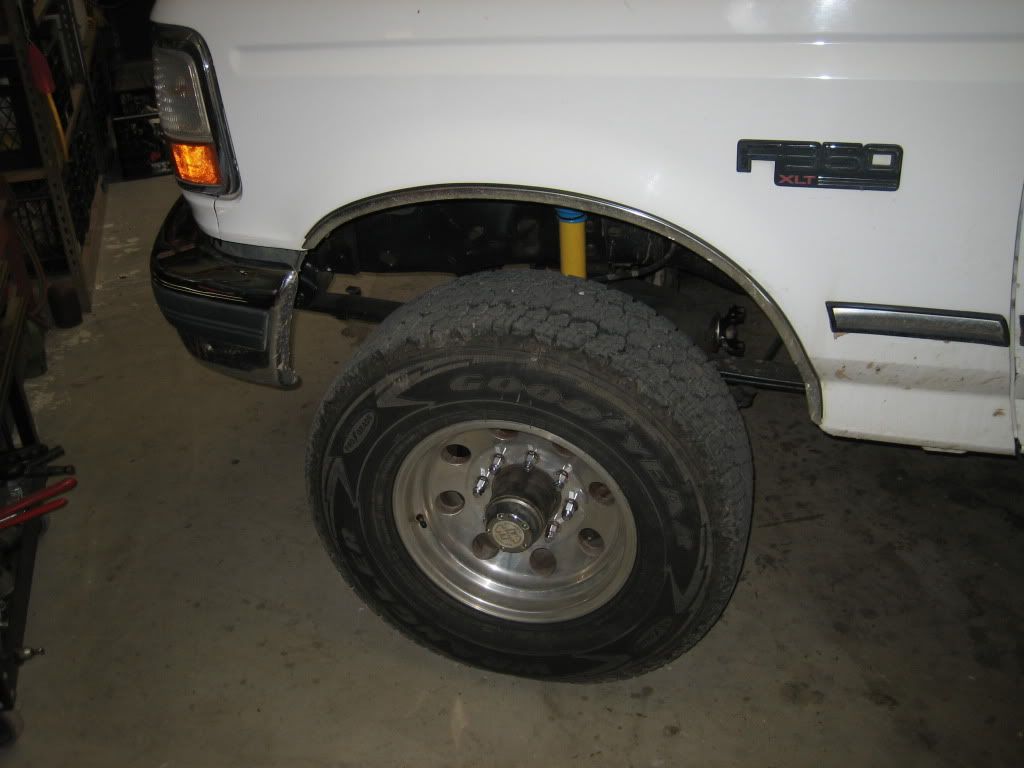
Found some proper alcoa's in a junkyard for $200, I also bought F250 lift blocks for the back and lowered the rear of the truck 2"
It runs amazingly well, I have had 2 mileage estimates both combined hwy/city and had a 20.3 and a 22.7 Really happy with it so far, but still a fair amount of details to finish up.
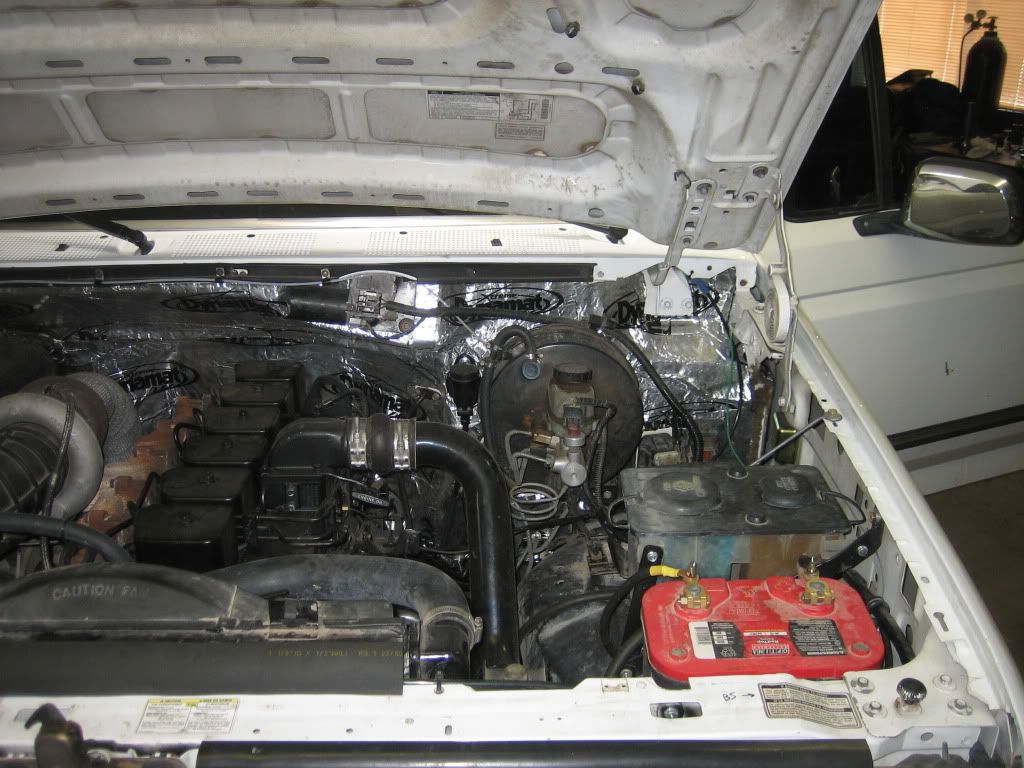
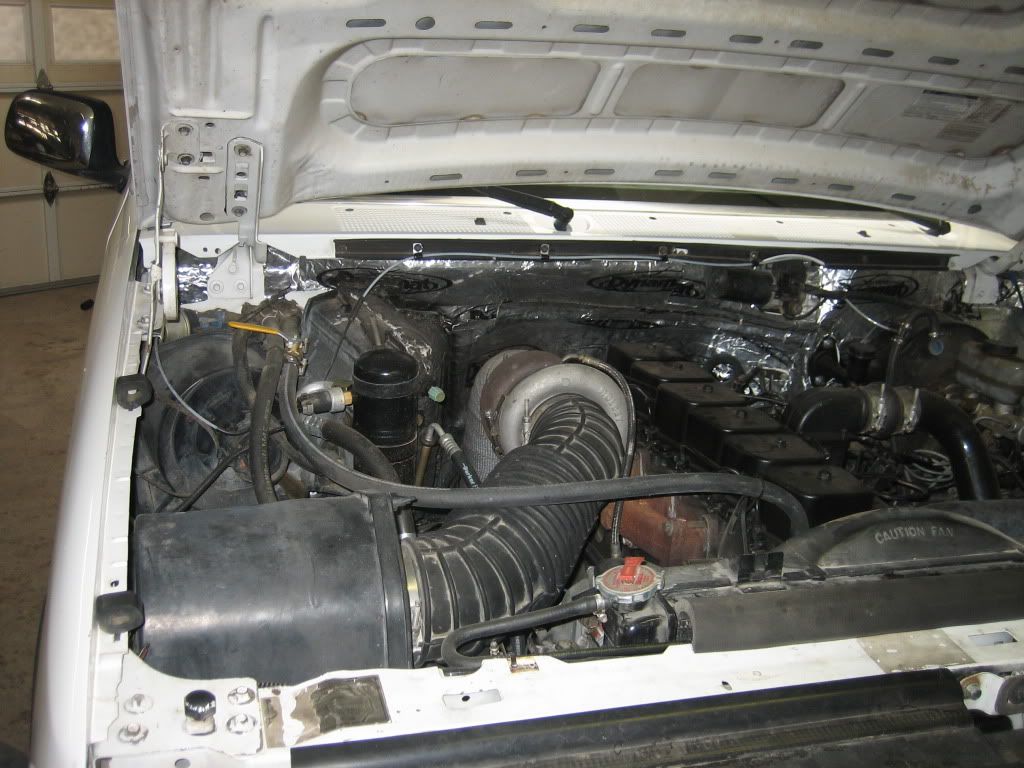


Lower radiator hose proved to be the tightest and worst. Don't know if I would have used the 1st gen rad again if I had the choice...

Heater pipe I made because the fitting on the engine was in the way of the a/c hoses


Intercooler plumbing modifications

The battery cable on the dodge was resting on the frame, that was a close one!

I had to relocate the battery to the drivers side

I then took the entire wiring harness apart and deleted all the gasser stuff. Then integrated the cummins into the factory harness, the old fuel pump relay is now the starter relay, ECU relay is now the gear vendors relay etc...


gasser engine ECU is not even hooked up anymore, and everything works! Still need to hook cruise up.

Various shots of details... Details, details...

Lower radiator hose, what a pain that was.

4" downpipe wrapped, a/c box double insulated.

Used the first gen intake for now

8" pilot shaft to t-case

38 gallon tank with spare mounted, the spare hangs a bit low but works for now..

Exhaust pics, I bought a stainless system for a powerstroke of the same era, but ended up having to modify it completely...

Muffler from dodge, I love this muffler!

Various exhaust mounts, etc


Manifold is now upside down but egt probe still works


Seats and center console stolen from dodge, most every good part that was on the dodge went into this truck. I feel better about doing what I did knowing a lot of the parts are going onto the new truck.


Shifter boot and ring are off an older kenworth, fit really nicely.


Added traction bars, and working on the rear diff right now. Pinion bearings are running hot...


Bed on for now, I'll pull off for finishing touches but I love the new length. Surprised they didn't make these trucks this length.

Found some proper alcoa's in a junkyard for $200, I also bought F250 lift blocks for the back and lowered the rear of the truck 2"

It runs amazingly well, I have had 2 mileage estimates both combined hwy/city and had a 20.3 and a 22.7 Really happy with it so far, but still a fair amount of details to finish up.


#13
nice job
looks real clean helps when you have tools and time
the fifth gear fix you used I tried that one and it cam loose also this is the only one I feel comfortable with
NV4500 Transmission 5th Gear Repair
your input shaft from the transfer case actually holds this in-place and the lock ring cannot move works believe me
#14
nice job
looks real clean helps when you have tools and time
the fifth gear fix you used I tried that one and it cam loose also this is the only one I feel comfortable with
NV4500 Transmission 5th Gear Repair
your input shaft from the transfer case actually holds this in-place and the lock ring cannot move works believe me
looks real clean helps when you have tools and time
the fifth gear fix you used I tried that one and it cam loose also this is the only one I feel comfortable with
NV4500 Transmission 5th Gear Repair
your input shaft from the transfer case actually holds this in-place and the lock ring cannot move works believe me
You replaced your entire mainshaft with the split thrust washer design and it still came loose? Are you sure about that? I have seen that repair, it's pretty clever but I have never heard of the updated mainshaft having a problem...
#15
yea that happened to my dads truck updated shaft and lock-ring with setscrew and even used red locktite we put in fifth gear fix and so far so good so when I built my truck I made sure I used that
the best thing about the fifth gear issue is its an easy tear down remove t case and adapter housing and its all there
nice build
the best thing about the fifth gear issue is its an easy tear down remove t case and adapter housing and its all there
nice build


